Setting up SSL for your WordPress site ensures a secure connection, and doing this with Cloudflare’s free SSL service is a smart and cost-effective choice. In this tutorial, we’ll guide you through the process of setting up Cloudflare SSL for your WordPress site, ensuring a secure HTTPS domain.
Prerequisites
Please make sure you have the following:
- Cloudflare account
- Access to your domain registrar (e.g., Namecheap)
Additional Knowledge
While the transcript covers the essentials of setting up Cloudflare SSL, it’s important to understand that SSL (Secure Sockets Layer) encrypts data transferred between the user and the server, enhancing security. Cloudflare not only provides SSL but also offers performance and security services for web traffic.
Instructions for WordPress Cloudflare SSL for HTTPS Domains
- Navigate to the Cloudflare website and log in to your account.
- Click on ‘Add a site’.

- Enter your domain name and press ‘Continue’.

- Select the ‘Free’ plan, which includes a Universal SSL certificate.

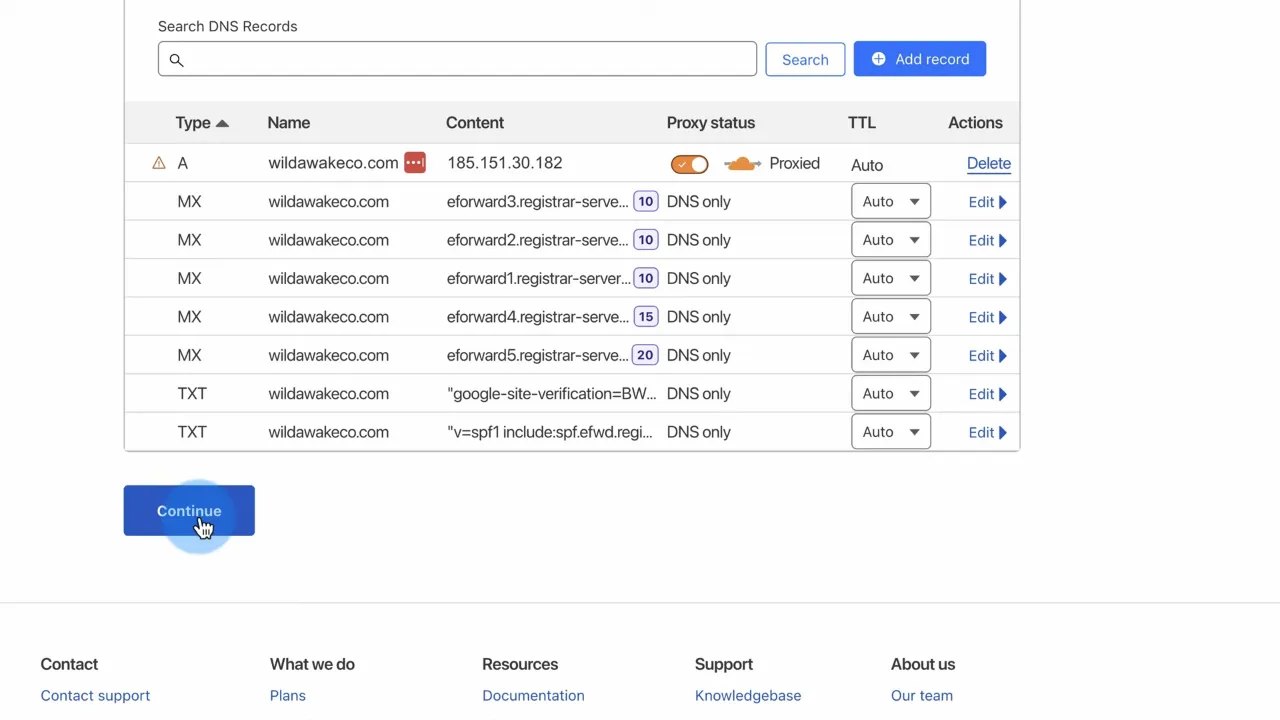
- Review the DNS records that Cloudflare has imported. Add any missing records if necessary and press ‘Continue’.
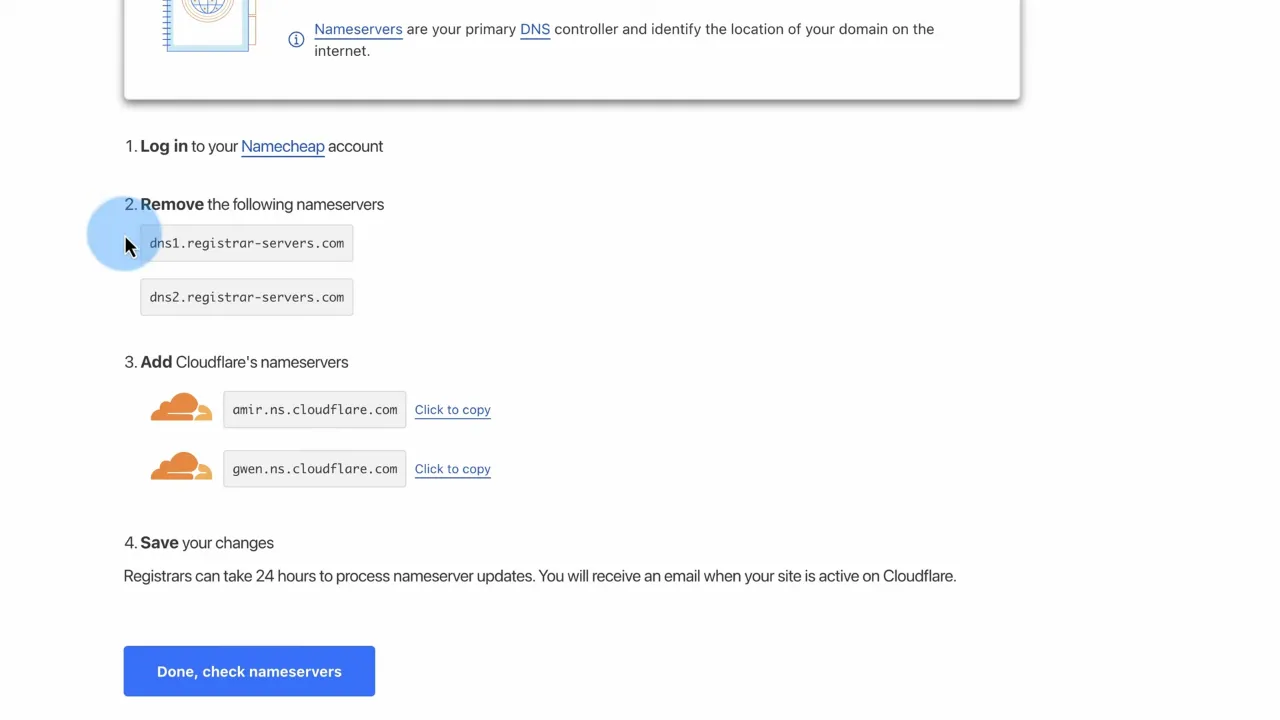
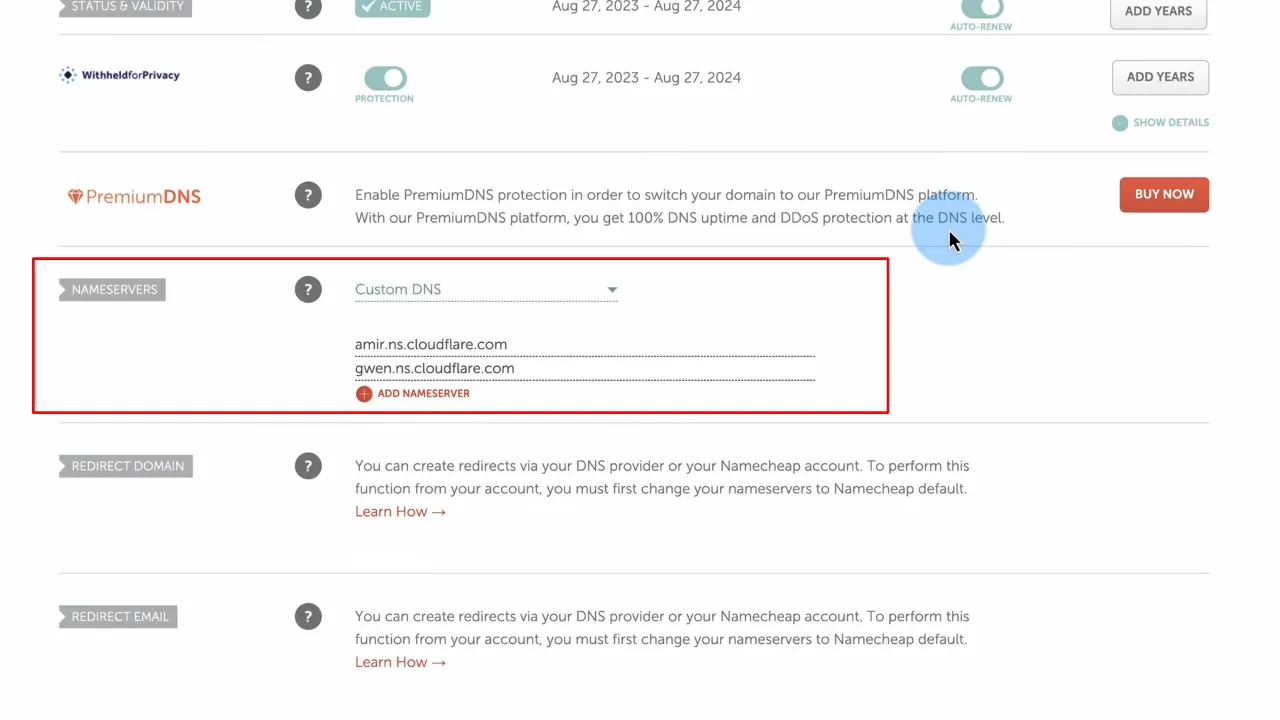
- Change your domain’s name servers to the ones provided by Cloudflare. This requires accessing your domain registrar (like Namecheap) and updating the name server records
Note: Wait for the name server changes to propagate, which can take up to 48 hours.
- Access your Cloudflare dashboard (once active) and click on the ‘SSL/TLS’ tab.
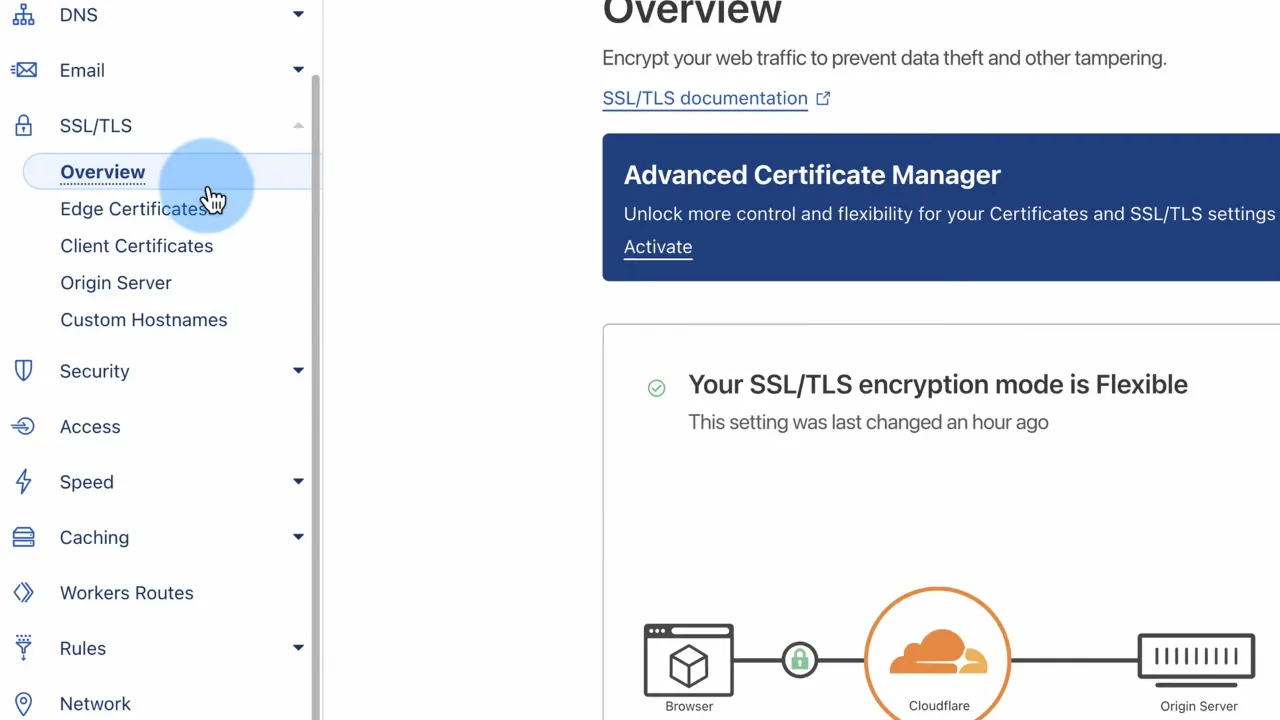
- Ensure that SSL is set to ‘Full’. This encrypts traffic between the browser and Cloudflare, and between Cloudflare and your server.
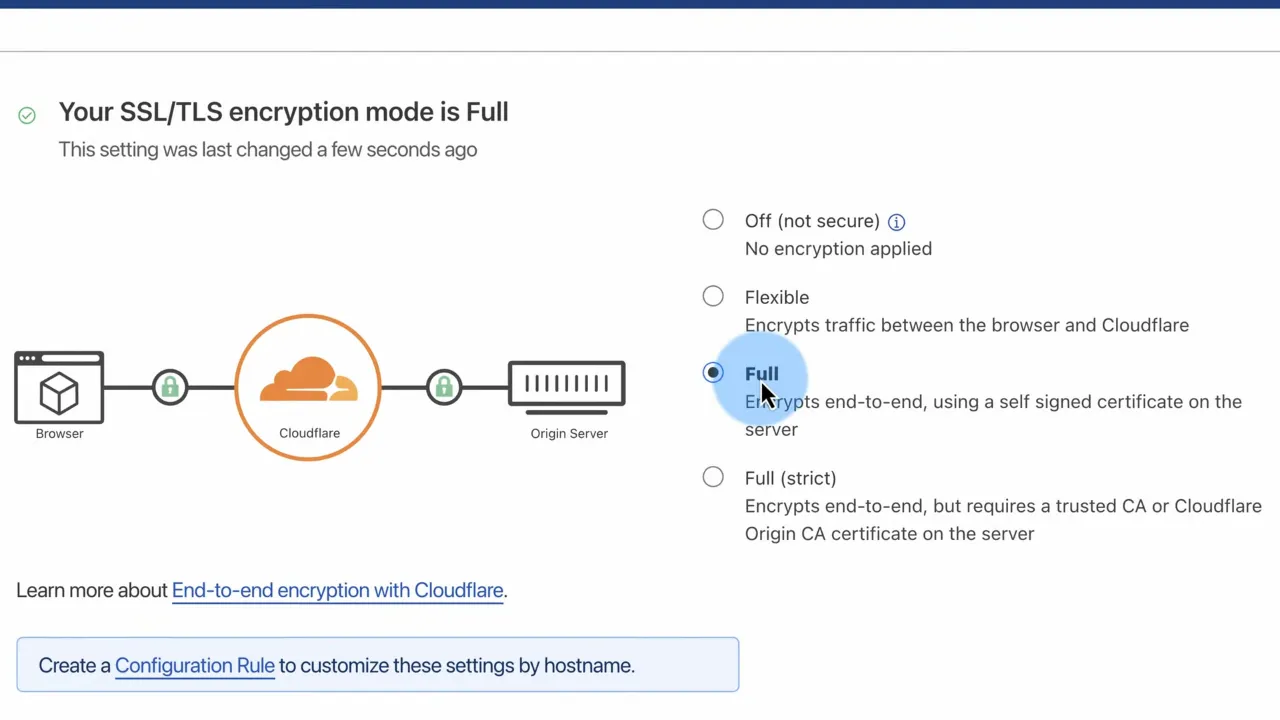
- Check your website to ensure SSL is working correctly. Look for ‘HTTPS’ in your website’s URL.
Official Documentation
WordPress Cloudflare SSL for HTTPS Domains – Conclusion
Securing your WordPress site with Cloudflare’s free SSL is a straightforward process that significantly boosts your website’s security. By following these steps, you can ensure a safe browsing experience for your visitors with HTTPS encryption.
