Creating a Bricks Builder before and after slider can be a neat addition to your website, allowing users to visually compare two images. This tutorial will walk you through the process using custom CSS and JavaScript.
Prerequisites
Please make sure you have the following installed and activated:
Creating the Bricks Builder Before and After Slider
Setting Up Your Images
- Upload your images
In your WordPress media library, upload the ‘before’ and ‘after’ images you wish to use.
Adjusting Bricks Settings
- Navigate to
Bricks > Settings > Builder Access > Code Execution. - Ensure that code execution is enabled for administrators.

Adding the Code
- Navigate to the section container where you want the slider.
- Add a code widget.
- Copy the necessary JavaScript and CSS below:
<! --Sourced from: https://img-comparison-slider.sneas.io/-->
<img-comparison-slider>
  <img slot="first" src="https://staging14.websquadron.co.uk/wp-content/uploads/Mid028.webp" width="600" height="600"/>
  <img slot="second" src="https://staging14.websquadron.co.uk/wp-content/uploads/Mid027.webp" width="600" height="600"/>
</img-comparison-slider>
<script
  defer
  src="https://unpkg.com/img-comparison-slider@7/dist/index.js"
></script>
Source: WebSquadron
- Paste in the JavaScript and CSS code you’ve obtained into the code widget.

- Define the image paths, width, and height within the code.
- Toggle the “Execute code” option in the code widget.
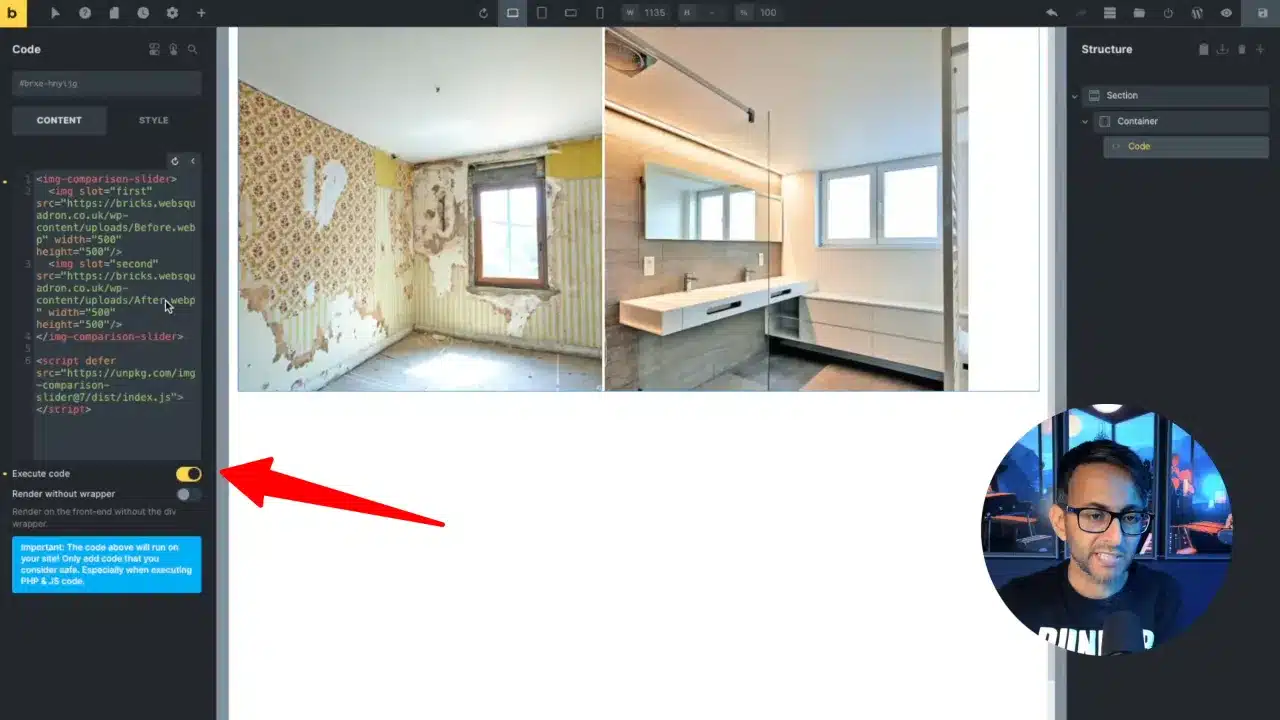
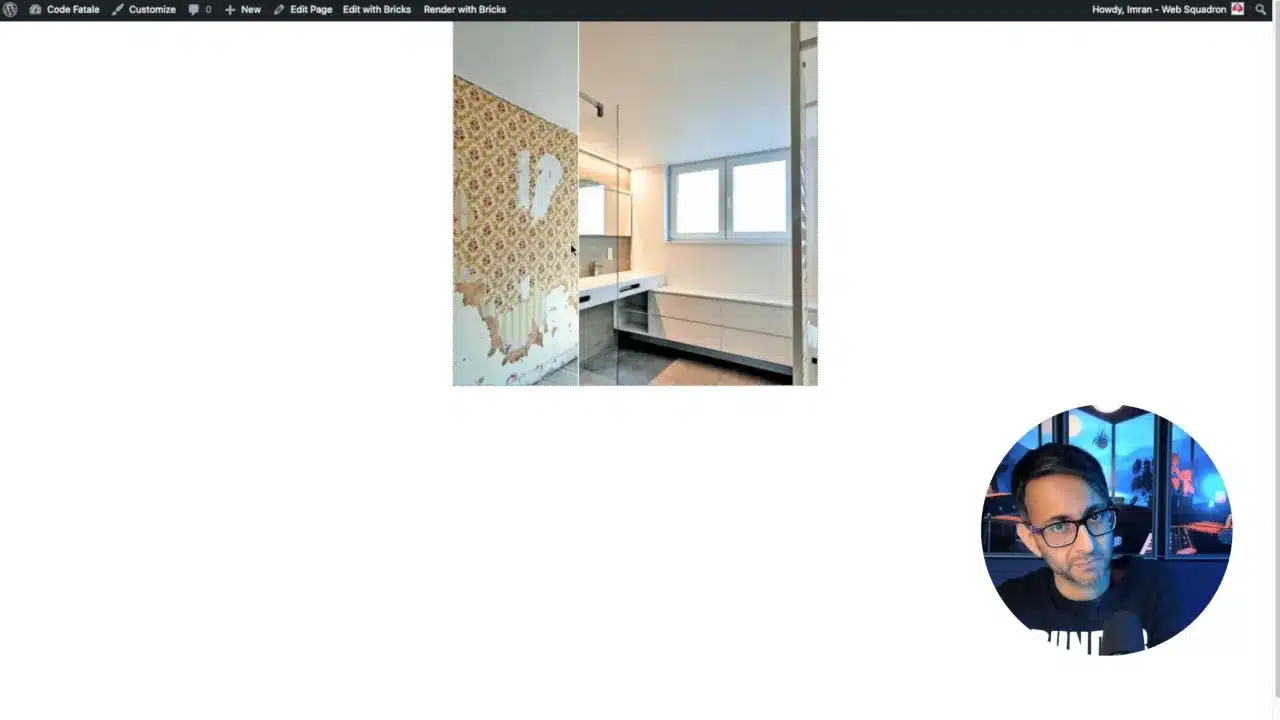
- Save and preview your Bricks builder before and after slider.|
Troubleshooting Common Issues
- Centering the slider
If the images are not aligning correctly, add a ‘center’ tag within your code. - Preventing flashing
Ensure that ‘execute code’ is toggled on to avoid any flashing during the transition.
Supplementary Resources
Bricks Builder Before and After Slider – Conclusion
By following these steps, you should now have a fully functional before and after slider on your Bricks Builder site. Remember to enable code execution in the Bricks settings and ensure your images are properly centered for the best user experience.
