To add WooCommerce custom fields it does need much. In fact, just a simple code added with Code Snippets. Explore with WP Simple Hacks how to add a shipping timer to your product page, a feature that can enhance the shopping experience by providing customers with crucial delivery information. The approach is straightforward and doesn’t require advanced coding skills. By the end of this tutorial, you’ll have a clear understanding of how to create custom fields, save them to your database, and display them on your product page.
Add Custom Fields to WooCommerce Products
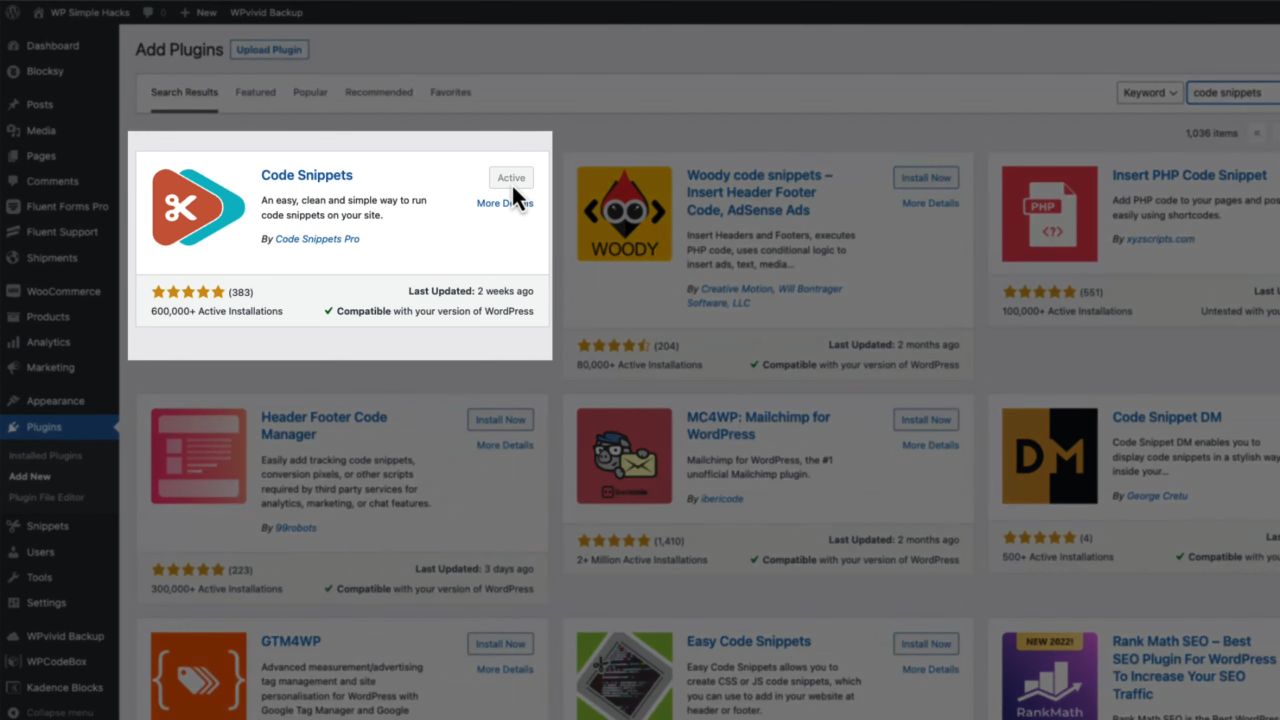
- Install the Code Snippets Plugin
Navigate to your WordPress dashboard, go to ‘Plugins’, click on ‘Add New’, and search for ‘Code Snippets’. Install and activate the plugin.

- Add a New Snippet
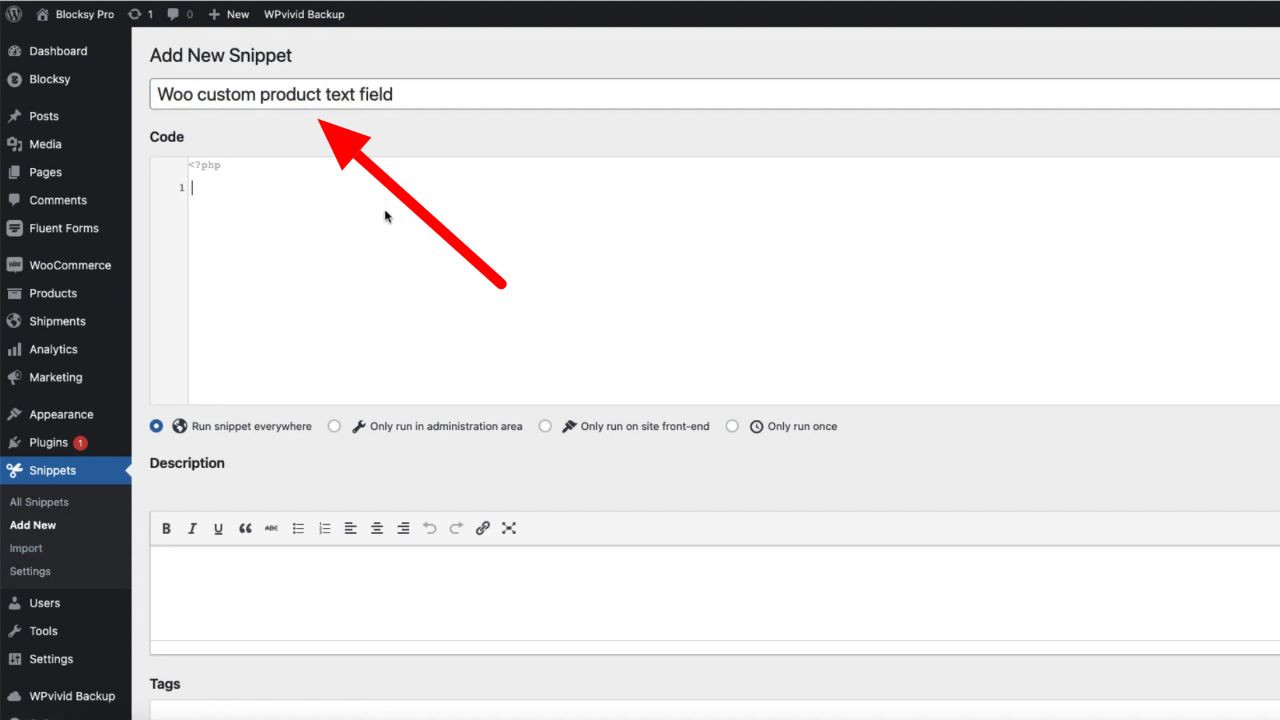
In your WordPress dashboard, go to ‘Snippets’ and click on ‘Add New’. Give your snippet a title, for example, ‘Woo Custom Product Text Field’.

- Paste the Code Snippet
Copy the code snippet below and paste it into the ‘Code’ section of your new snippet. This code will create a new custom field, save it to your database, and display it on your product page.// Add custom field to Woocommerce backend under General tab add_action( 'woocommerce_product_options_general_product_data', 'wpsh_add_text_field' ); function wpsh_add_text_field() { woocommerce_wp_text_input( array( 'id' => '_shipping_time', 'label' => __( 'Shipping info', 'woocommerce' ), 'description' => __( 'This is a custom field, you can write here anything you want.', 'woocommerce' ), 'desc_tip' => 'true', 'type' => 'text' ) ); } // Save custom field values add_action( 'woocommerce_admin_process_product_object', 'wpsh_save_field', 10, 1 ); function wpsh_save_field( $product ) { if ( isset( $_POST['_shipping_time'] ) ) { $product->update_meta_data( '_shipping_time', sanitize_text_field( $_POST['_shipping_time'] ) ); } } // Display this custom field on Woocommerce single product pages add_action( 'woocommerce_product_meta_end', 'wpsh_display_on_single_product_page', 10 ); function wpsh_display_on_single_product_page() { global $product; // Is a WC product if ( is_a( $product, 'WC_Product' ) ) { // Get meta $text = $product->get_meta( '_shipping_time' ); // NOT empty if ( ! empty ( $text ) ) { echo '<div class="woocommerce-message">Estimated shipping time: ' . $text . '</div>'; } } } // Display this custom field on Woocommerce archive pages add_action( 'woocommerce_after_shop_loop_item', 'wpsh_display_on_archive_page', 10 ); function wpsh_display_on_archive_page() { global $product; // Is a WC product if ( is_a( $product, 'WC_Product' ) ) { // Get meta $text = $product->get_meta( '_shipping_time' ); // NOT empty if ( ! empty ( $text ) ) { echo '<div class="custom-text">Estimated shipping time: ' . $text . '</div>'; } } }Source: WP Simple Hacks
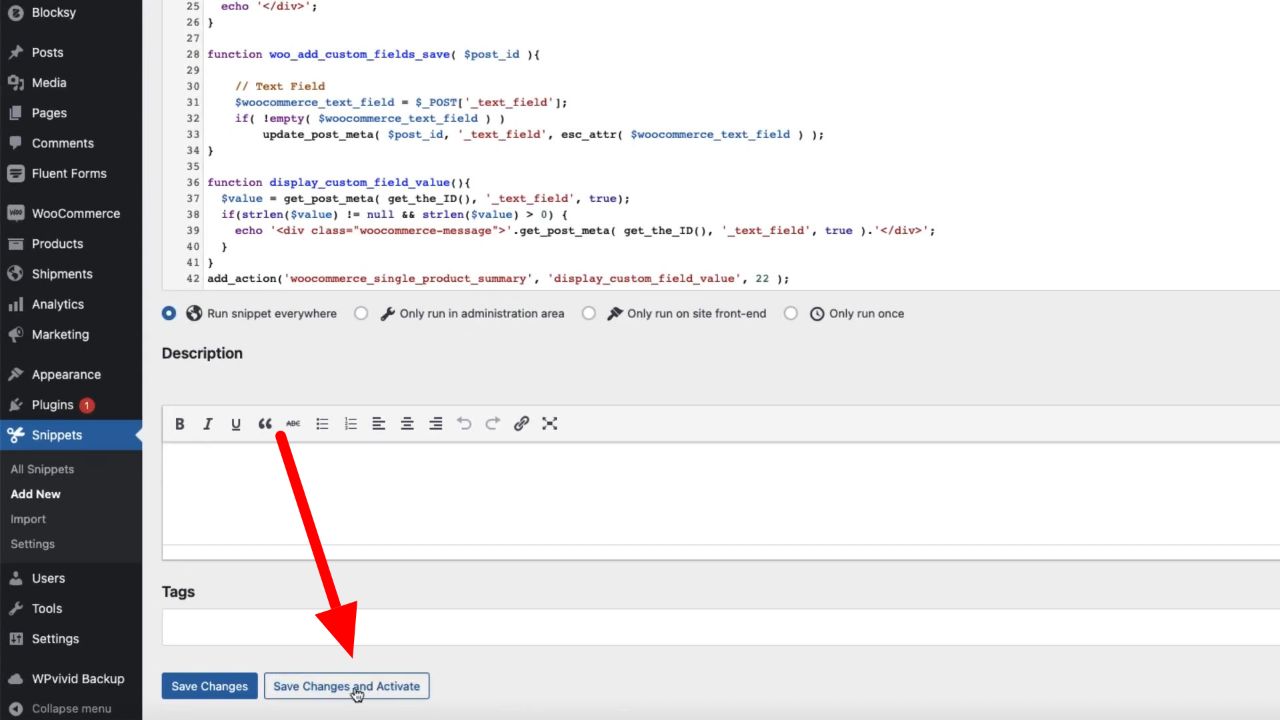
- Activate the Snippet
Click on ‘Save Changes and Activate’ to activate your new snippet.

- Add Your Custom Field to a Product
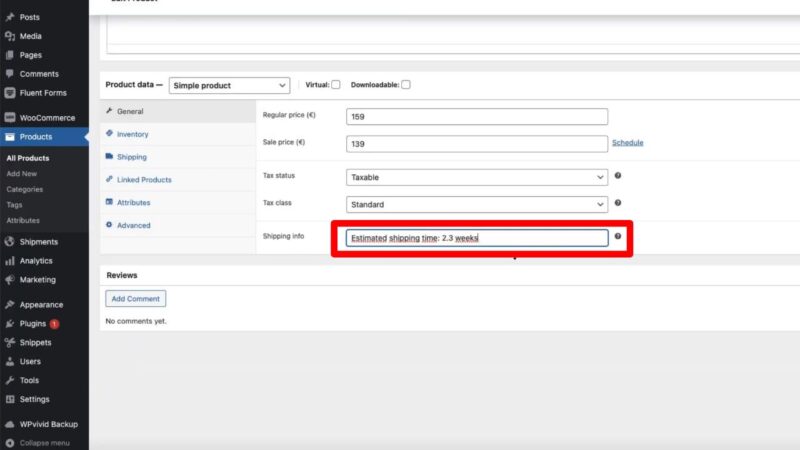
Go to your product page in the WordPress dashboard and locate the new custom field, ‘Shipping Info’. Enter your predicted shipping time in the field and click ‘Update’.
- View Your Product Page
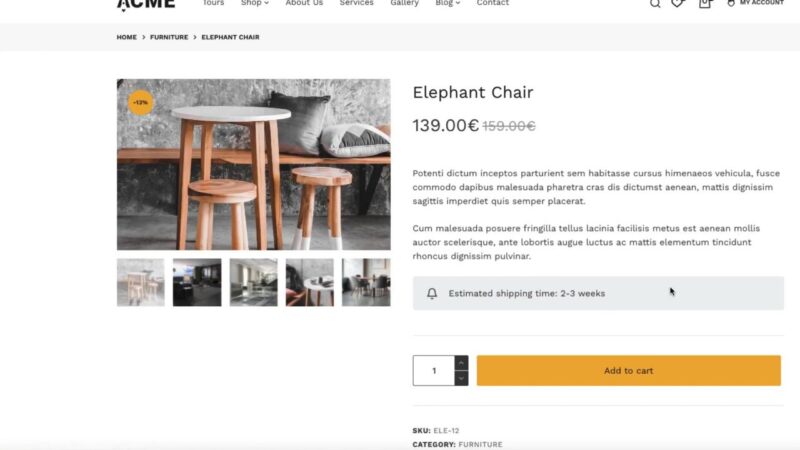
Navigate to your product page on your website. You should now see your custom field displayed on the page.


Why WooCommerce Custom Fields Might Benefit You
Boosting Customer Confidence
Imagine a customer browsing through your online store, considering whether to purchase a product. They’re interested, but they’re unsure about the delivery time. By displaying a custom field with the estimated shipping time, you can provide this crucial information upfront, boosting customer confidence and increasing the likelihood of a purchase.
Streamlining Your Business Operations
Consider the time you spend responding to customer inquiries about shipping times. By automating the display of this information, you can reduce the number of these inquiries, freeing up time to focus on other aspects of your business.
Enhancing Your Brand Image
Transparency is a powerful tool for building a positive brand image. By providing detailed product and shipping information, you demonstrate to your customers that you value transparency and customer service, which can help to build trust and loyalty.
Common Issues
- Custom Field Not Displaying
If your custom field is not displaying on your product page, ensure that you have correctly copied and pasted the code snippet and that the snippet is activated. - Incorrect Shipping Information Displaying
If the wrong shipping information is displayed, check that you have entered the correct information in the custom field on your product page.
