Content Delivery Networks (CDNs) are crucial for enhancing website performance. In this tutorial, we’ll explore “What is a CDN” and guide you through activating one on your Hostinger WordPress website.
Prerequisites
Please make sure you have the following:
The 3 Key Things A CDN Does
- Compression
A CDN compresses your website, making it smaller and faster to load. This process involves optimizing the size of your website’s files, including HTML, CSS, and JavaScript. - Global Server Network
It distributes your website’s content across multiple servers around the world. When a user accesses your site, the CDN delivers content from the nearest server, significantly reducing loading time. - Security Enhancement
CDNs offer protection against DDoS attacks and other security threats. By distributing traffic across its network, a CDN can mitigate the impact of sudden traffic spikes or malicious attacks.
Set up CDN on your Hostinger Website
- Log in to your Hostinger account navigate to your website’s dashboard and click “Manage” on the website you want to activate CDN.

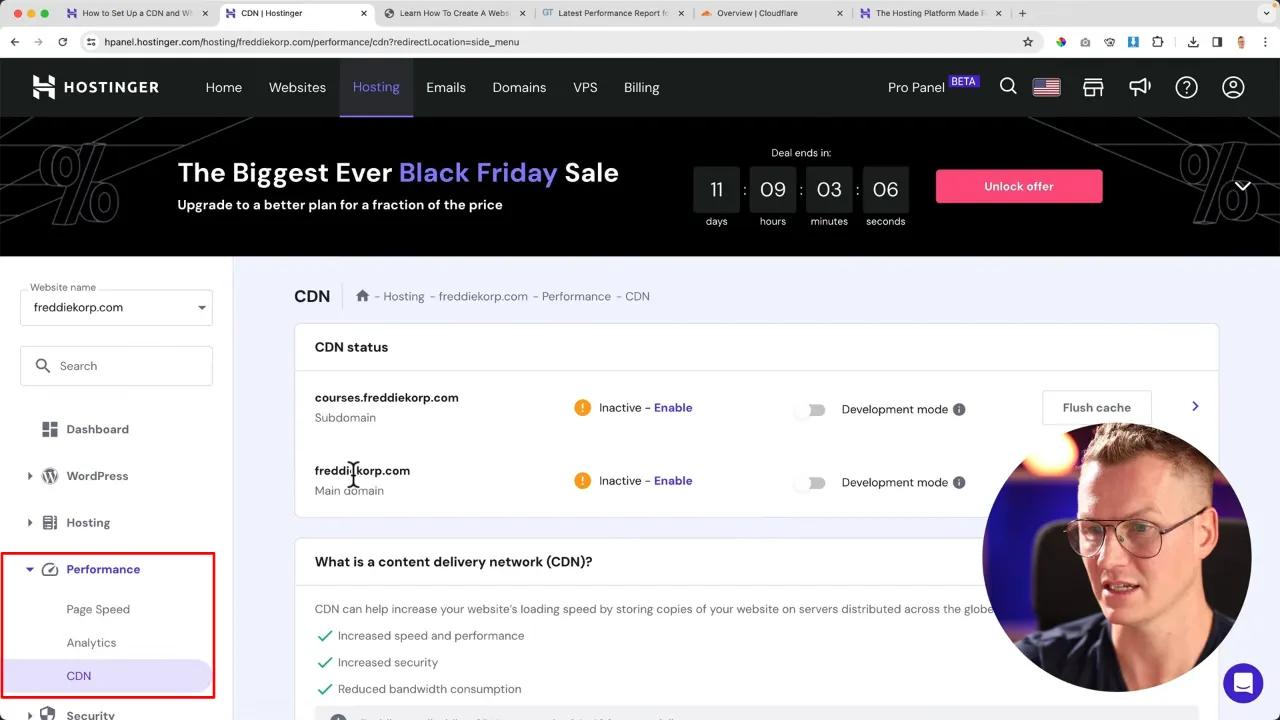
- Go to the Performance > CDN.

- Enable the CDN by clicking on the corresponding option.

Note: It may take 24-48 hours to become fully active.
- Optimize further by compressing images to WebP format, minifying CSS and JavaScript files, and enabling smart image optimization for mobile devices.

- Save your settings to apply the changes and test your site with tools like GTmetrix or PageSpeed Insights.
What Is a CDN and How to Activated it on Hostinger – Conclusion
Implementing a CDN on your Hostinger WordPress site can drastically improve loading times and protect against DDOS attacks. By following these steps, you can enhance your website’s performance and user experience.

