Creating visually appealing designs in WordPress often involves layering elements for depth and engagement. One design technique that can significantly enhance your page’s aesthetic involves overlap sections with Z Index and sticky top using Elementor. This method allows specific sections of your content to overlap as the user scrolls through your page, providing a dynamic, engaging user experience. This tutorial will guide you through the process of achieving this effect, enhancing your WordPress site’s design with Elementor.
Prerequisites
Please make sure you have the following installed and activated:
What is a Z Index?
The Z-index is like a layering tool in CSS that decides which parts of your website appear on top when they overlap. Think of it as deciding who gets to stand in front of the line; elements with a higher Z-index move to the front, while those with a lower one stay behind. It only works if you’ve also told the elements where to stand (using position), making sure they’re not all just stuck at the back by default (static). So, Z-index helps you control the visual stacking of your website elements, making some pop out more than others.
Instructions to Overlap Sections with Z Index and Sticky Top in Elementor
- Open your WordPress dashboard and navigate to the page you wish to edit with Elementor.
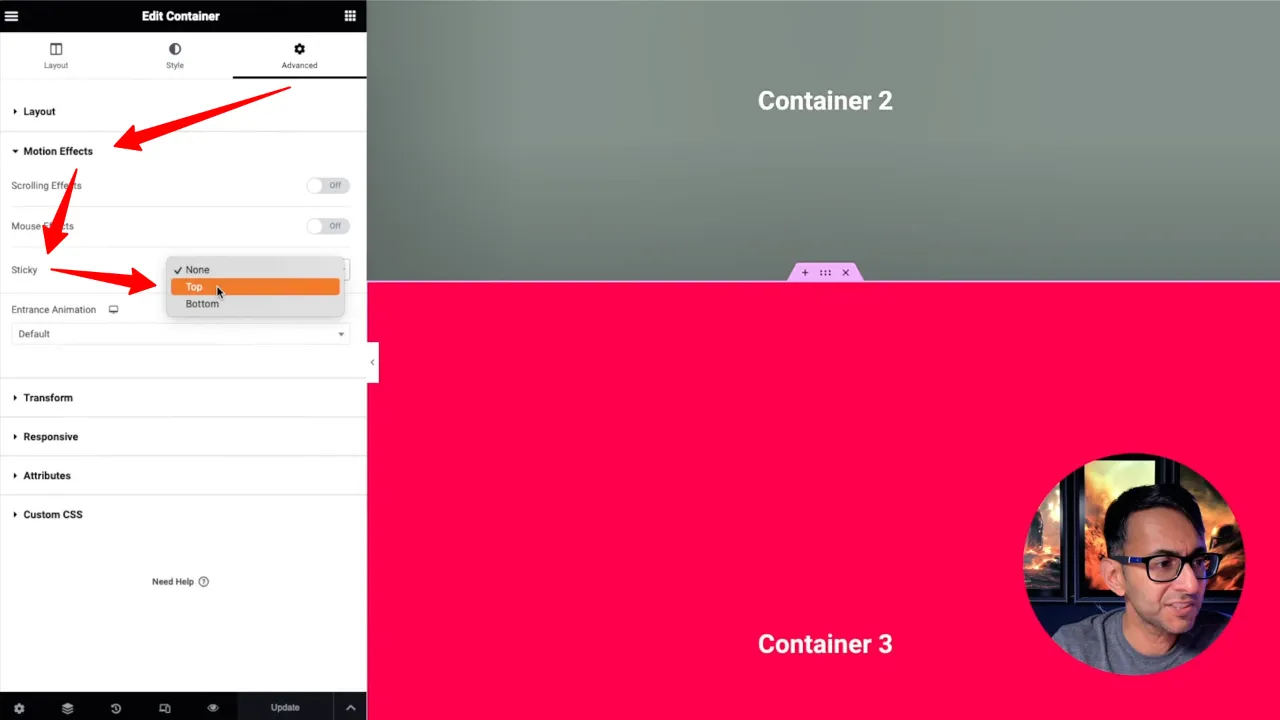
- Select the section you want to make sticky (e.g., container 3), navigate to Advanced > Motion Effects > Sticky and select ‘Top’.
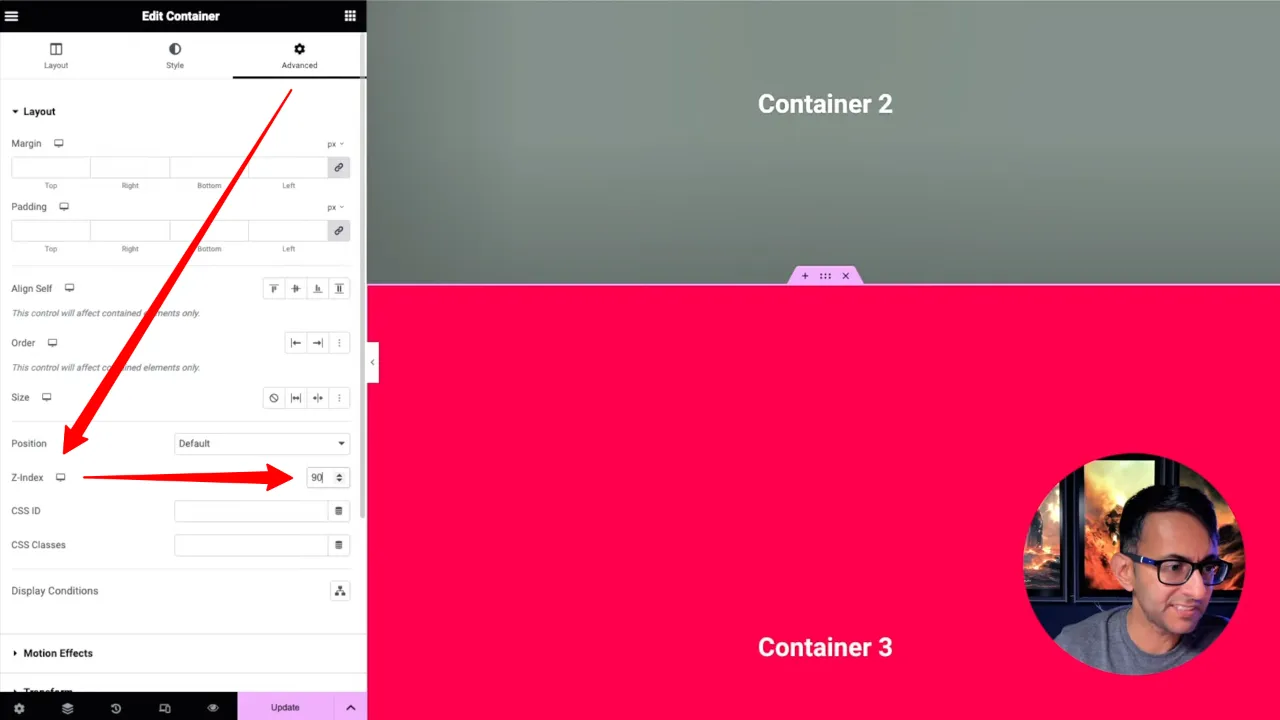
- Adjust the Z Index under the Advanced > Layout > Z-Index to 90. The Z Index dictates the stack order of elements.
- Repeat these steps for the subsequent sections (containers 4 and 5), setting their Z Index values to 100 and 110 respectively, ensuring each has a higher value than the previous.
- For each section you want to overlap, ensure you have also set the Sticky option to Top under Motion Effects.
- Adjust the Z Index for the non-sticky sections (containers 6 and 7) to higher values (e.g., 120 and 130) to maintain their order in the layout.
Note: If you encounter any unwanted overlapping, you may need to adjust which sections are set to sticky or modify their Z Index values accordingly.
Official Documentation
Overlap Sections with Z Index and Sticky Top – Conclusion
By following the steps outlined above, you can create engaging, overlapping sections on your WordPress site using Elementor. This technique allows you to layer content in a visually appealing way, making your site more interactive and engaging for visitors. Experiment with different Z Index values and sections to find the perfect design for your needs.
