WPLearningLab helps you understand how to add an Elementor sticky button to your website. We will be using a column-based approach, which allows the button to follow the user as they scroll down the page, staying within the confines of the column. This feature can be useful for call-to-action buttons or navigation aids, providing a constant, accessible interactive element for your site visitors.
Creating an Elementor Sticky Button
- Find a Suitable Column
The first step is to find a suitable column on your website where you can add the sticky button. The column should be high enough to allow the button to follow the user as they scroll down the page.

- Add the Button
Once you’ve identified the column, add the button to it. You can do this by dragging and dropping the button widget from the Elementor panel to the column.

- Position the Button
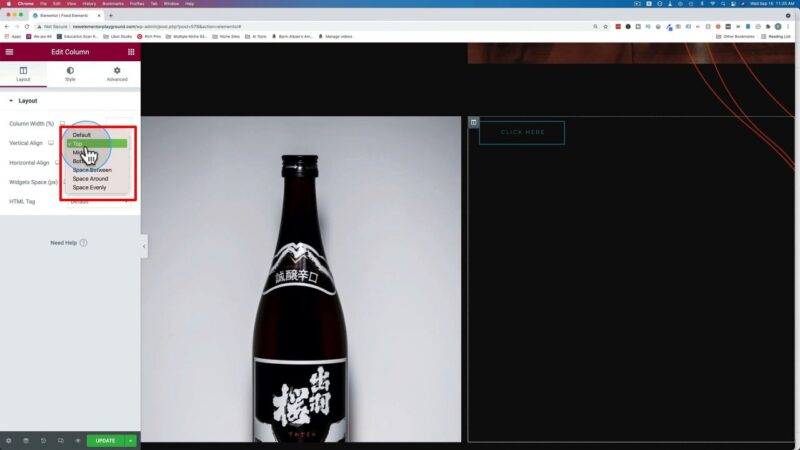
If the button doesn’t appear at the top of the column, you can adjust its position by going to the column settings and changing the vertical-align option to ‘Top’.

- Customize the Button
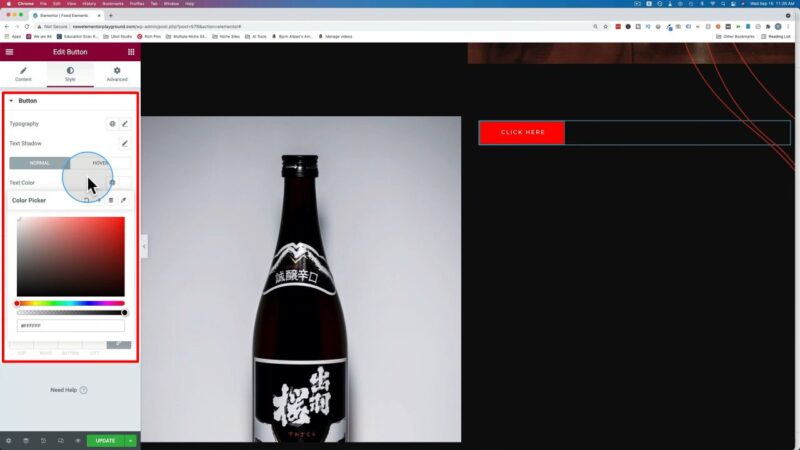
You can customize the appearance of the button as per your preference. For instance, you can change the color of the button and the font color to make it more visible.

- Make the Button Sticky
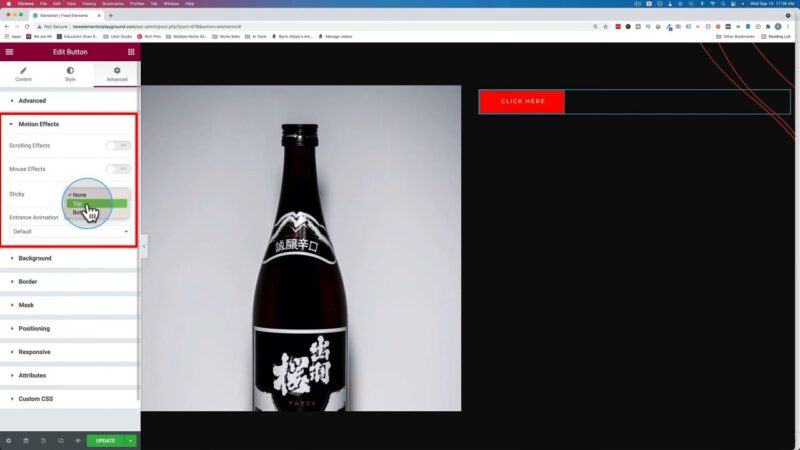
To make the button sticky, go to the ‘Advanced’ tab in the Elementor panel, select ‘Motion Effects’, and turn on the ‘Sticky’ option. Set it to ‘Top’ to make the button stick to the top of the page as the user scrolls down.

- Set the Button to Stay in Column and set an Offset
If you want the button to stay within the column as the user scrolls down, turn on the ‘Stay in Column’ option in the ‘Motion Effects’ settings. You can also set an offset to create a gap between the button and the top of the browser. This can be done by adjusting the ‘Offset’ setting in the ‘Motion Effects’ settings.

Advantages of Using an Elementor Sticky Button
The use of sticky buttons can improve the user experience on your website. They serve as a constant call-to-action, encouraging users to engage with your site in a specific way, whether that’s subscribing to a newsletter, making a purchase, or navigating to a particular section of the site.
Sticky buttons can also improve the navigability of your site. By staying visible as the user scrolls, they provide a constant point of reference, making it easier for users to navigate your site.
Moreover, sticky buttons can contribute to the overall aesthetic of your site. With the right design and placement, they can add a dynamic, interactive element that makes your site more engaging and visually appealing.
Tips & Tricks
While this tutorial provides a basic guide to creating an Elementor sticky button, there are a few additional tips and tricks that can help you make the most of this feature:
- Use Contrasting Colors
Make your sticky button stand out by using contrasting colors. This will draw the user’s attention and make the button more noticeable. - Consider the Button Size
The size of the button should be suitable for its purpose. A button that’s too big can be distracting, while one that’s too small might be overlooked. - Test on Different Devices
Ensure that your Elementor sticky button works well on different devices. Test it on various screen sizes to ensure it’s fully responsive.
Common Issues
- Button Not Sticking
If your button isn’t sticking as expected, make sure the ‘Sticky’ option is turned on in the ‘Motion Effects’ settings. - Button Not Staying in Column
If the button isn’t staying within the column, ensure the ‘Stay in Column’ option is turned on. - Button Not Visible
If the button isn’t visible, check the color settings. The button color might be blending with the background, making it hard to see.

