Creating a custom content type search page in WordPress can be a nice addition, especially for websites with extensive directories or listings. This tutorial will guide you through setting up a CCT search page using JetEngine, JetSmartFilter, and Elementor. By the end of this guide, you’ll have a functional, user-friendly search feature for your website.

Prerequisites
Please make sure you have the following installed and activated:
Set Up a Custom Content Type Search Page – Instructions
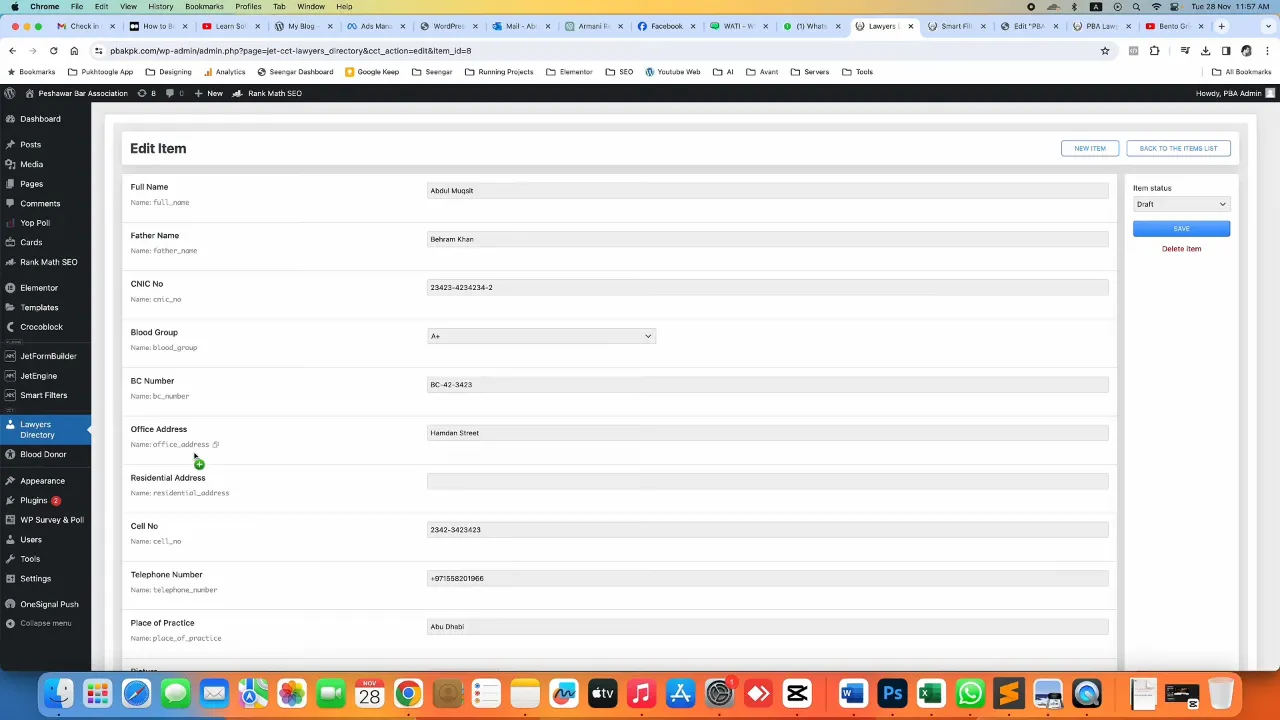
- Create your CCT and set it up according to your needs (e.g. Lawyers Directory).
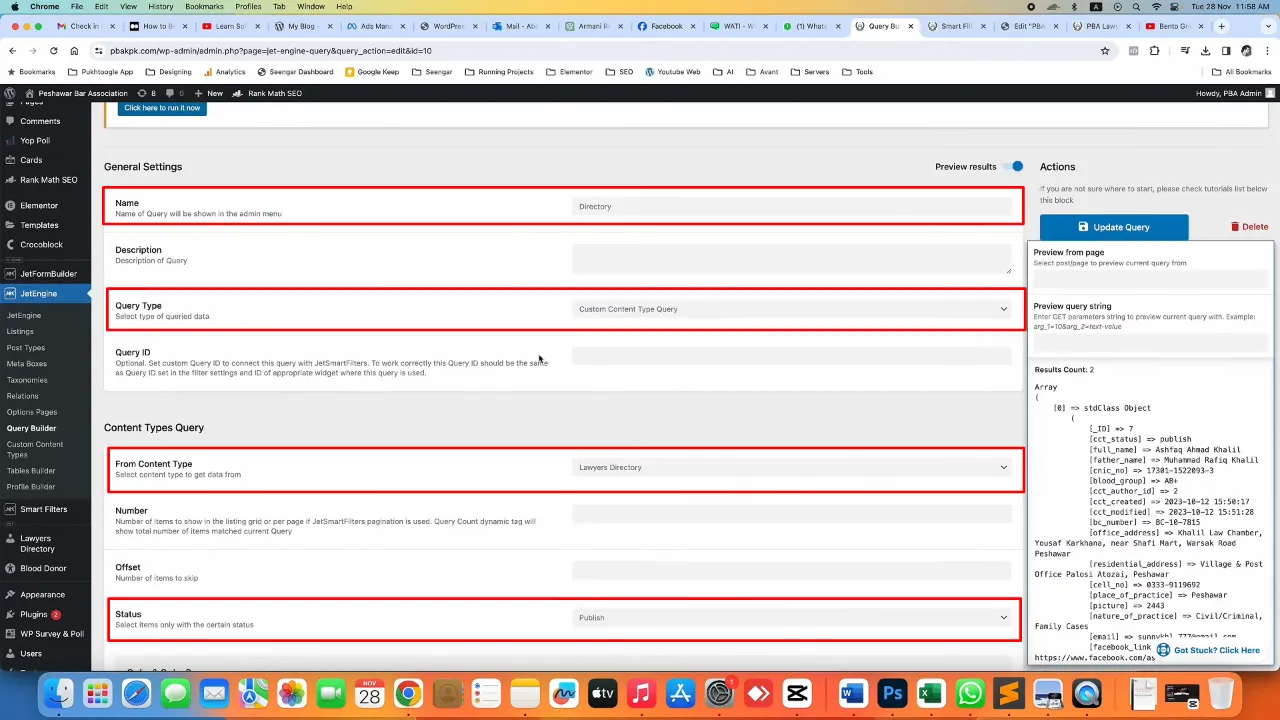
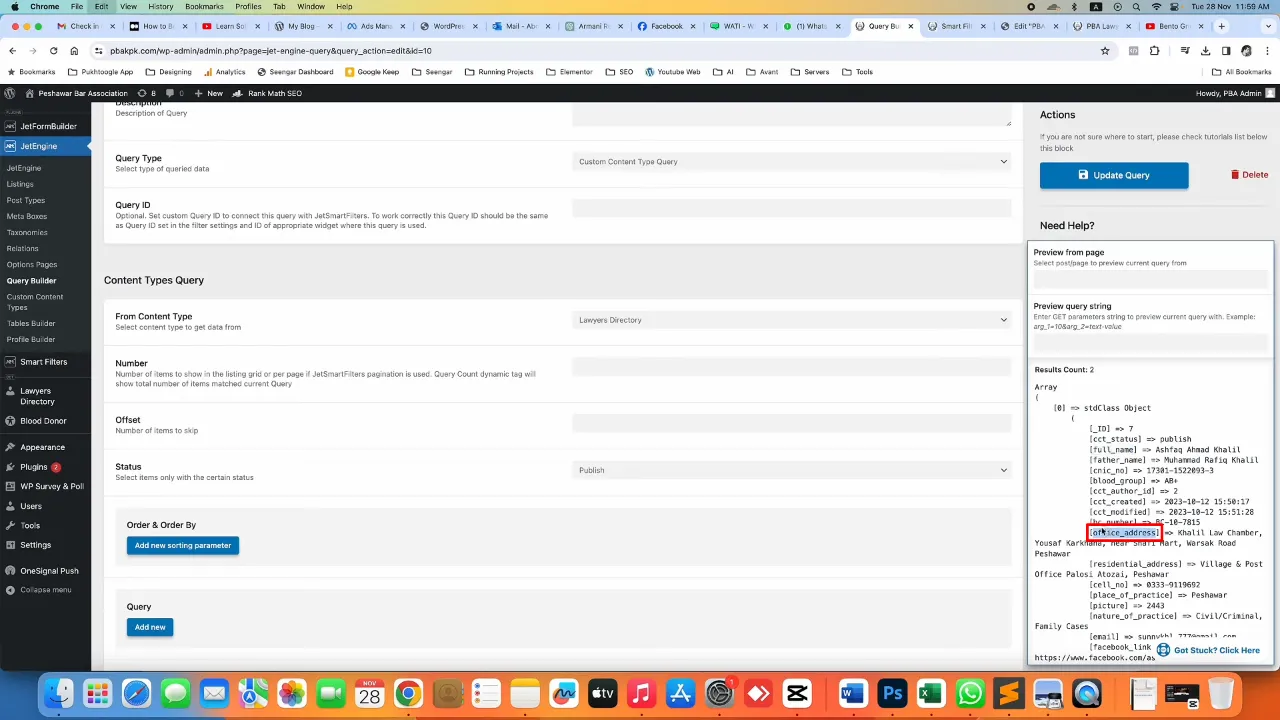
- Navigate to JetEngine > Query Builder > Add New.

- Set up your query settings and save the it afterward:
- Name: e.g. “Directory”
- Query Type: Custom Content Type Query
- From Content Type: e.g. Lawyers Directory
- Status: Publish
- Navigate to JetSmartFilter > Add New.
- Fill in the filter settings:
- Filter Name: e.g. “Search Lawyer CCT”
- Filter Type: Search
- Search by: By Custom Field (from Query Variable)
- Placeholder: e.g. “Type Lawyer Name…”
- Query Variable: e.g. “full_name”

Tip: You can see the available query variables in your custom query preview.
- Open your page in Elementor where you want to place the search page and insert the search filter widget.
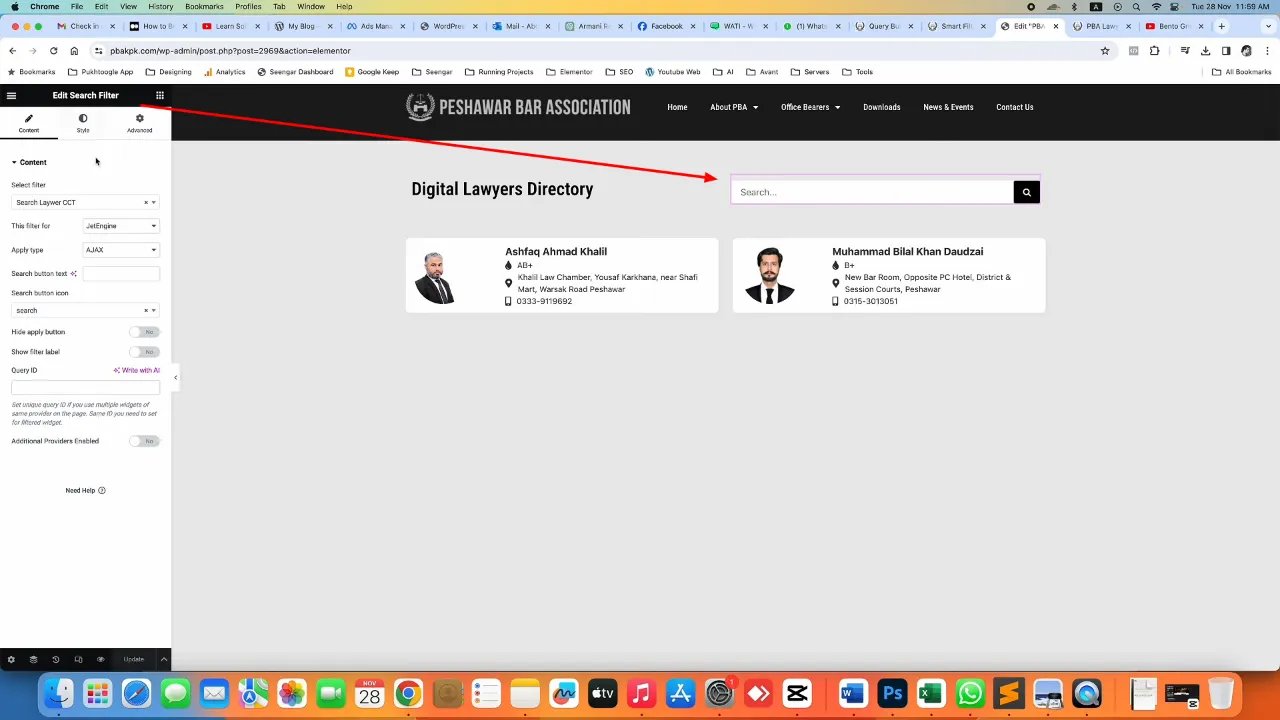
- Select the search filter widget and apply the following settings in the content tab:
- Select Filter: e.g. “Search Lawyer CCT”
- This filter for: JetEngine
- Apply type: Ajax

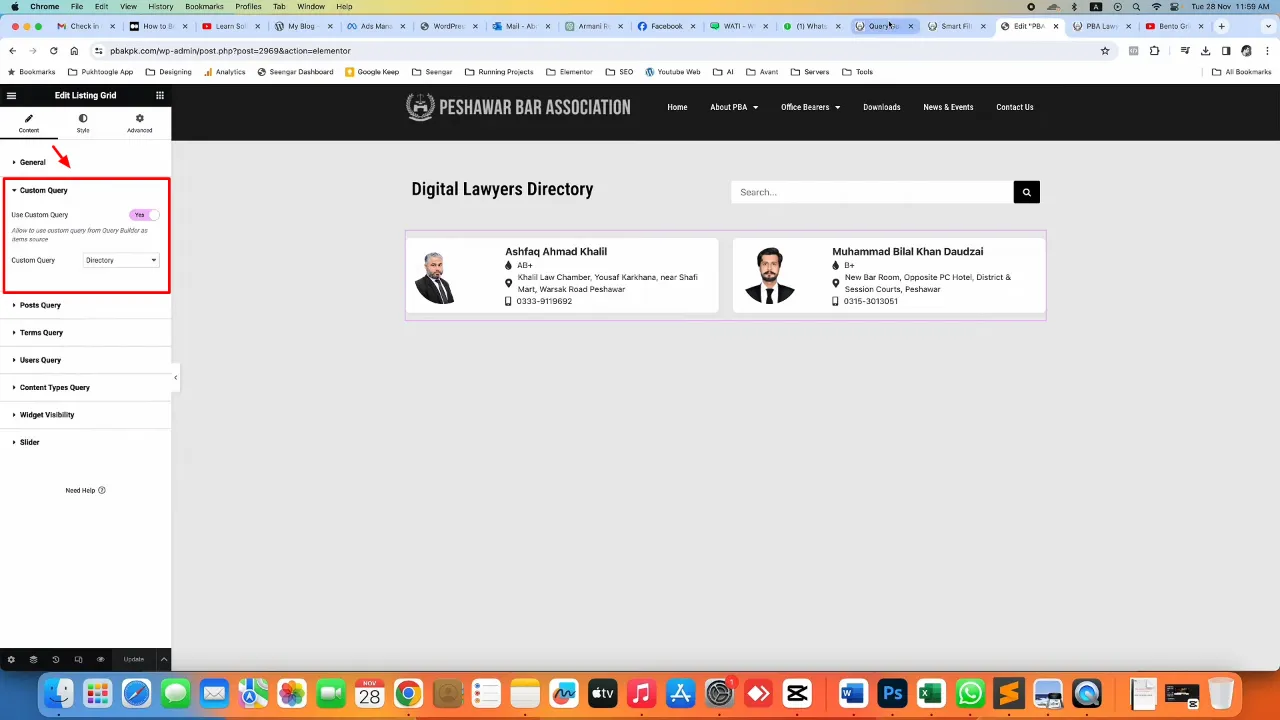
- Add a listing grid widget on the page (in this example it is already designed).
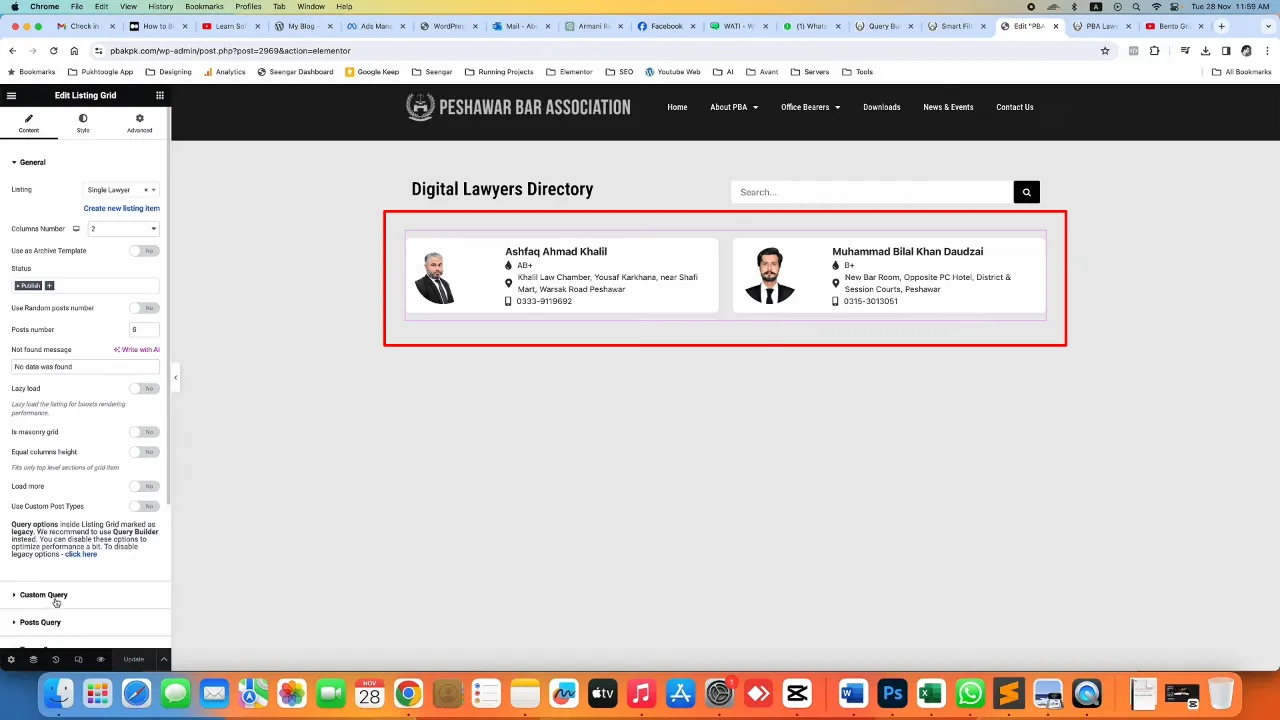
- Select the “Directory” query via Content > Custom Query.
- Update the smart filter with your chosen field, for instance, switching from ‘full name’ to ‘office address’.
Look for a variable name to filter 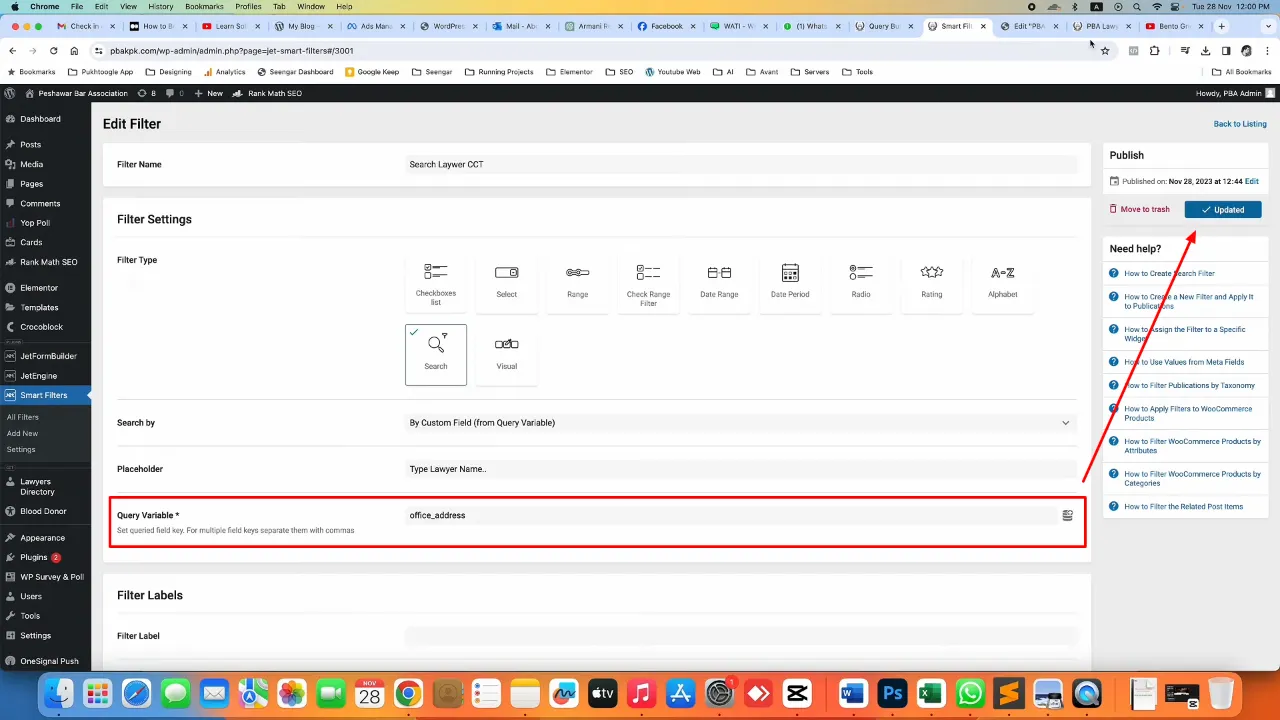
Fill in the variable name in your search filter settings - Test the functionality on your site by searching for various terms and confirming the accurate results.
Official Documentation
Custom Content Type Search – Conclusion
Implementing a custom content type search on your website enhances user engagement and improves navigation. With JetEngine and JetSmartFilter, the process is streamlined, allowing for a powerful yet user-friendly search feature. Experiment with different fields and settings to tailor the search experience to your site’s specific needs.
