Customize and enhance your website by adding a Category Featured Image. Presented by Wicky Design this tutorial is centered around using JetEngine and Elementor Pro to achieve this. Not only will we discuss how to add a featured image to your categories, but we will also show how to display your categories in a listing grid. Additionally, we will touch on the use of the query builder in JetEngine for advanced filtering for your listing grid. This tutorial is perfect for those who want to give their WordPress site a more organized and visually appealing look.
Adding a Category Featured Image
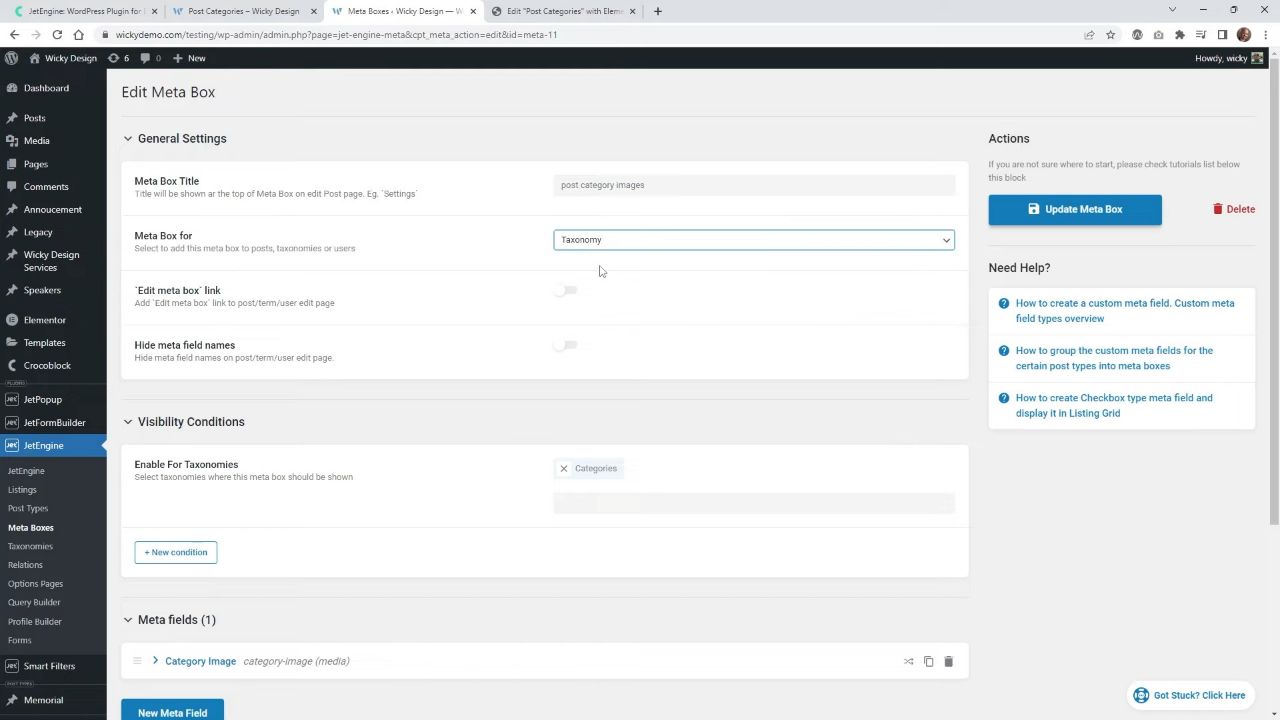
- Create a Meta Box
Navigate to JetEngine on your WordPress dashboard and click on ‘Meta Boxes’. Here, you will create a new Meta Box that will allow you to add a featured image to your categories. Name your Meta Box (for example, ‘post category images’), select ‘Taxonomy’ for the Meta Box type, and choose ‘Categories’ for the related Taxonomy.

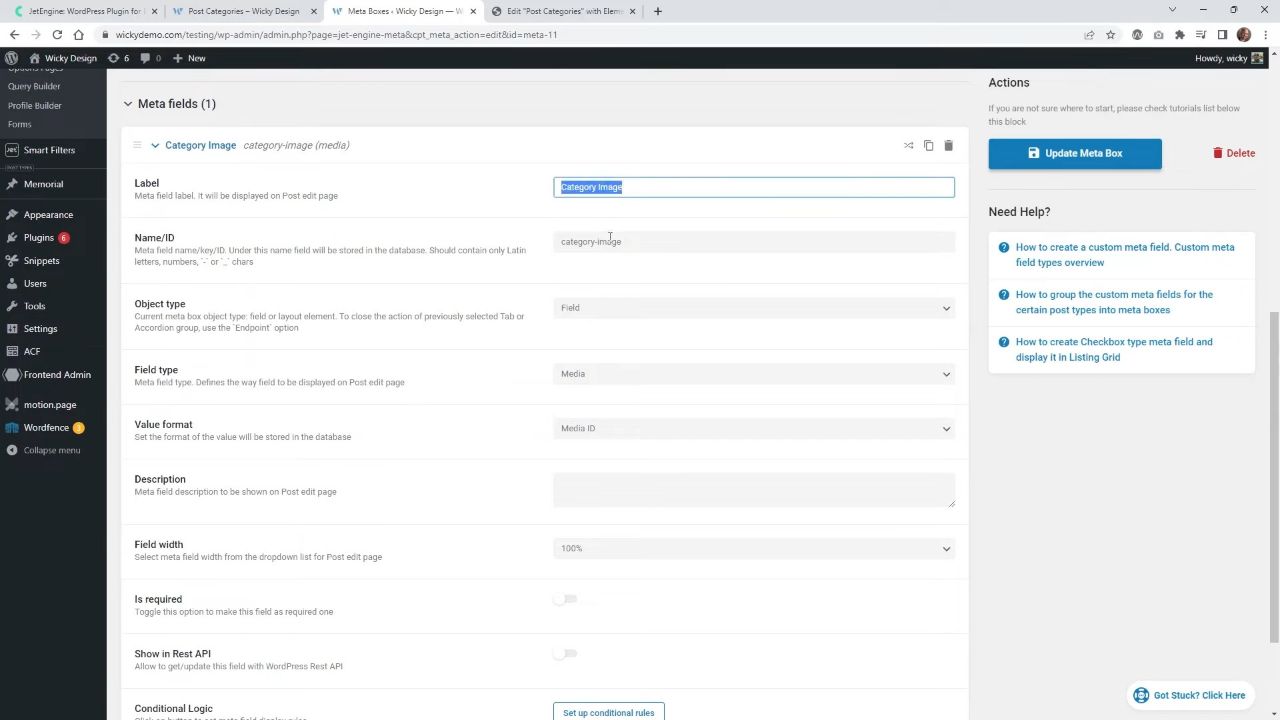
- Add a New Meta Field
In your newly created Meta Box, add a new Meta Field. Name it ‘category image’ and select ‘Media’ for the field type. Make sure to copy the Meta Field name to your clipboard as you will need it later in the tutorial.

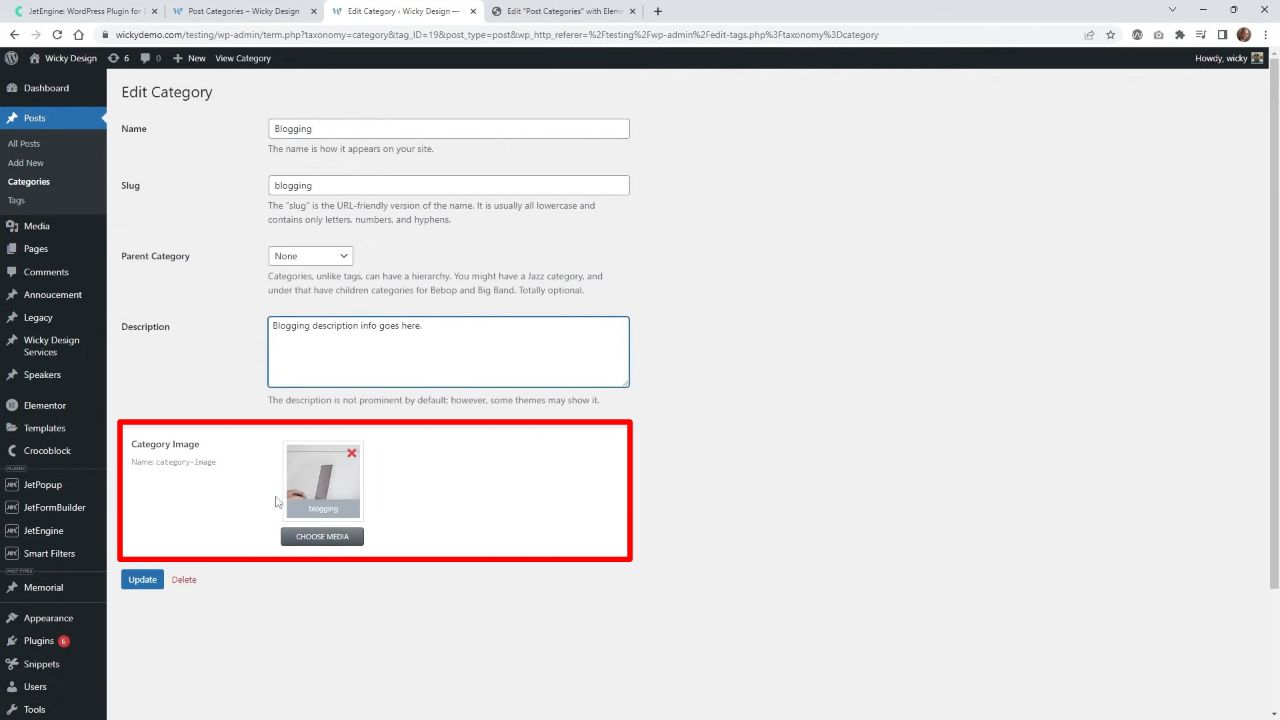
- Add Images to Your Categories
Now, when you navigate to your post categories, you should see a new section where you can add a featured image. Add images to a few of your categories to start with.

Creating a Listing Grid to Display Your Categories
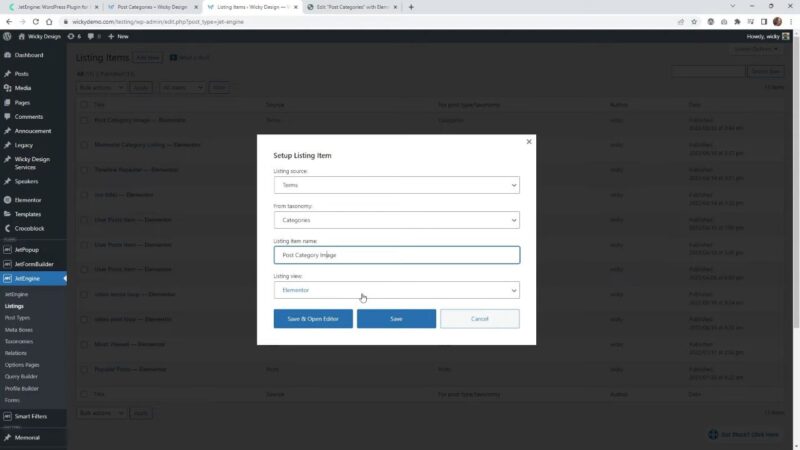
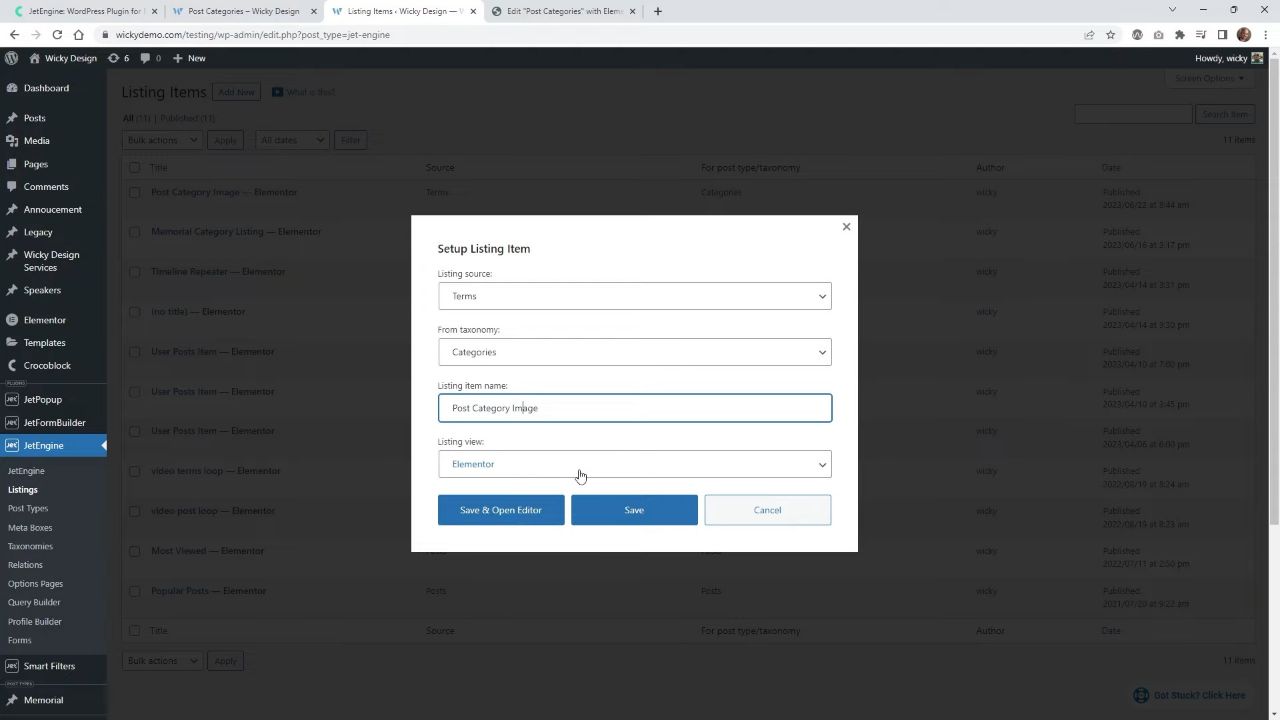
- Create a Listing
Navigate to ‘Listings’ under JetEngine on your WordPress dashboard. Here, you will create a new listing. For the listing source, select ‘Terms’, and for the Taxonomy, choose ‘Categories’. You can then start designing your listing using Elementor.
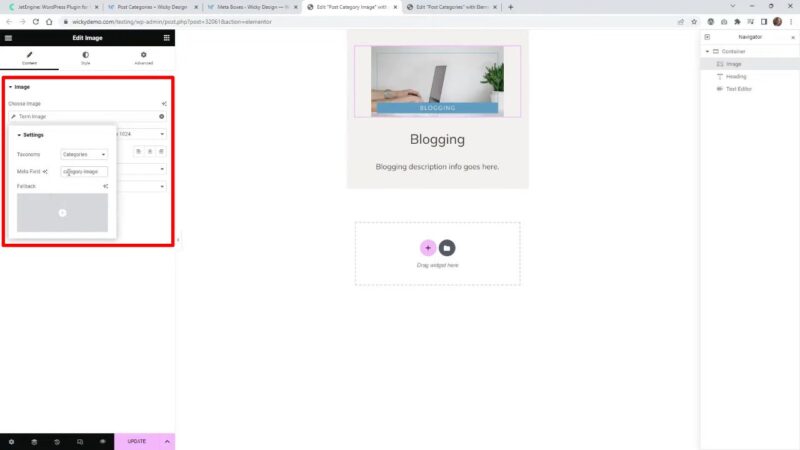
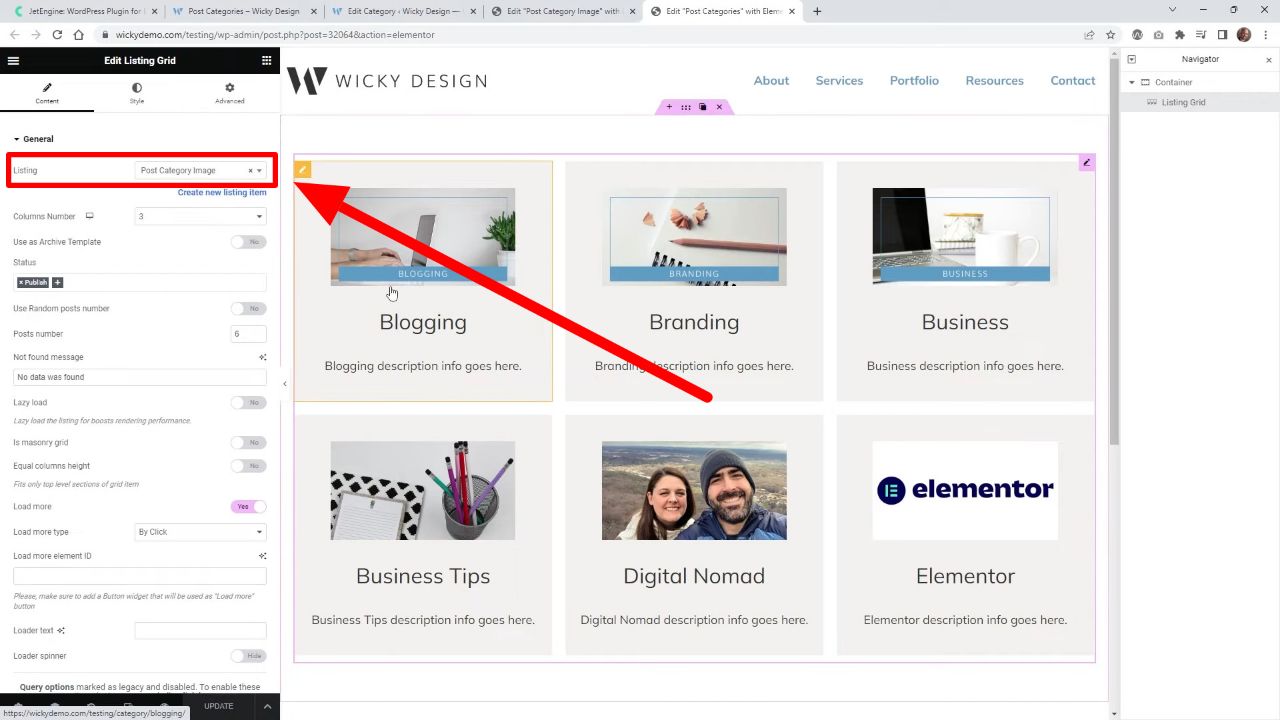
- Define and Design Your Listing
In your listing, add an image widget and select ‘Term Image’ under JetEngine in the Dynamic tags. Make sure ‘Categories’ is selected for the Taxonomy and enter the Meta Field name you copied earlier. You can also add a header widget and a text editor widget to display the category name and description respectively.
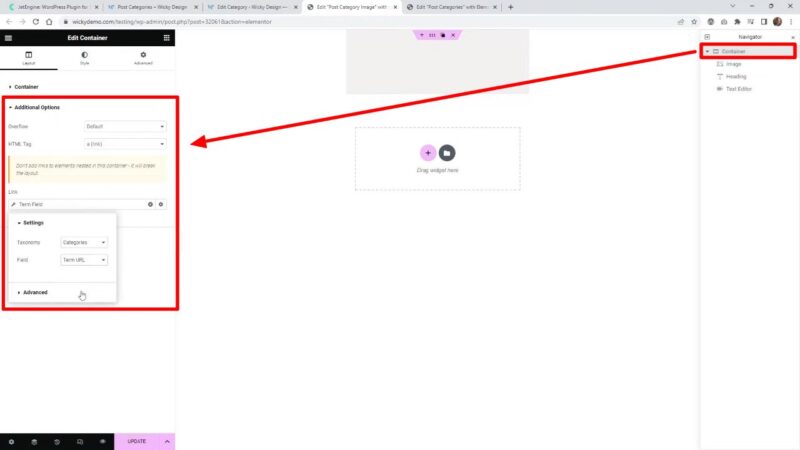
- Make Your Listing Clickable
To make your listing clickable, go to ‘Additional Options’ under your container and select ‘Term URL’ under JetEngine in the Dynamic tags. This will make the entire container clickable and redirect to the respective category page when clicked.
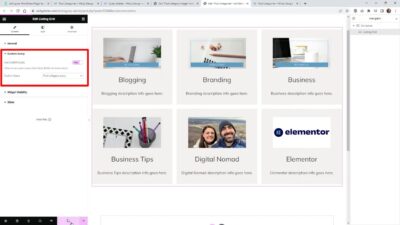
- Add a Listing Grid
Now that your listing is designed, you can add a listing grid to your page. Simply create a new page, add a listing grid, and select your newly created listing. The listing grid will automatically populate with your categories.

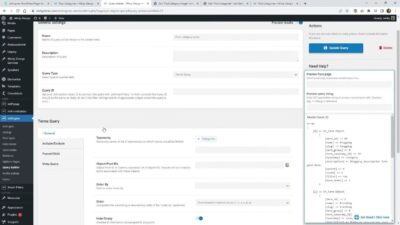
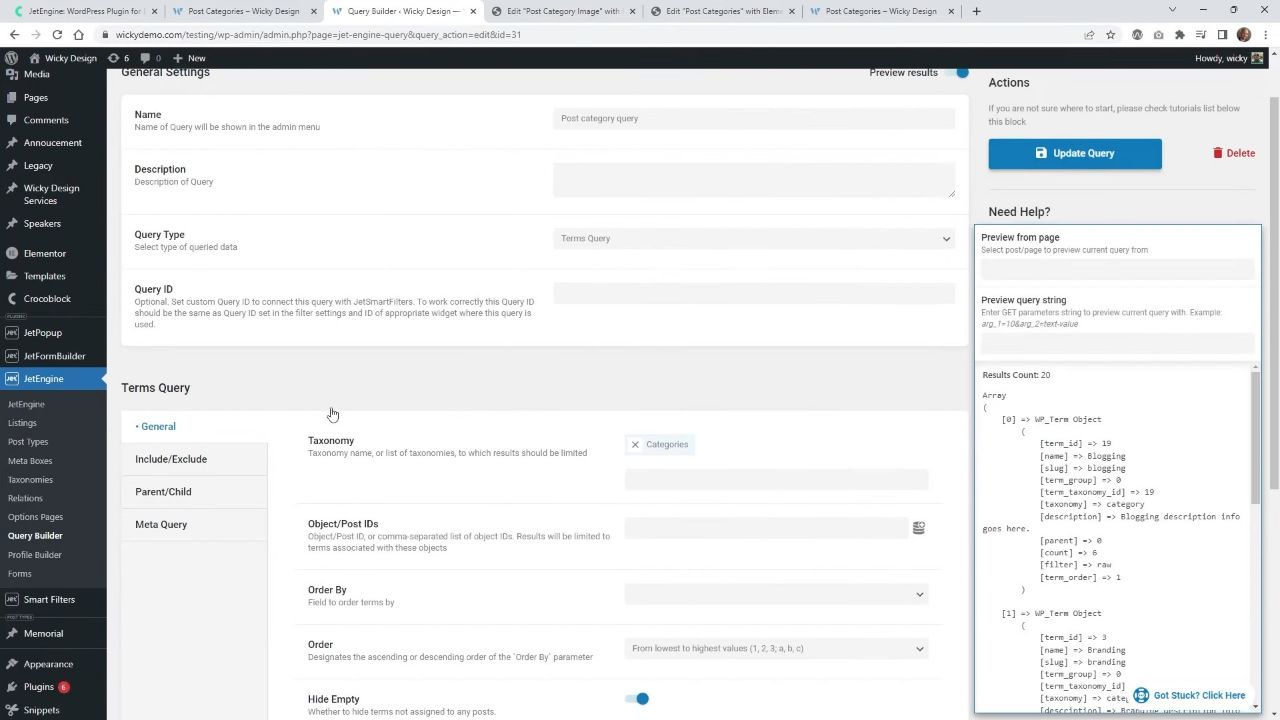
- Use the Query Builder to refine the Grid Results
If you want to show specific categories or just want to sort them differently you can create a custom query for your listing grid. Create a custom query in the query builder and set the listing grid to the created query.


Why This Tutorial is Beneficial
Understanding how to add a Category Featured Image and display it in a listing grid can greatly enhance the visual appeal and organization of your WordPress site. It allows you to provide a more engaging and visually pleasing experience for your site visitors. Furthermore, the skills learned in this tutorial can be applied to other aspects of your website, making it a valuable addition to your WordPress toolkit.
Tips for Choosing Effective a Category Featured Image
Choosing the right featured images for your categories is crucial. Here are a few tips to help you select effective images:
- Relevance
The image should be relevant to the category. It should give the user an idea of what kind of content they can expect in that category. - Quality
The image should be high-quality and clear. Blurry or pixelated images can make your site look unprofessional. - Consistency
Try to maintain a consistent style or theme for all your featured images. This can help to create a cohesive look and feel for your site. - Size
Be mindful of the size of your images. Large images can slow down your site, which can negatively impact user experience and SEO.
Common Issues and Their Solutions
- The featured image is not displayed in the listing grid
Make sure you have added a featured image to your categories. The listing grid will not display an image if none has been added. - The listing is not clickable
Ensure that you have selected ‘Term URL’ under JetEngine in the Dynamic tags for your container. This will make the entire container clickable. - The listing grid is not populating with categories
Check that you have selected the correct listing in your listing grid. The listing grid will not populate if the wrong listing is selected.
