Create a Breakdance video lightbox for improved user experience on your website. This tutorial by the Breakdance YouTube Channel provides a clear, step-by-step guide on how to use a link element in Breakdance to open a video in a lightbox. This feature allows you to insert a button, access its link settings, set it to open a lightbox, and designate a video to show in the lightbox.
Steps to Create A Breakdance Video Lightbox
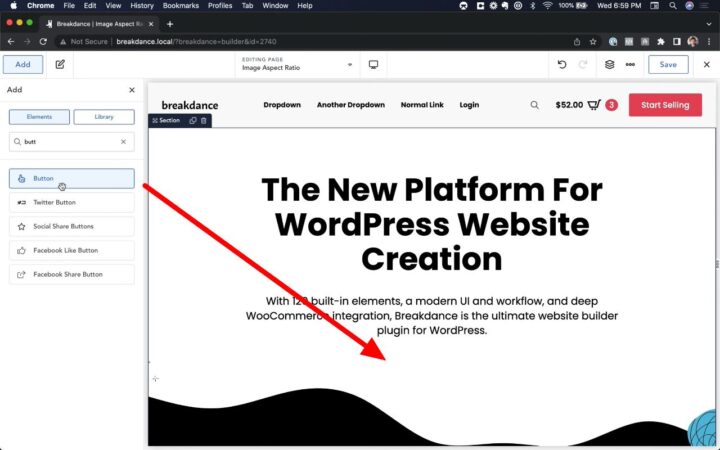
- Add a Button
Click on the ‘Add’ button to insert a new button. This feature also works with a text link or a wrapper link element.

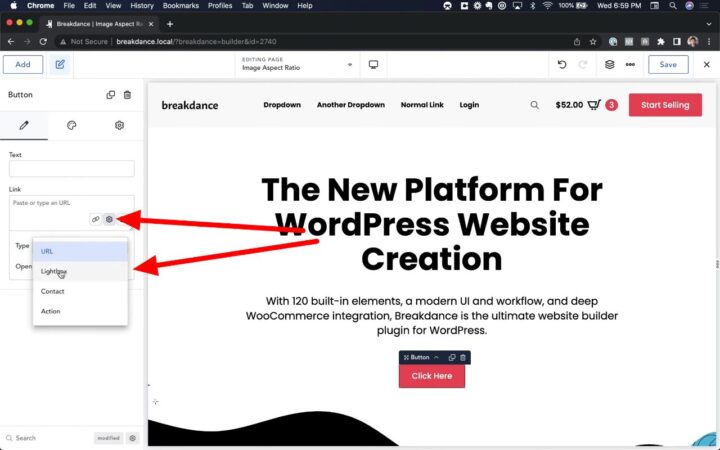
- Access Link Settings & Select Lightbox
Once the button is added, go to the ‘Link’ section and click on ‘Settings’, and under the ‘Type’ dropdown menu, select ‘Lightbox’.

- Select Video Option and Insert Video URL
You have the option to open an image or a video in a lightbox. For this tutorial, choose ‘Video’. Paste the URL of the video you want to display in the lightbox.

- Save and Test
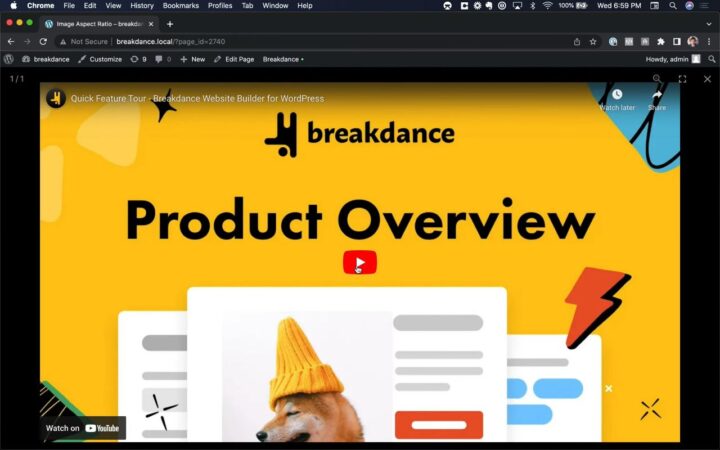
After inserting the video URL, save your changes and view the frontend to test the button. It should open a lightbox displaying the video you selected.
Why you should use a Breakdance Video Lightbox
Boost Engagement
Video content is a powerful tool for boosting engagement on your website. By incorporating a video lightbox, you allow users to interact with your content in a more dynamic and engaging way. This can lead to increased time spent on your site and improved conversion rates.
Enhance Aesthetics
A video lightbox can significantly enhance the visual appeal of your website. It provides a clean, organized way to display videos, contributing to a more professional and polished site design.
Improve Site Navigation
Video lightboxes improve site navigation by allowing users to view videos without being redirected to a new page or site. This seamless user experience can lead to improved site navigation metrics, including bounce rate and pages per session.
Best Practices for Using Video Lightboxes
While creating a video lightbox is straightforward, there are a few best practices you should keep in mind to ensure you’re maximizing the potential of this feature:
- Video Selection
Choose videos that are relevant and valuable to your audience. The more engaging your video content, the more likely users are to interact with your lightbox. - Loading Times
Be mindful of the size and quality of the videos you’re using. Larger, high-definition videos may take longer to load, which could impact user experience. - Mobile Responsiveness
Ensure your video lightbox is responsive and functions well on mobile devices. With a significant portion of web traffic coming from mobile users, it’s crucial that your lightbox is optimized for these devices.
Advanced Features
The Breakdance plugin offers several advanced features for users who want to further customize their video lightboxes:
- Autoplay
You can set your video to start playing automatically when the lightbox opens. This can be a useful feature for grabbing users’ attention. - Looping
If your video is short or if it’s a promotional clip, you might want it to loop continuously. Breakdance allows you to set your video to loop within the lightbox. - Overlay Customization
Breakdance allows you to customize the overlay color and opacity of your lightbox. This can be useful for ensuring your lightbox matches your site’s color scheme.
Using Other Media Types
While this tutorial focuses on video lightboxes, the Breakdance plugin also supports image lightboxes. This versatility allows you to display a variety of media types in a lightbox, further enhancing your site’s content offerings.
Common Issues
- Video Not Displaying in Lightbox
Ensure that the video URL you pasted is correct. Check the video’s privacy settings on its hosting platform. - Button Not Working
Make sure you have saved your changes before exiting to the frontend. If the problem persists, check for any plugin conflicts on your WordPress site.

