Adding a WooCommerce Delivery Date option to the checkout page is an helpful feature for many online stores. It enhances customer service by allowing shoppers to choose a convenient delivery date within a specified range. In this tutorial, we’ll guide you through the process of implementing this functionality using a simple code snippet, ensuring your WooCommerce site caters to your logistical needs and improves the overall shopping experience.
Prerequisites
Please make sure you have the following installed and activated:
Additional Knowledge
Understanding the basics of WooCommerce and its checkout process is crucial for customizing your e-commerce site effectively. WooCommerce, being a flexible and widely-used e-commerce solution, allows for various customizations, including adding custom fields to the checkout page. The Code Snippets plugin offers a straightforward way to insert PHP code snippets into your site, bypassing the need to edit your theme’s functions.php file directly. This method is safer and keeps customizations separate from theme updates.
Instructions for a WooCommerce Delivery Date on Your Checkout Page
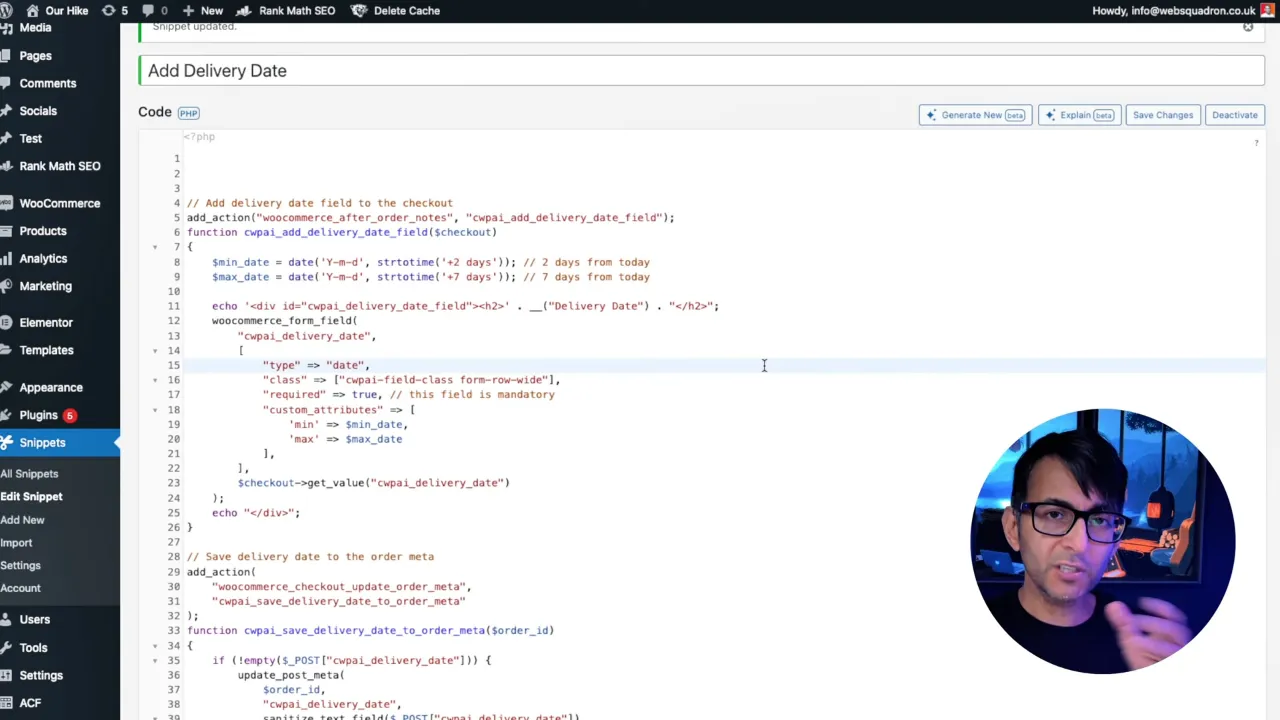
- Navigate to Snippets > Add New and title your new snippet something descriptive, like “WooCommerce Delivery Date Selector”.
- Copy & Paste the code below into the Code Snippets editor:
// Add delivery date field to the checkout
add_action("woocommerce_after_order_notes", "cwpai_add_delivery_date_field");
function cwpai_add_delivery_date_field($checkout)
{
    $min_date = date('Y-m-d', strtotime('+2 days')); // 2 days from today
    $max_date = date('Y-m-d', strtotime('+7 days')); // 7 days from today

    echo '<div id="cwpai_delivery_date_field"><h2>' . __("Delivery Date") . "</h2>";
    woocommerce_form_field(
        "cwpai_delivery_date",
        [
            "type" => "date",
            "class" => ["cwpai-field-class form-row-wide"],
            "required" => true, // this field is mandatory
            "custom_attributes" => [
                'min' => $min_date,
                'max' => $max_date
            ],
        ],
        $checkout->get_value("cwpai_delivery_date")
    );
    echo "</div>";
}

// Save delivery date to the order meta
add_action(
    "woocommerce_checkout_update_order_meta",
    "cwpai_save_delivery_date_to_order_meta"
);
function cwpai_save_delivery_date_to_order_meta($order_id)
{
    if (!empty($_POST["cwpai_delivery_date"])) {
        update_post_meta(
            $order_id,
            "cwpai_delivery_date",
            sanitize_text_field($_POST["cwpai_delivery_date"])
        );
    }
}

// Display delivery date in the custom column
add_action('woocommerce_admin_order_data_after_shipping_address', 'cwpai_my_orders_delivery_date_column');
function cwpai_my_orders_delivery_date_column($order)
{
    $delivery_date =  "<strong>Delivery Date:</strong><br>" . get_post_meta($order->get_id(), 'cwpai_delivery_date', true); // Get custom order meta
    echo !empty($delivery_date) ? $delivery_date : 'N/A';
}
Source: Code Snippets
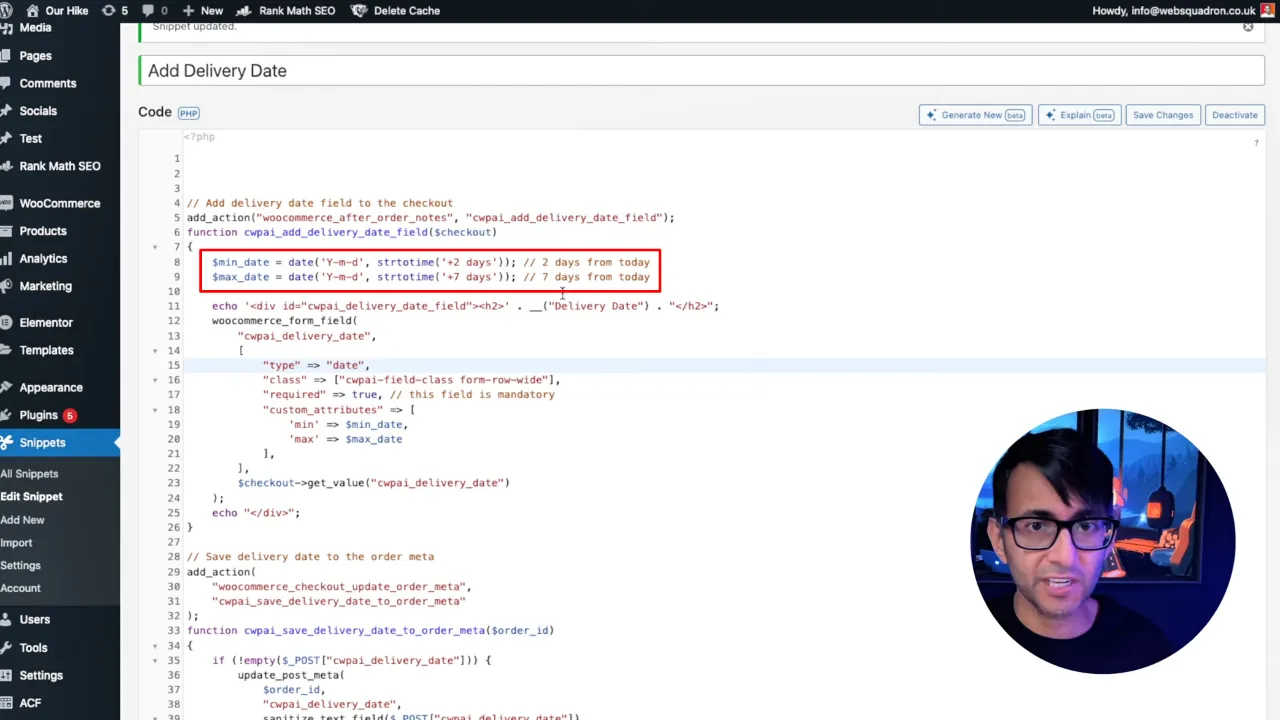
- Modify the code if necessary to fit your delivery date range. By default, the snippet sets the delivery date options from 2 to 7 days after the current date. Adjust these values as needed for your store’s delivery schedule.
- Click on Save Changes and Activate the snippet.
Tip: Test the delivery date feature thoroughly on your checkout page to ensure it works as expected. It’s also a good practice to update the snippet if your delivery policies change.
Official Documentation
WooCommerce Delivery Date – Conclusion
By following the steps outlined in this tutorial, you have successfully added a delivery date selector to your WooCommerce checkout page. This customization not only improves the user experience but also provides your business with a flexible way to manage deliveries. Feel free to tinker with the code snippet to tailor the delivery options to your specific needs. Happy coding, and remember, customization is key to standing out in the e-commerce space!
