Locking content in WordPress is a clever way to engage visitors and control the visibility of specific sections. In this tutorial, we’ll explore how to lock content in WordPress using a simple HTML code. We will use Elementor in this example but it is also adaptable to other page builders.
Prerequisites
Please make sure you have the following installed and activated:
Pros and Cons of Hiding Content via HTML Code
When considering the implementation of content locking via HTML code, it’s important to weigh the benefits and drawbacks. Below is a table outlining the key pros and cons:
| Pros | Cons |
|---|---|
| Simple Implementation: HTML-based content locking is relatively easy to implement, especially with page builders like Elementor. | Limited Security: This method provides a basic level of security but is not foolproof. Tech-savvy users might bypass it. |
| Customizability: Offers flexibility in design and functionality. You can tailor the look and behavior to fit your site’s theme. | Not SEO-Friendly: Locked content might not be indexed by search engines, which could affect your site’s SEO performance. |
| Enhanced User Engagement: Can be used to create interactive experiences that encourage users to engage more with your content. | Potential Accessibility Issues: Overuse or improper implementation might hinder the accessibility of your website. |
| No Plugin Dependency: Eliminates the need for additional plugins, reducing the risk of compatibility issues and site slowdown. | Maintenance Required: Any changes in your site’s layout or updates might require you to adjust the HTML code accordingly. |
Instructions to Lock Content in WordPress with HTML
- Navigate to the page you want to edit with Elementor.

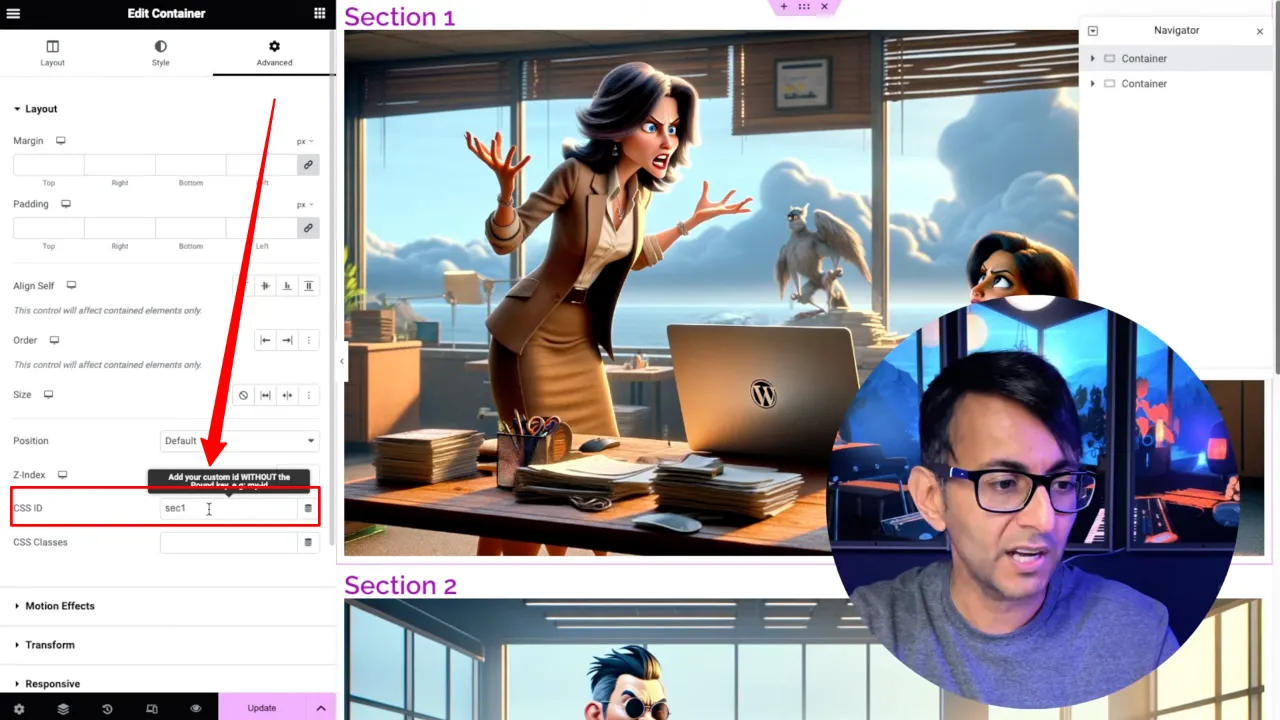
- Assign unique IDs to each element, e.g. the container in the Elementor editor (Advanced > CSS ID), like ‘sec1’ and ‘sec2’.

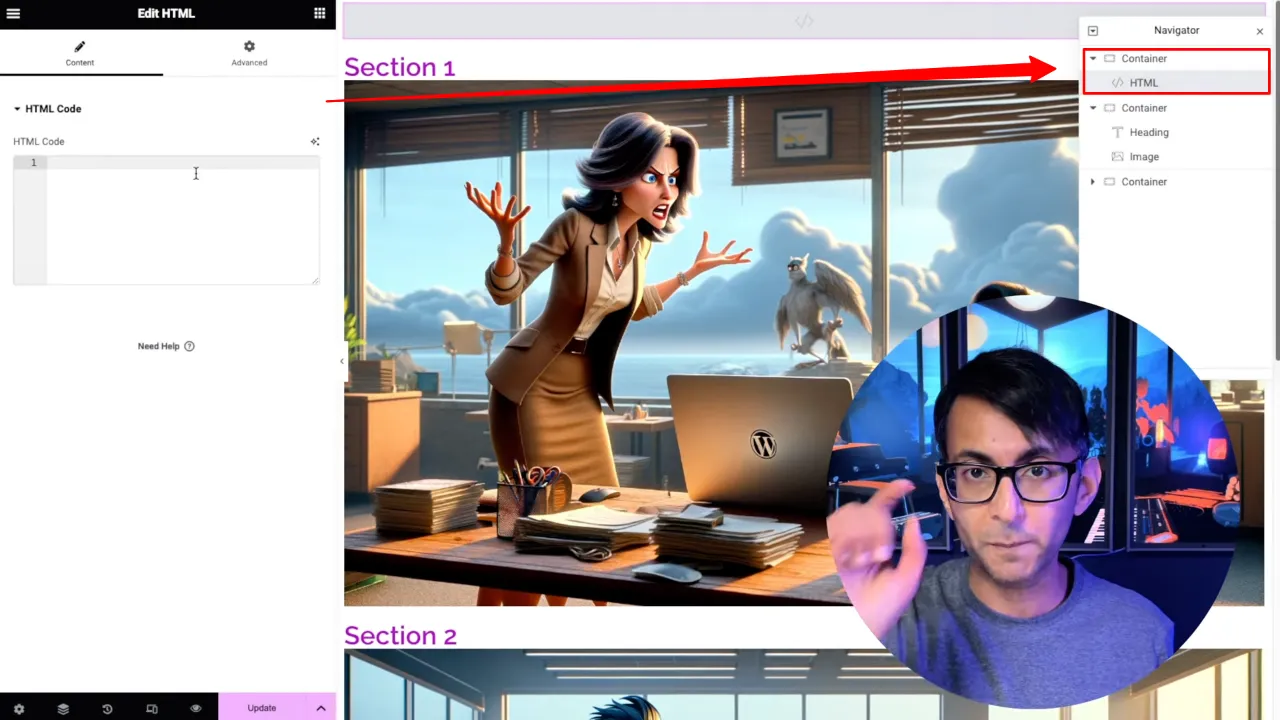
- Insert an HTML widget above these containers.

- Paste the provided HTML code into the widget:
<input type="text" id="passwordField" placeholder="Enter password"> <script> document.getElementById('passwordField').addEventListener('input', function() { var value = this.value; if (value === '') { // Set both sec1 and sec2 to display none if passwordField is empty document.getElementById('sec1').style.display = 'none'; document.getElementById('sec2').style.display = 'none'; } else if (value === 'CA') { document.getElementById('sec1').style.display = 'block'; document.getElementById('sec2').style.display = 'none'; } else if (value === 'DA') { document.getElementById('sec1').style.display = 'none'; document.getElementById('sec2').style.display = 'block'; } else { document.getElementById('sec1').style.display = 'none'; document.getElementById('sec2').style.display = 'none'; } }); </script> <style> #sec1, #sec2 { display: none; } </style>Source: Code Snippets
- Modify the IDs in the code to match those assigned to your elements and set custom passwords in the code for each section. These will be used to unlock the content.

- Save your changes and preview the page to ensure functionality.

Official Documentation
Lock Content in WordPress with HTML – Conclusion
By following these steps, you can easily set up content locking on your WordPress site. This approach is great for creating interactive experiences, like revealing hidden content after entering a password.

