Creating a Listing Template for Custom Taxonomy in Elementor using JetEngine and JetThemeCore is a fantastic way to organize and display content on your WordPress site. This tutorial will guide you through the process of setting up a listing template that showcases terms from a custom taxonomy in a grid layout. By the end of this tutorial, you’ll have a dynamic and visually appealing way to present your content categories, enhancing user navigation and interaction with your site.
Prerequisites
Please make sure you have the following installed and activated:
Why Build a Listing Template for Custom Taxonomy?
Custom taxonomies are a powerful WordPress feature that allows for the categorization of content beyond the default categories and tags, enabling you to create a more organized and navigable website structure. With a custom listing template, you can:
- Enhance User Experience
By organizing content into custom taxonomies and presenting them through a well-designed listing template, users can easily find the content they’re interested in. This improved navigation can lead to increased engagement and time spent on your site. - Showcase Content Effectively
Custom listing templates allow you to display your content in a more attractive and functional way. You can include elements such as images, descriptions, and even custom fields that offer more information at a glance, making your content more appealing and accessible to your audience. - Improve Site Structure for SEO
Organizing your content into custom taxonomies and using listing templates can also have SEO benefits. It makes your site more crawlable for search engines, which can improve your site’s overall discoverability. Custom taxonomies also allow for the creation of more specific and optimized URLs. - Enable Dynamic Content Presentation
Utilizing dynamic content widgets from JetEngine, you can create listing templates that automatically update when new content is added to a taxonomy. This means less manual updating and fresher content for your visitors. - Customize for Specific Needs:
Whether you’re running an eCommerce store, a portfolio site, a blog, or a business directory, custom listing templates can be adapted to suit the specific needs of your site. This customization can set your website apart from competitors and cater specifically to your target audience.
Listing Template for Custom Taxonomy Instructions
Note: For this tutorial, a taxonomy with examples was created beforehand, e.g. Vacancy Location (via JetEngine > Taxonomies).
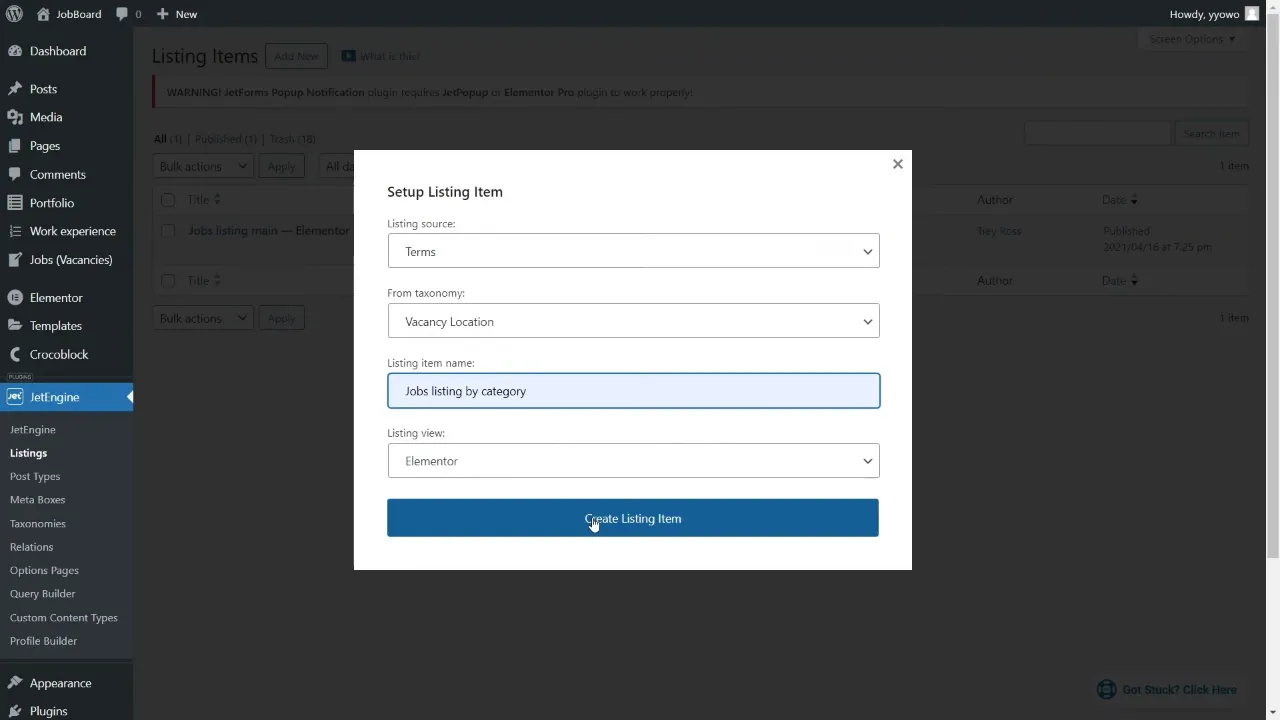
- Navigate to JetEngine > Listings > Add New. For the Listing Source, choose ‘Terms’ and specify your custom taxonomy. Enter a name for your listing, select ‘Elementor’ for customization, and create the listing item.
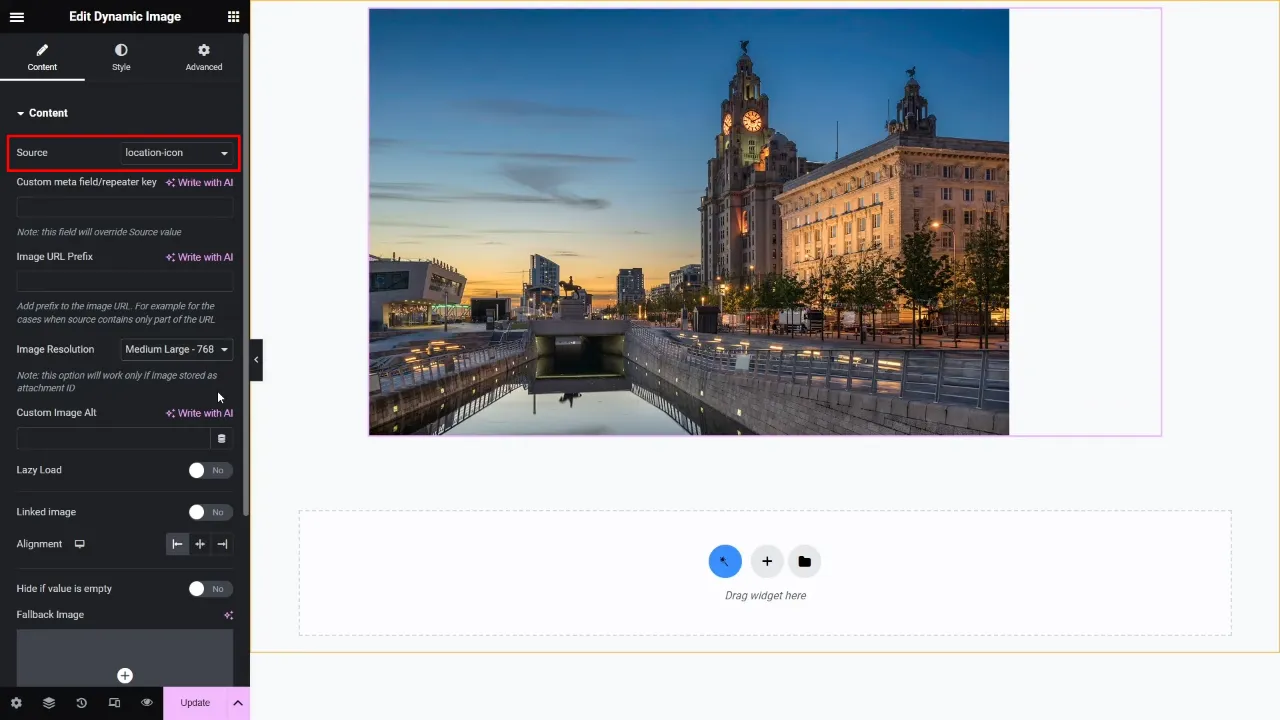
- Add a dynamic image widget for the category image and change the source accordingly. Style the image as needed (e.g. Image height: 200px, Object Fit: Cover).
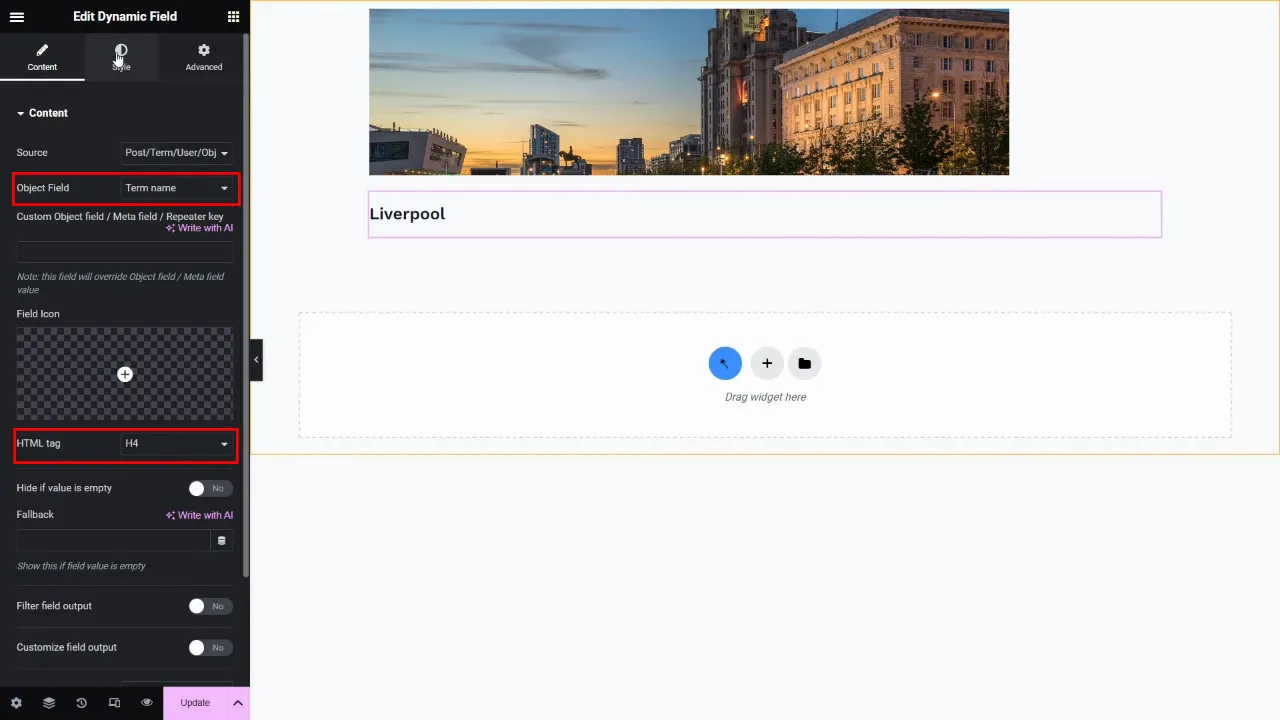
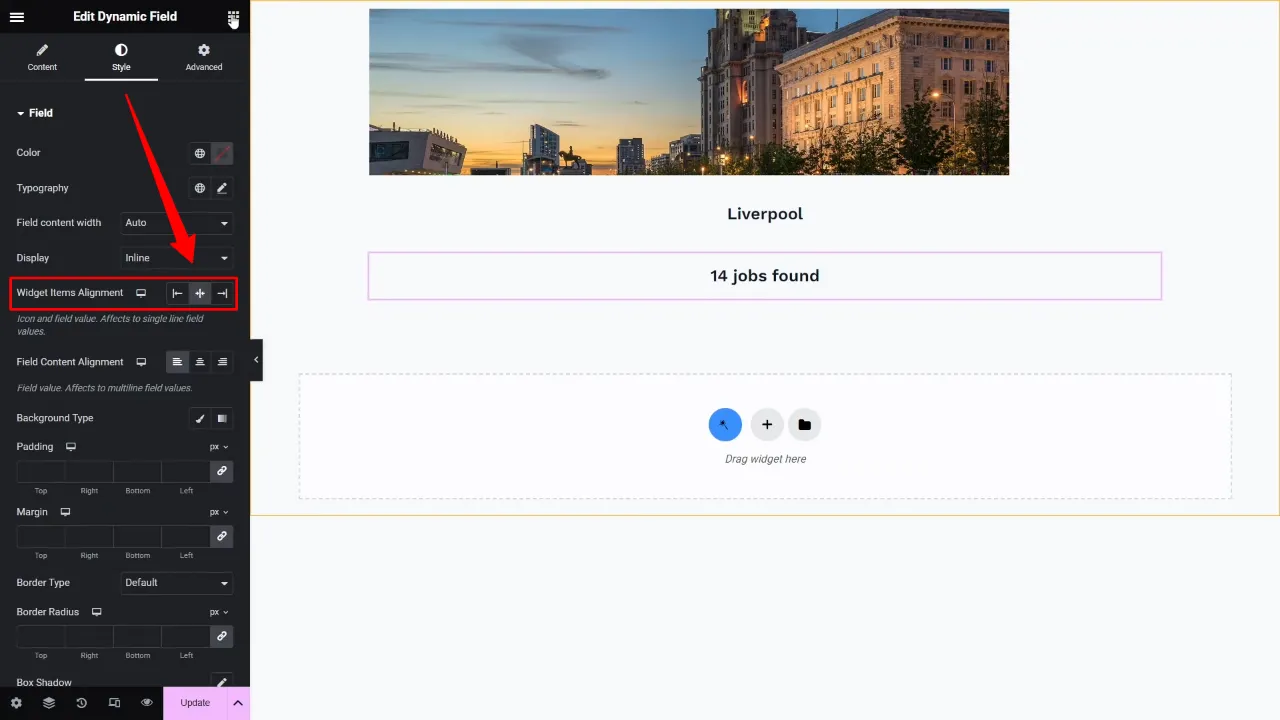
- dd a dynamic field widget, change the object field to “Term name” and adjust the HTML tag to “H4”. Center align the text via the Style settings.

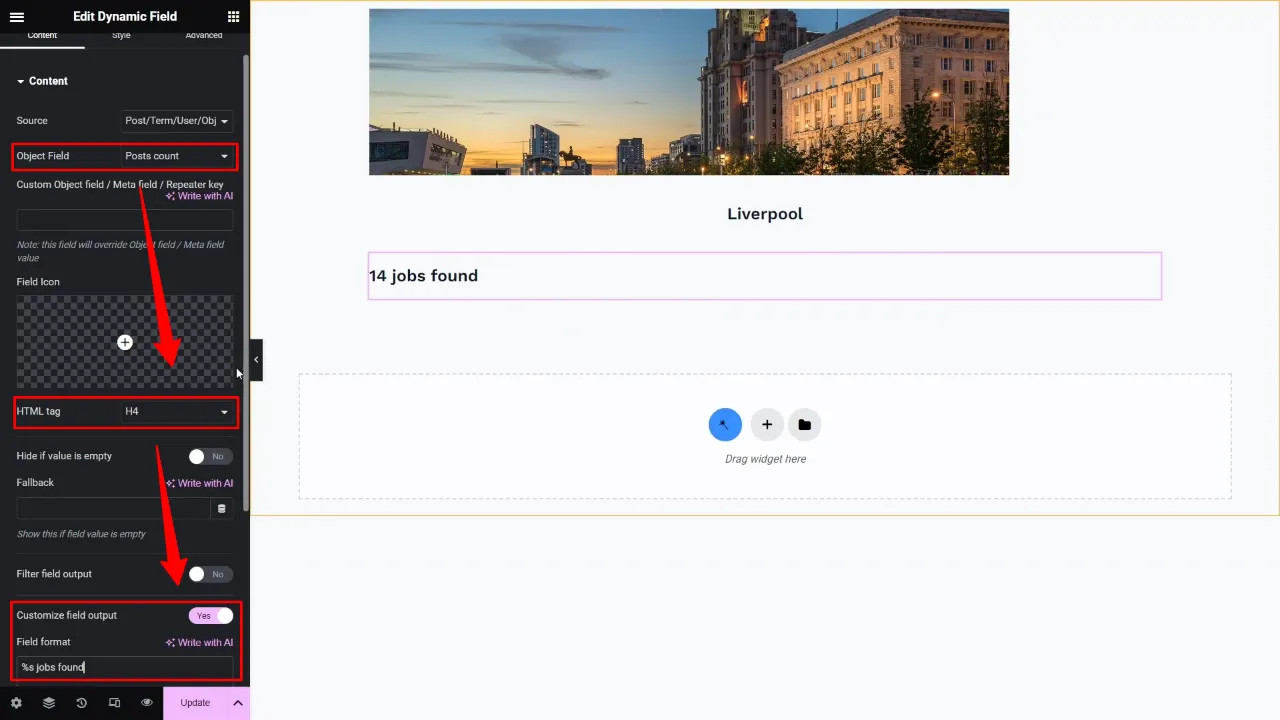
- Add another dynamic field widget, set the Object Field to ”Post count”, the HTML tag to “H4”, toggle the Customize field output, and add “%s jobs found”. Then center align it via the style tab.
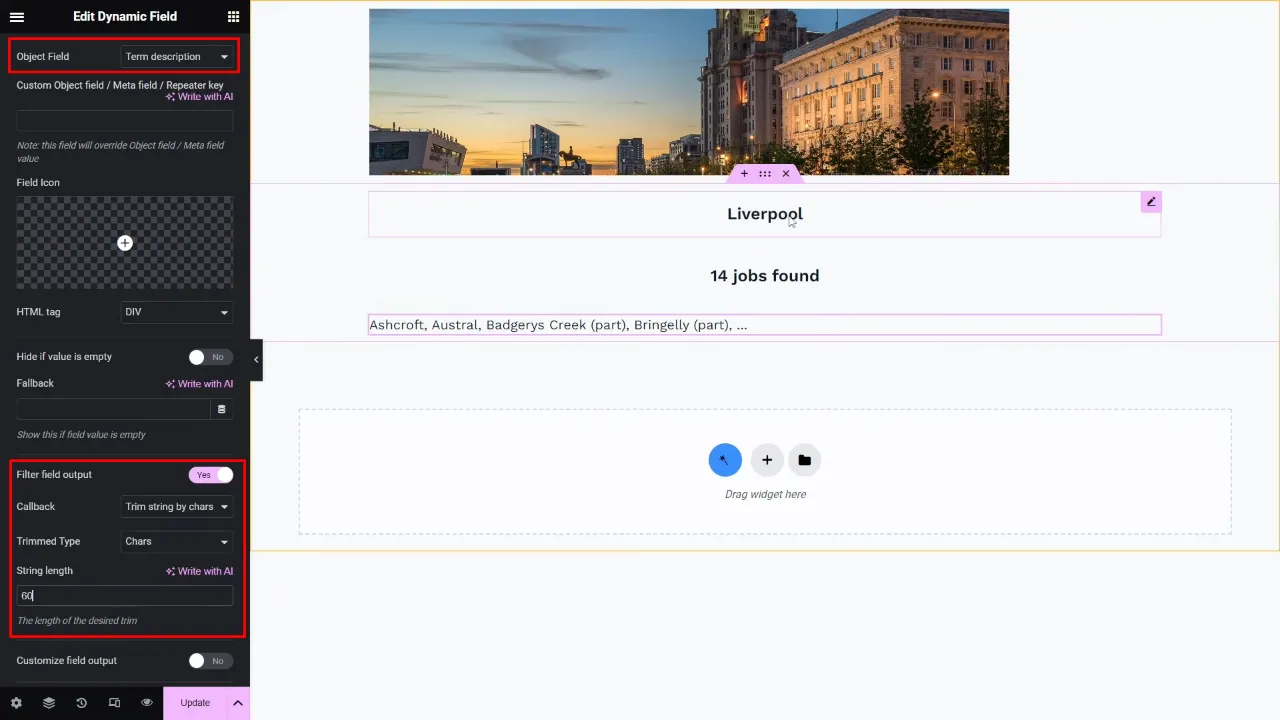
- Add the last dynamic field and select “Term description” as Source. Toggle the Filter field output, select “Trim string by chars” and define the string length, e.g. 60.
Tip: Style the widgets to your liking so that it fits your branding.
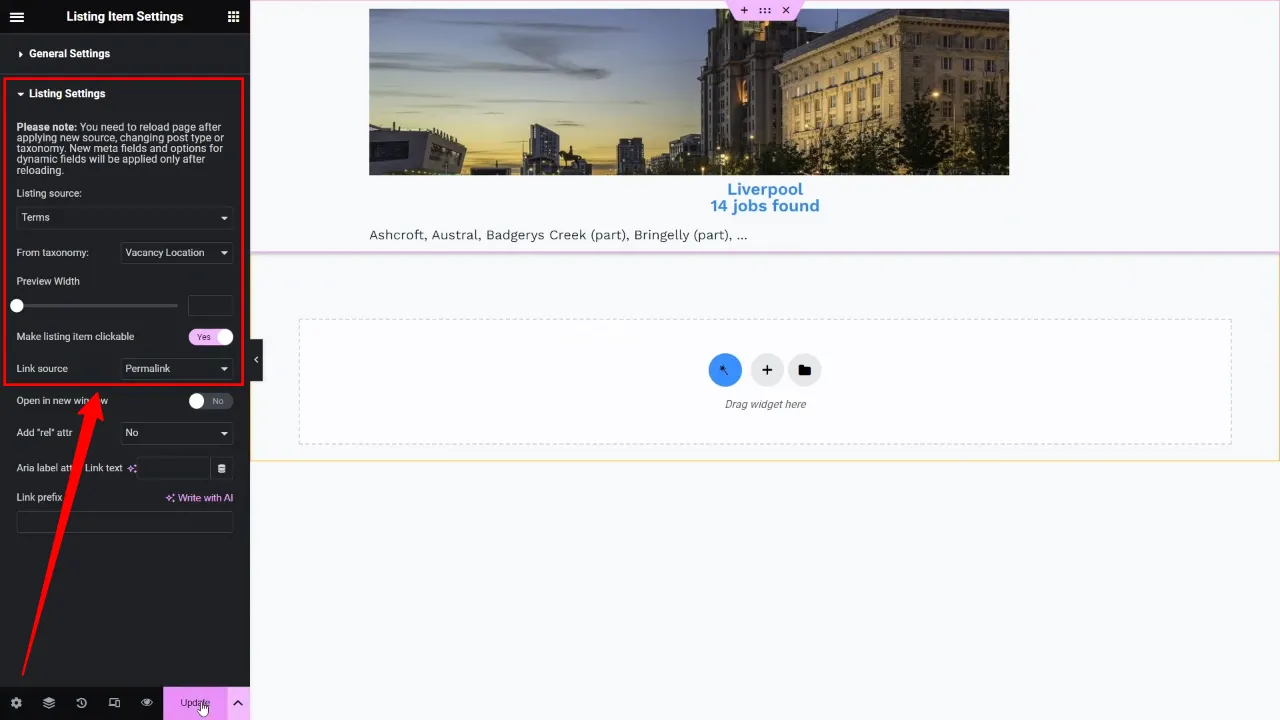
- Via Settings > Listing Settings toggle the “Make listing item clickable” and update your listing.
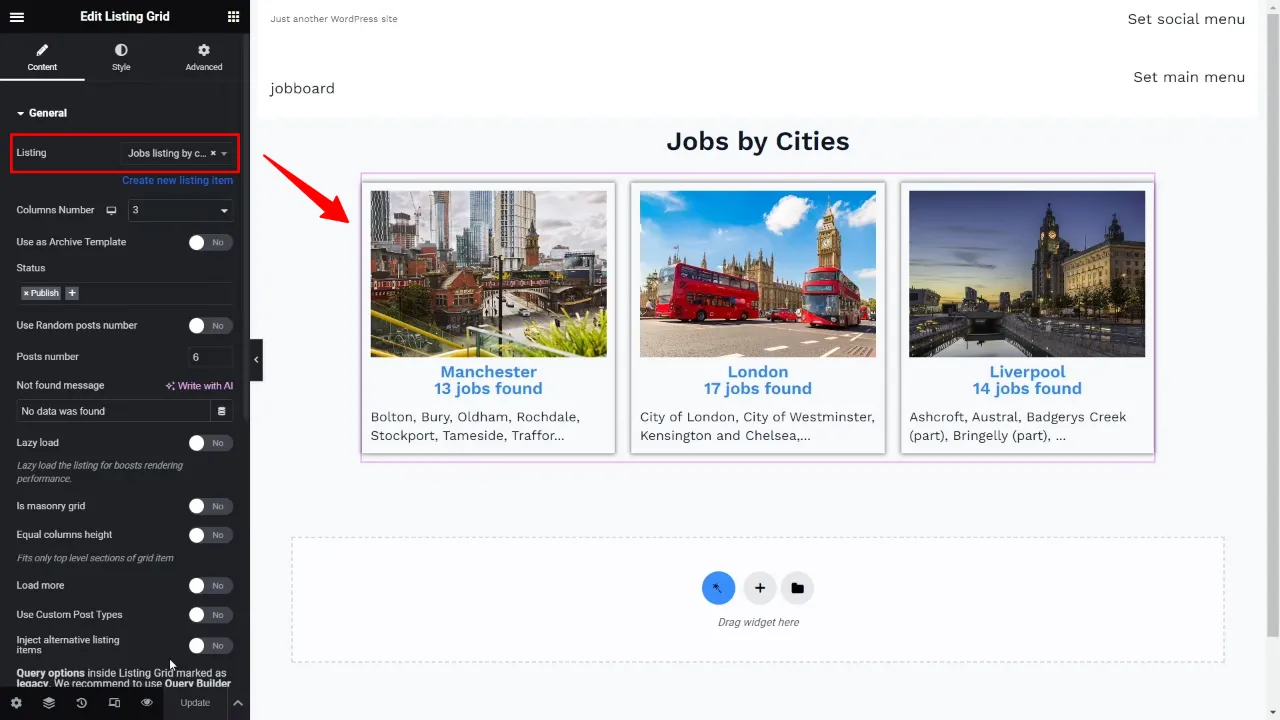
- Create a new page (WordPress Dashboard > Page > Add New > Edit with Elementor) where your listing will be displayed. Insert a JetEngine Listing Grid widget and configure it to use your newly created term listing. Save your changes.
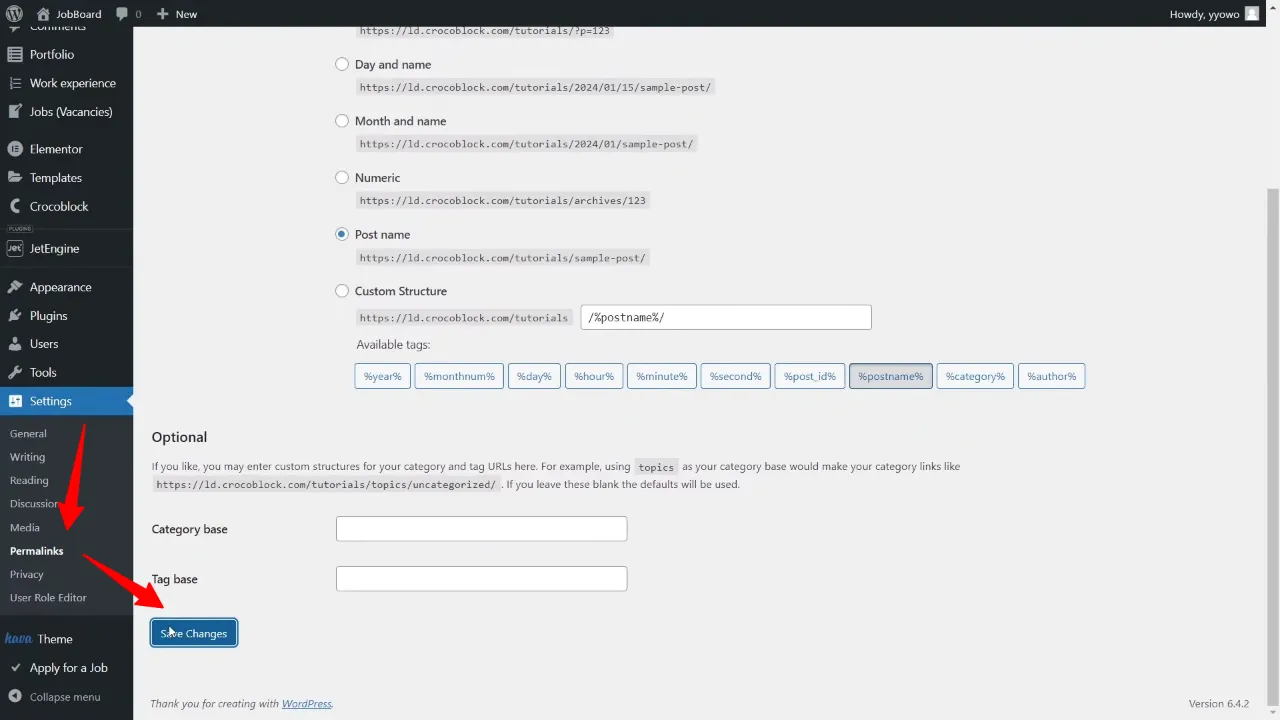
- Update permalinks via Settings > Permalinks > Save Changes.
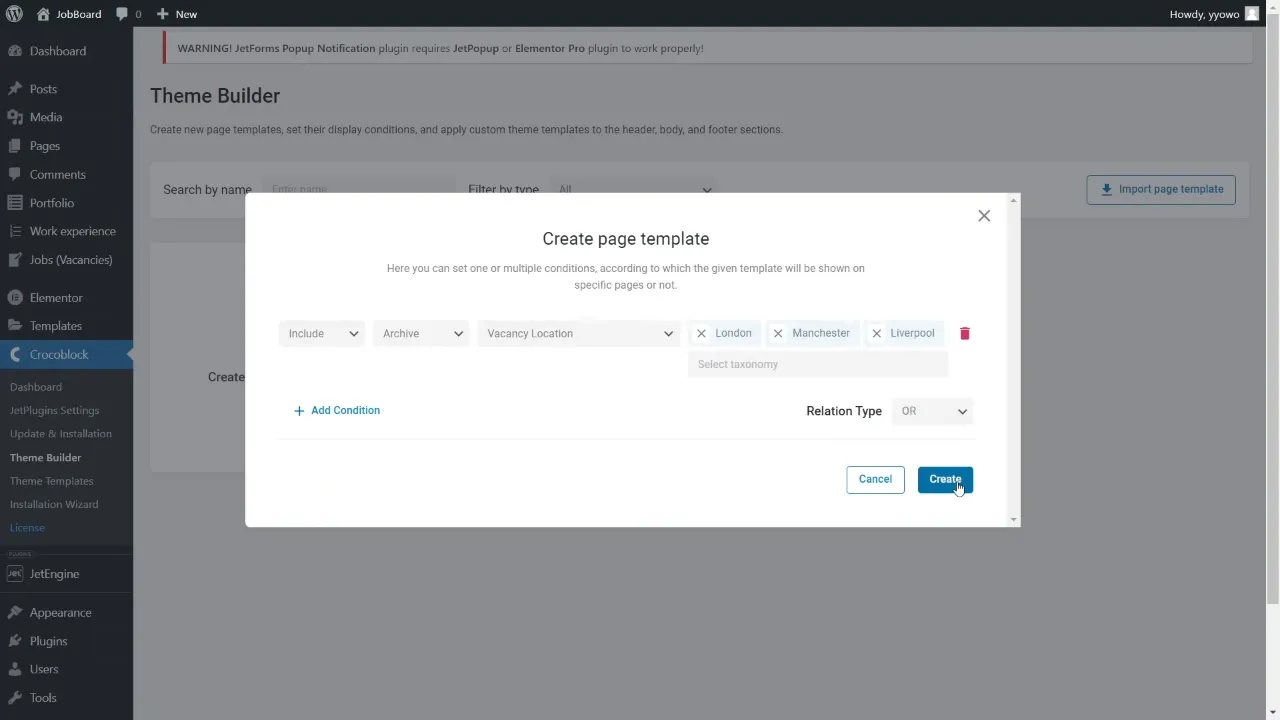
- Design an archive template for posts within each term by going to Crocoblock > Theme Builder > Create new page template. Set conditions for when this template will be applied to specific taxonomy terms.
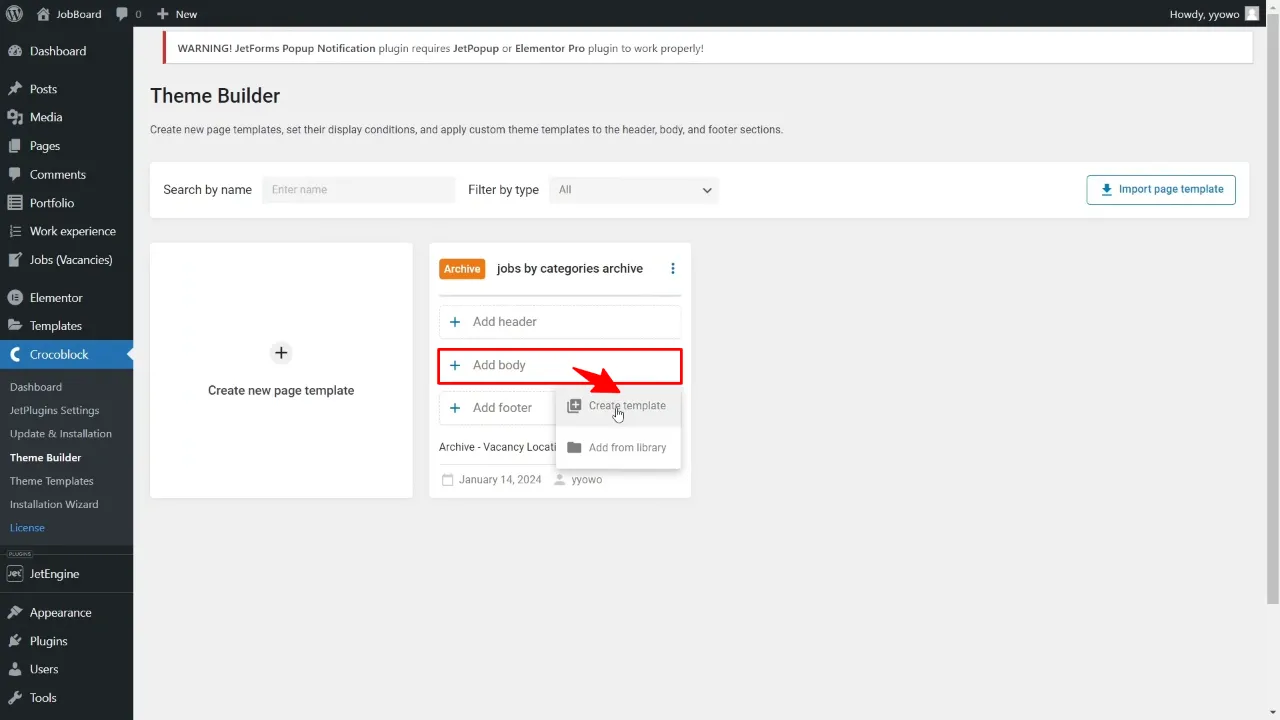
- After creation click on “Add body” > “Create template”.
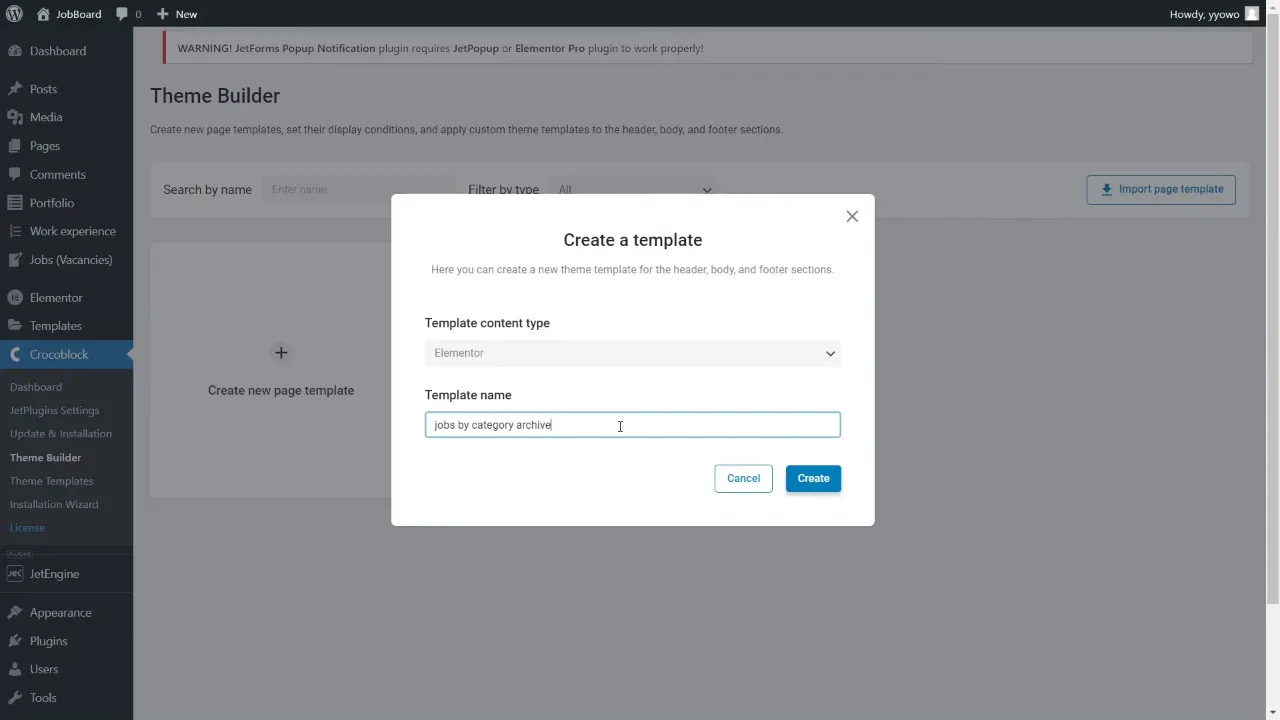
- Choose “Elementor” as the template content type, name the template, and click on create.
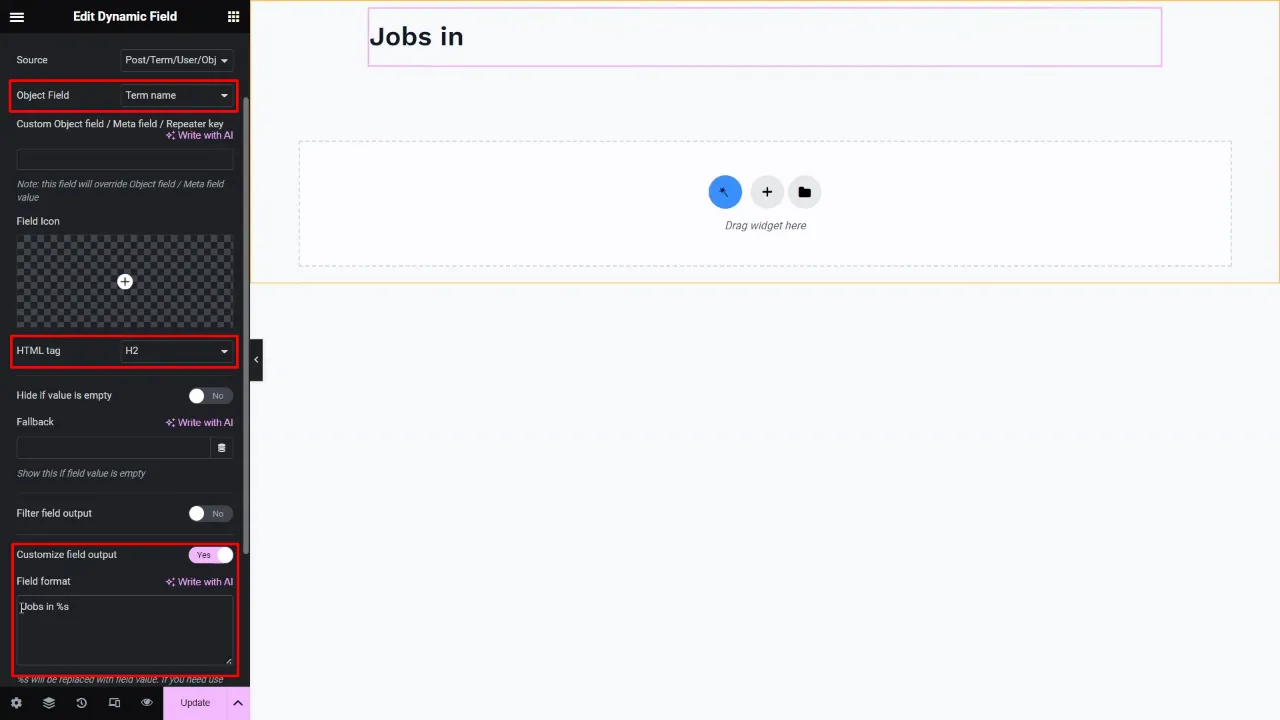
- Add a dynamic field widget for the title and select “Term name” as object field. Set the HTML tag to “H1”, toggle the customize field output and insert “jobs in %s”.
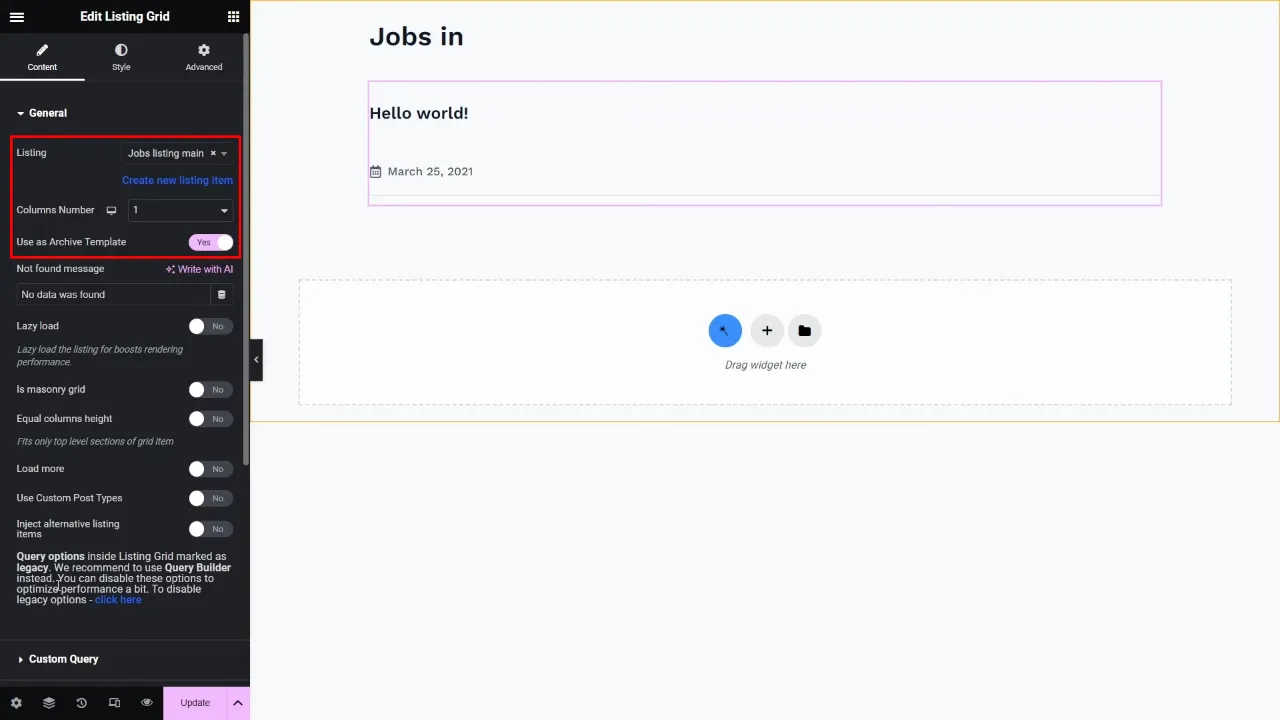
- Add the listing grid widget and choose your listing source, e.g. “Job listing by category”. Set the column number to 1 and toggle the use as archive template. Save your template.
Tip: You can preview the page by changing the preview settings (Settings > Preview Settings > Choose post type)
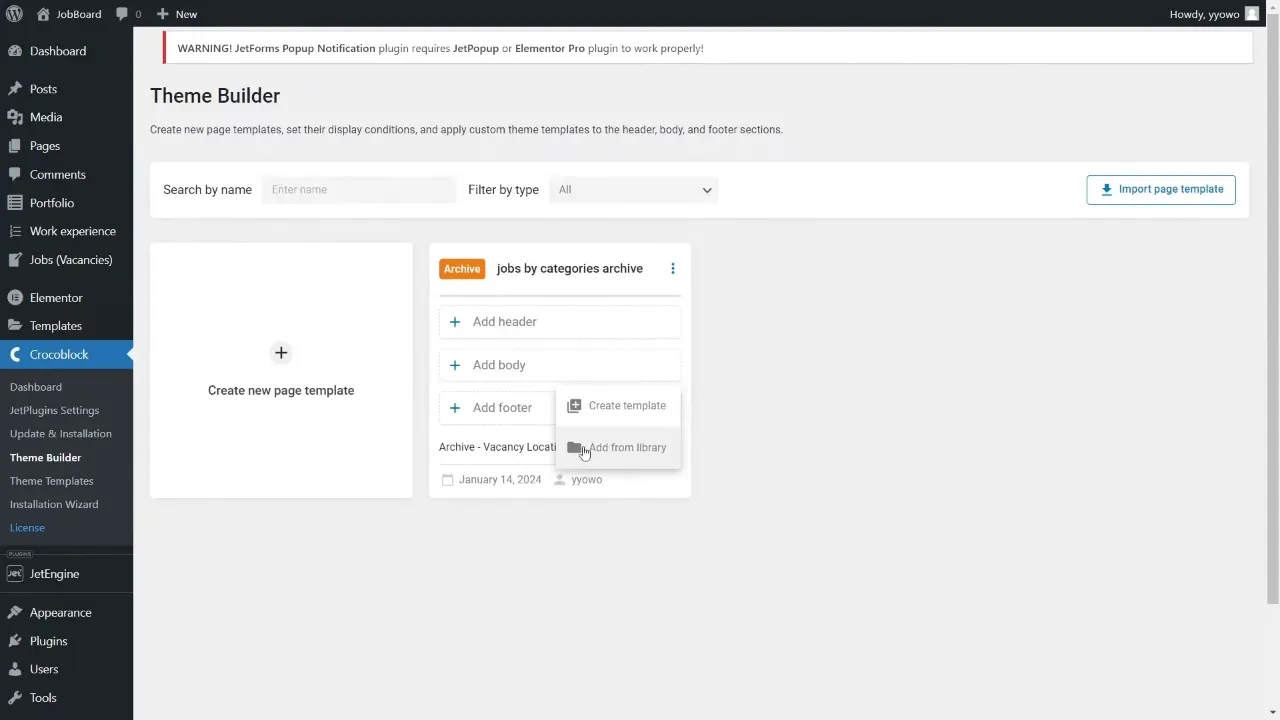
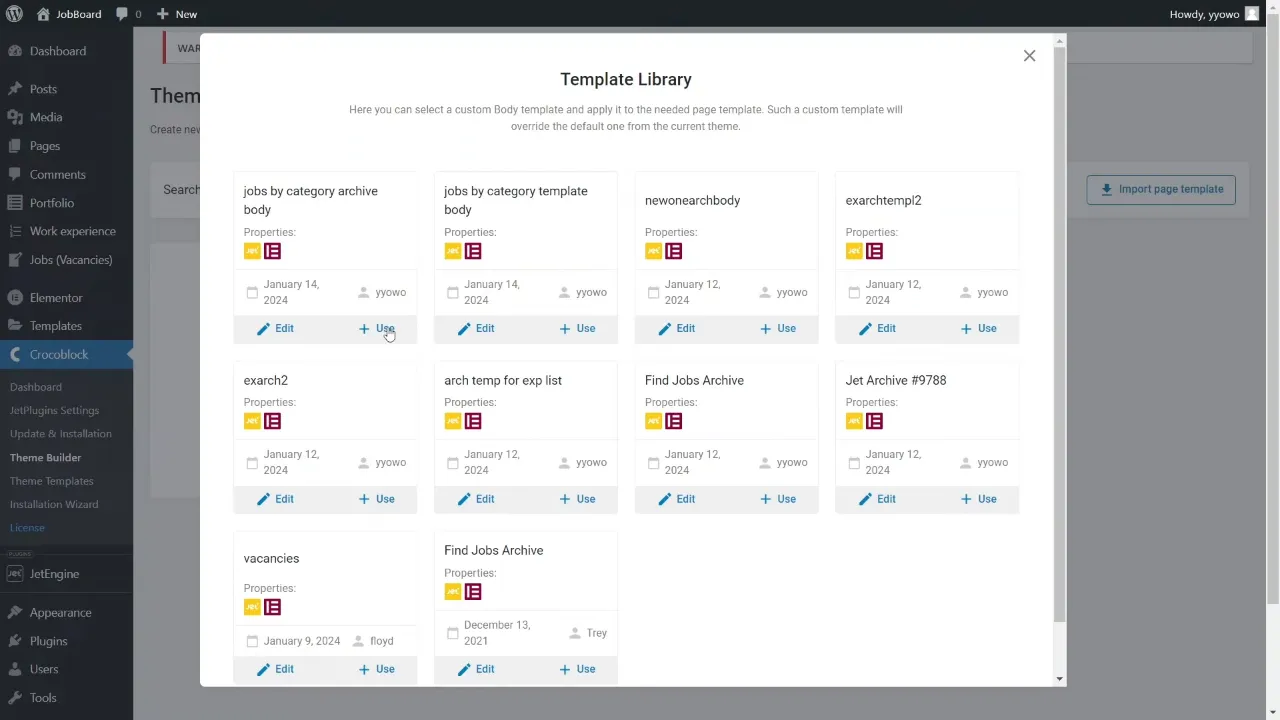
- Return to Crocoblock > Theme Builder and link your body template by selecting “Add from library”. Select the template you created and click on “Use”.
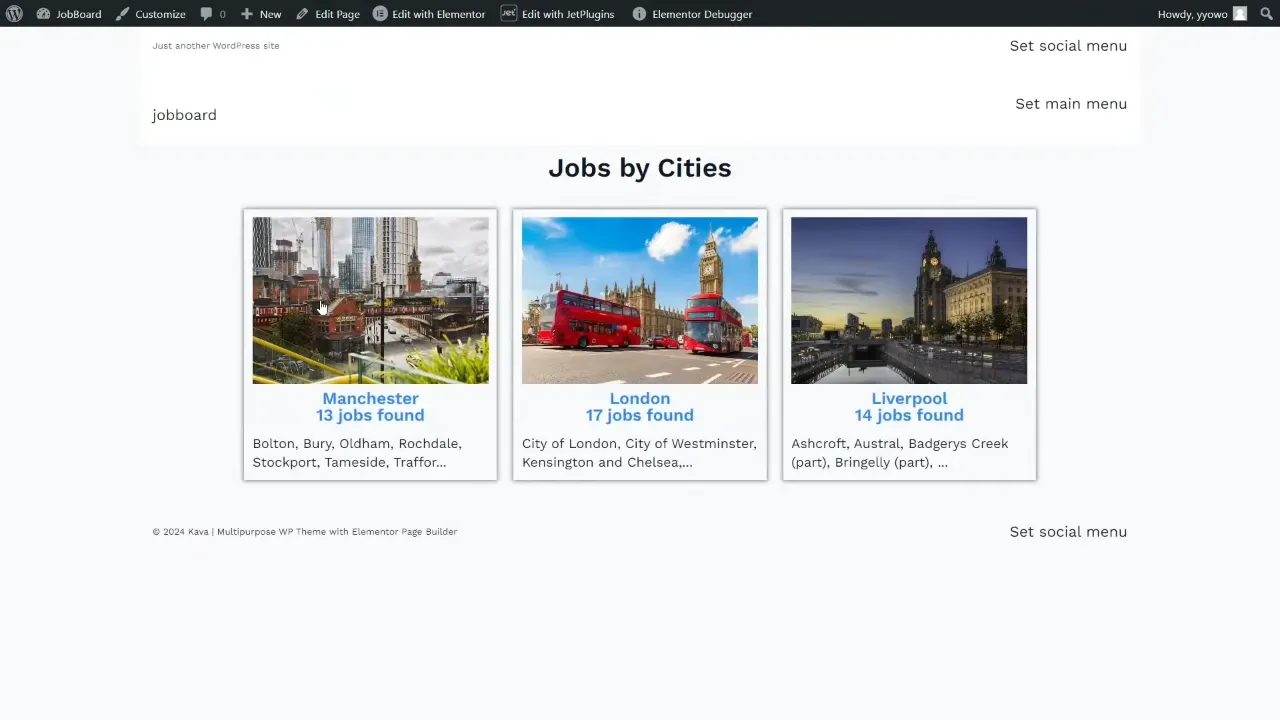
- Visit the page with the results and check if everything is working accordingly.
Official Documentation
Listing Template for Custom Taxonomy – Conclusion
By following these steps, you’ve created a dynamic listing template for custom taxonomy in Elementor, utilizing JetEngine and JetThemeCore. This setup not only improves your website’s organization but also enhances the user experience by providing a structured and visually appealing way to navigate through content. Remember, the flexibility of these tools allows for extensive customization, so feel free to experiment and tailor the listings and archive templates to perfectly match your site’s design and functionality needs.
