JetEngine Custom Post Type is a powerful feature of the JetEngine plugin by Crocoblock. This tutorial will walk you through the basics of setting up and using custom post types with JetEngine.
Prerequisites
Please make sure you have the following installed and activated:
Introduction to JetEngine
JetEngine is a plugin that extends the functionality of WordPress and Elementor by allowing you to create custom post types, custom fields, and more. It’s a one-stop solution for many features that you’d otherwise need multiple plugins for.
Setting Up JetEngine Modules
- Navigate to
JetEngine > JetEngine. - Select the modules you want to use. For this tutorial, we’ll focus on
Grid Gallery for Dynamic Field widgetandForms (Legacy).

Tip: If you’re unsure about a module, each has a helpful video and description to guide you.
Creating Your First Custom Post Type
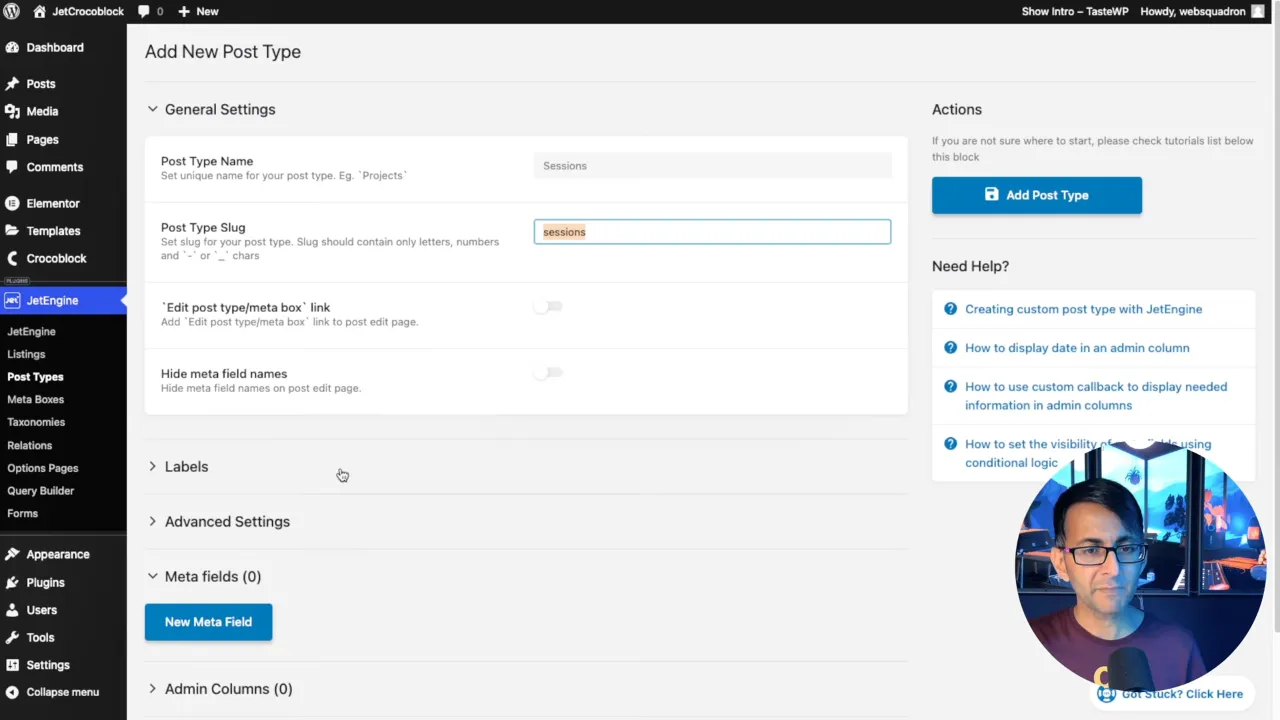
- Navigate to
JetEngine > Post Types. - Click
Add New. - Name the Post Type “Sessions” in the name field. This will automatically create a slug.
- Skip the labels section unless you have specific naming requirements.

Note: Changing labels like “Add New Item” to “Add New Session” is optional and often unnecessary.
Advanced Settings
Menu Icon
Enable Features
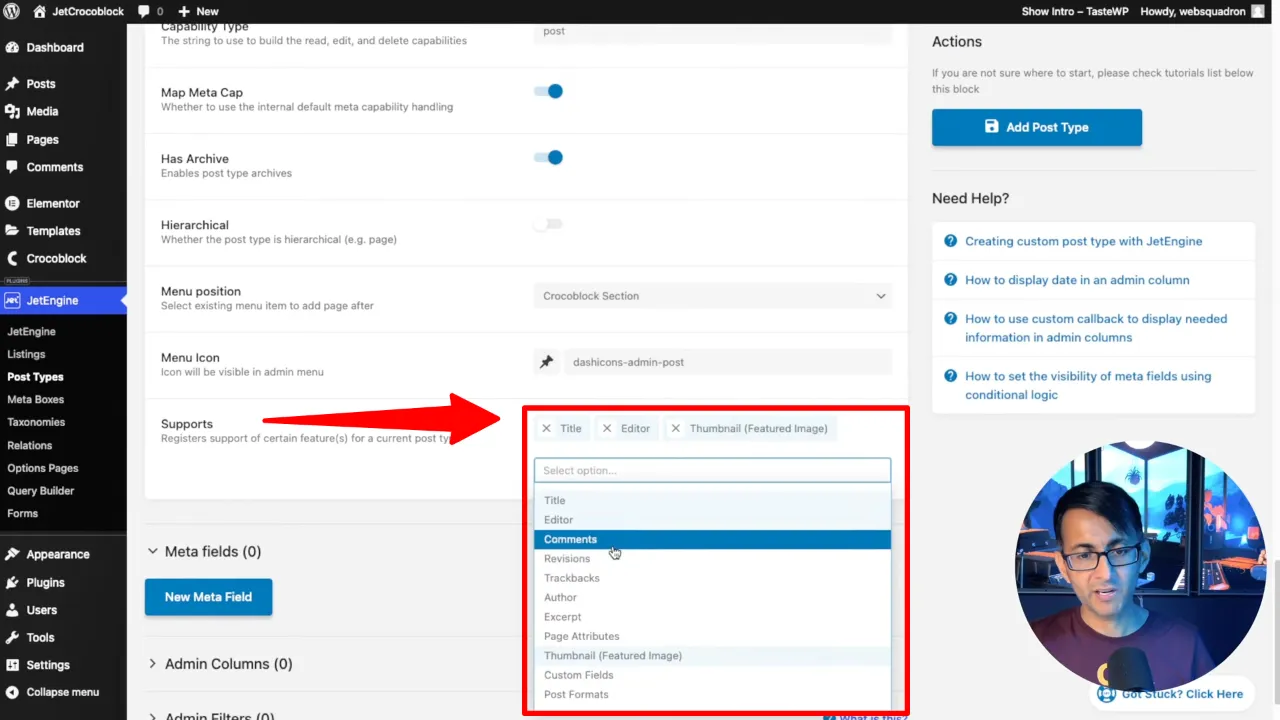
- Select the features you want to enable for your custom post type. For example,
TitleandFeatured Image.

Insight: By default, only
TitleandEditorare enabled. You can add more likeFeatured Image,Comments, etc., based on your needs.
JetEngine Custom Post Type – Conclusion
Creating custom post types with JetEngine is a straightforward process that offers a lot of flexibility. This tutorial covered the basics, and future tutorials will explore more advanced features like custom fields and glossaries.


