JetEngine Custom Fields are a cornerstone for adding customized functionality to your WordPress website. This tutorial will guide you through the intricacies of setting up and utilizing these fields, based on an in-depth video tutorial.
Prerequisites
Ensure you have the following installed and activated:
Planning Your Fields
Before you start adding fields, it’s crucial to plan what kind of information you want to capture. This will help you choose the appropriate field types.
- Decide on the type of custom fields you need. For instance, if you’re setting up a fitness class listing, you might need fields for class type, trainer, and level.
- Choose the field types that suit your needs. JetEngine offers a variety of types like text, select box, checkbox, etc.
Setting Up Basic Fields
Text Field for Session Description
The class description provides essential information about what the class entails.
- Navigate to
JetEngine > Custom Fieldsand click onAdd New. - Enter “Sessions” as title.
- Click on
New meta field. - Enter “Description” as label and “description” as name/id.
- Select “Field” as object type.
- Select “Text” as the field type.
- Set the width to 100% to utilize the full space.
- Mark it as required to ensure that this crucial information is not skipped.

Occurrence Meta Field
This field captures when the class occurs, such as “Every Monday and Wednesday,” allowing attendees to plan their schedules.
- Click on
New Meta Field. - Enter “Occurrence” in the field name.
- Select “Text” as the field type.
- Set the width to 50%.

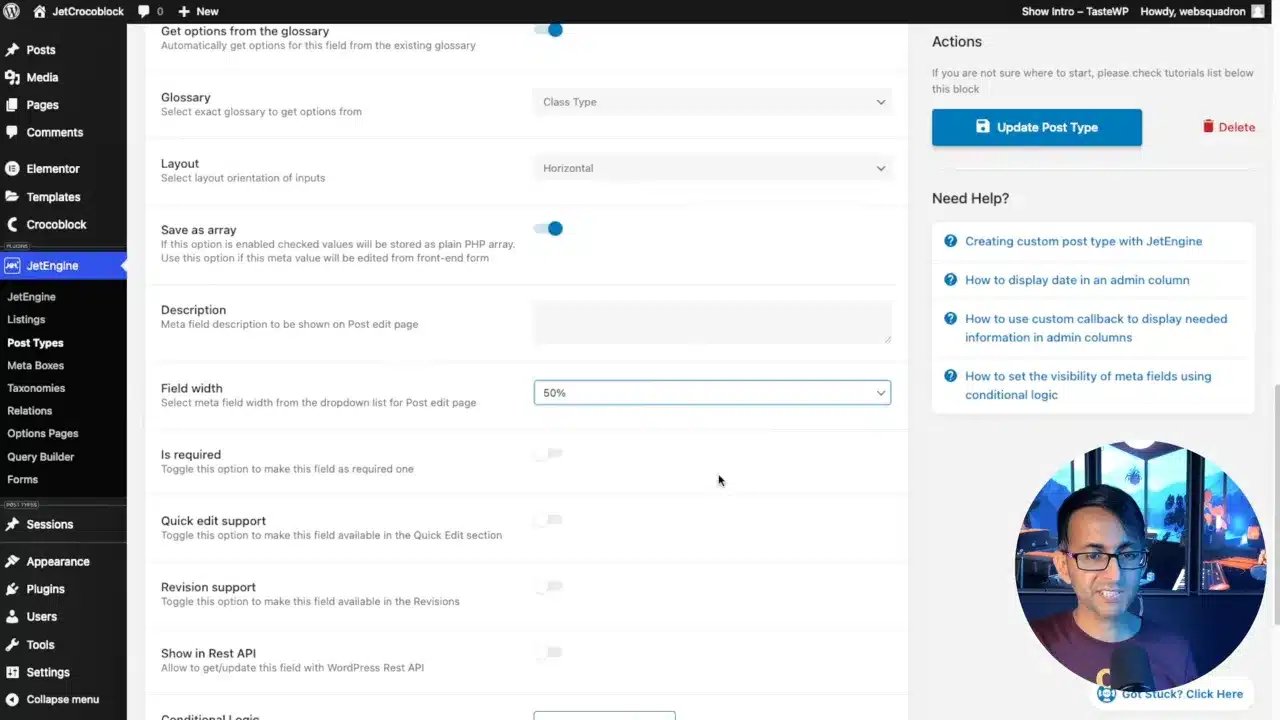
Checkbox for Class Type
Class types help categorize your classes, making it easier for users to find what they’re looking for.
- Click on
New Meta Field. - Enter “Type” as label and name/id.
- Select “Field” as the object type.
- Select “Checkbox” as the field type.
- Add options like “Aerobics,” “Cardio”, “Spin Cycling”, and “Weight Training” manually or select your previously created glossary.
- Toggle the “Save as array” option on.
- Set the width to 50% to align it well with other fields.
- Mark it as required to make sure each class is categorized.
Trainer Meta Field
This field specifies who the trainer for the class is, a crucial detail for many attendees.
- Click on
New Meta Field. - Enter “Trainer” in the field name.
- Select “Select Box” as the field type.
- Set the width to 50%.
- Mark it as required.

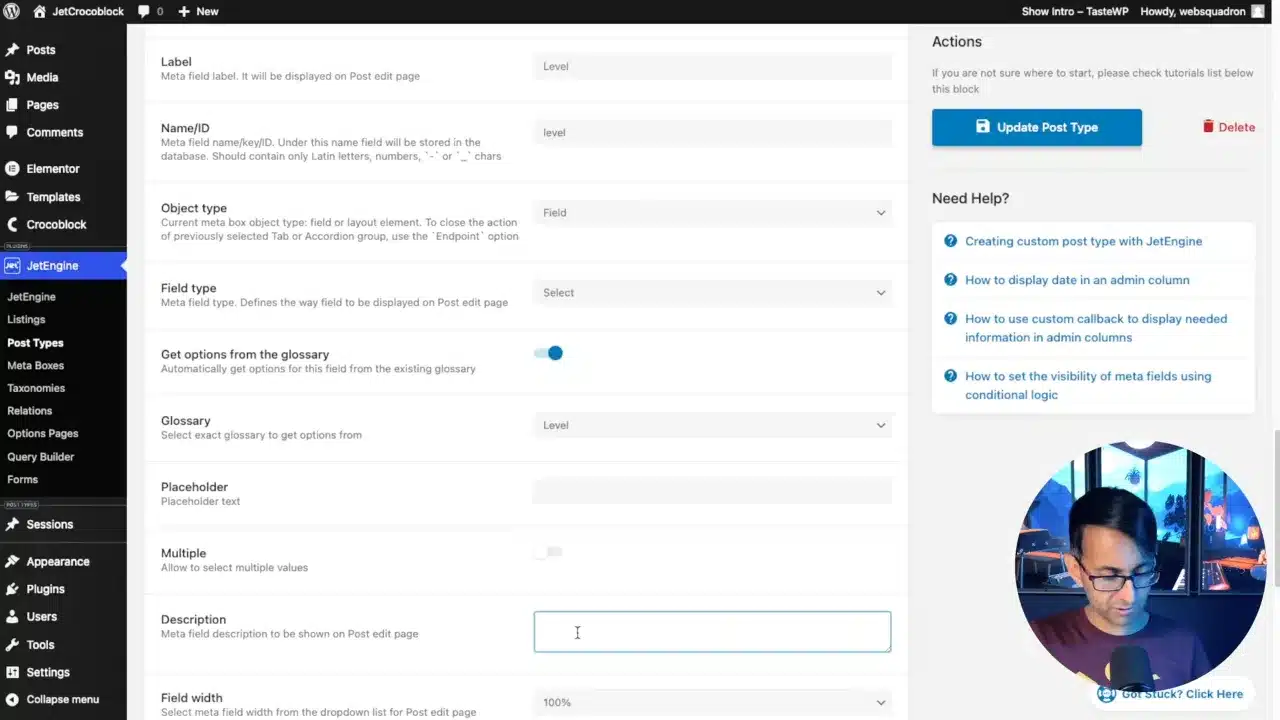
Level Meta Field
This field indicates the difficulty level of the class, helping attendees choose a class that suits their skill level.
- Click on
New Meta Field. - Enter “Level” in the field name.
- Select “Radio” as the field type.
- Add options like “Beginner,” “Intermediate,” and “Advanced.”
- Set the width to 50%.
Session Type Meta Field
This field indicates whether the class is a group session or a one-on-one session, allowing attendees to choose based on their preference.
- Click on
New Meta Field. - Enter “Session Type” in the field name.
- Select “Checkbox” as the field type.
- Add options like “Group” and “One-on-One” or connect a glossary.
- Toggle the “Save as array” option on.
- Set the width to 50%.

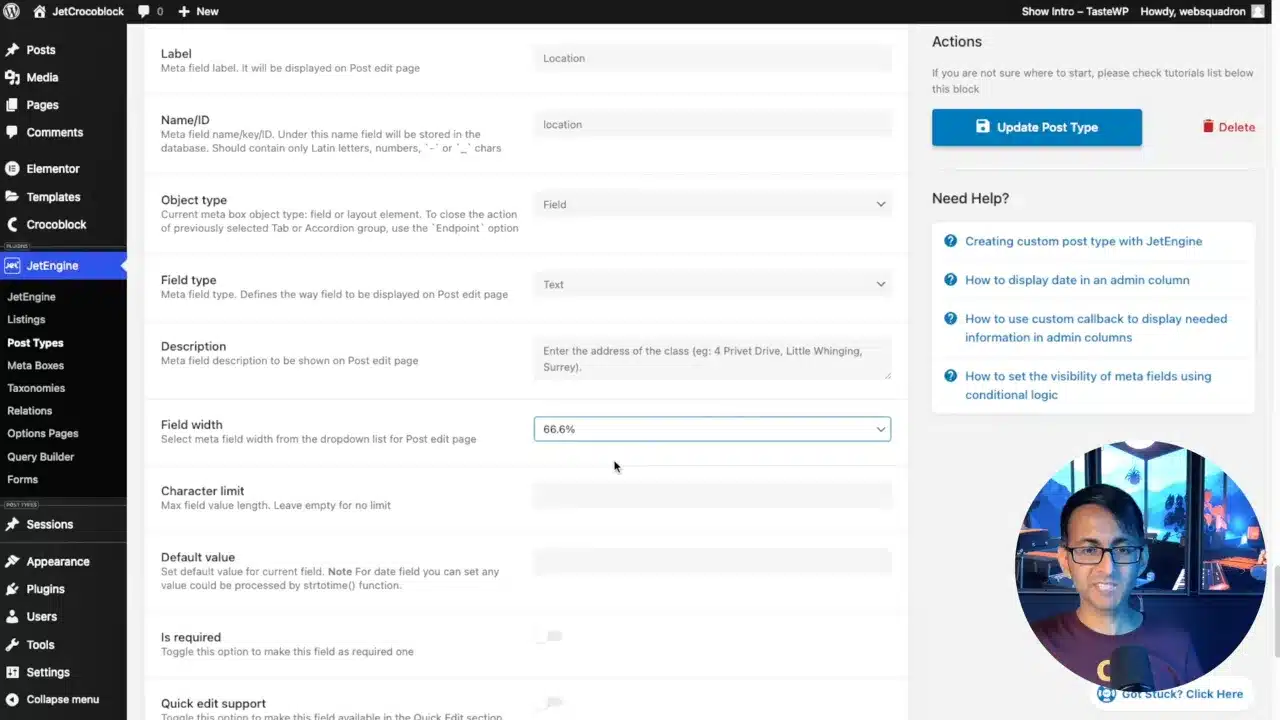
Location Meta Field
This field specifies where the class will take place, an important detail for logistical planning.
- Click on
New Meta Field. - Enter “Location” in the field name.
- Select “Text” as the field type.
- Set the width to 66%.
Cost Meta Field
This field specifies the cost of attending the class, a critical factor for many when choosing a class.
- Click on
New Meta Field. - Enter “Cost” in the field name.
- Select “Number” as the field type.
- Set the width to 50%.
- Mark it as required.

Image Meta Field
This field allows you to add an image for the trainer.
- Click on
New Meta Field. - Enter “Trainer Image” in the field name.
- Select “Image” as the field type.
- Set the width to 100%.
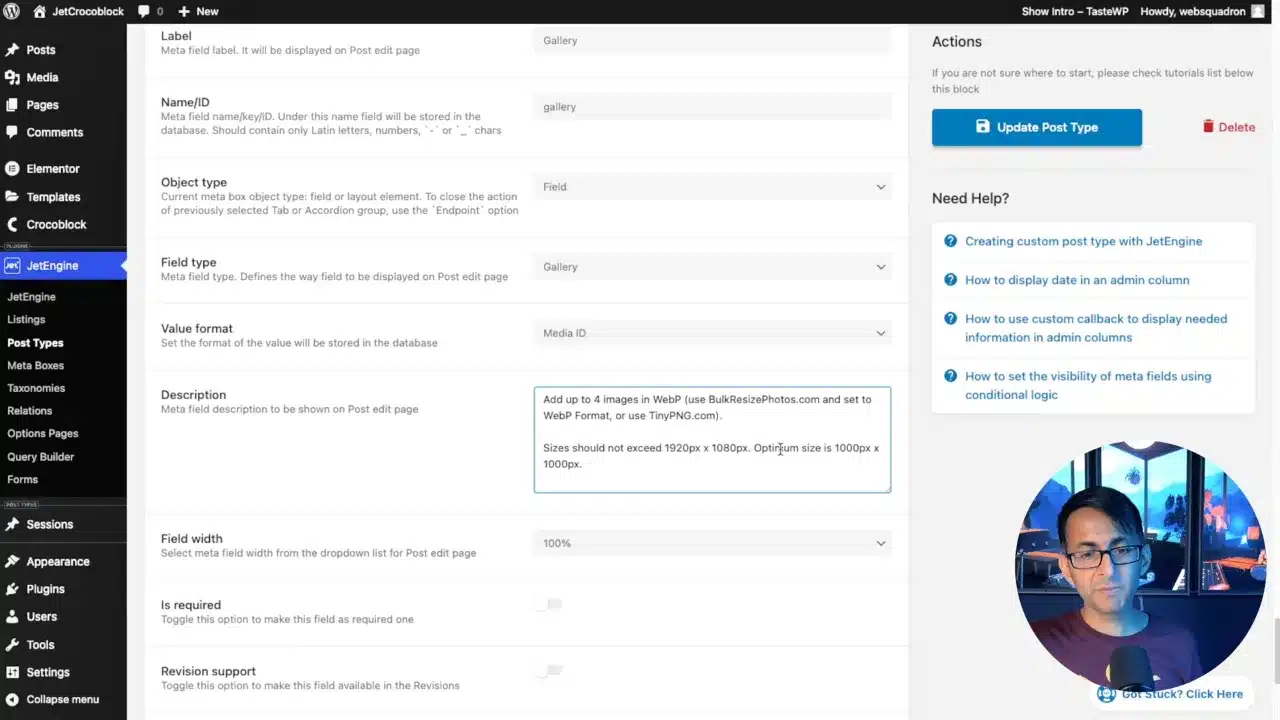
Gallery Meta Field
This field allows you to add multiple images related to the class, offering a visual overview to potential attendees.
- Click on
New Meta Field. - Enter “Gallery” in the field name.
- Select “Gallery” as the field type.
- Set the width to 100%.
Advanced Field Settings
Using Glossaries
Glossaries help maintain consistency in the terms used across various fields.
- Create a glossary for class types.
- Navigate to the “Type” field.
- Choose the glossary you created in the options to maintain uniformity.
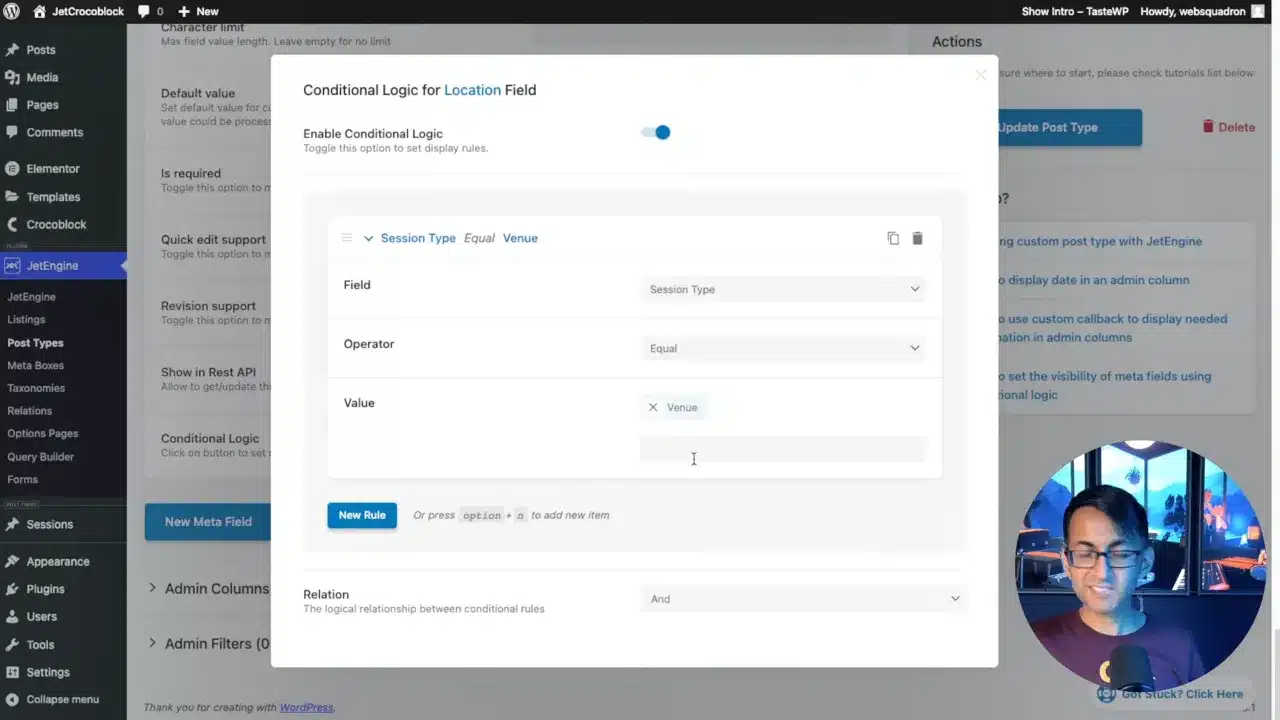
Conditional Logic
Conditional logic helps display fields only when they are relevant, improving user experience.
- Navigate to a new field named “Location.”
- Enable conditional logic.
- Set the rule to show this field only if the “Session Type” is equal to “Venue.”
Admin Columns
Admin columns help you quickly identify essential details about each custom post type entry right from the WordPress dashboard. This is particularly useful for content management and quick edits.
Adding Trainer Column
This column will help you quickly identify which trainer is associated with each class, making management easier.
- Navigate to
JetEngine > Post Types > Sessions. - Scroll down to “Admin Columns.”
- Click on
Add Newto add a new column. - Name it “Trainer.”
- Select “Meta Value” as the type.
- Enter the meta field name for the trainer.
- Set the order to 3, so it appears as the third column.
- Toggle the “Is Sortable” option to on.

Adding Image Column
This column will display the featured image of each class, giving you a visual cue and making navigation simpler.
- Click on
Add Newto add another column. - Name it “Image.”
- Select “Custom Callback” as the type.
- Choose “Thumbnail” from the existing callbacks.
- You can also replace the “thumbnail” part with your own image id (e.g. trainer_image).
- Set the order to 1, so it appears as the first column.

Final Touches
Reordering Admin Columns
- Adjust the order numbers for each column if needed.
- Save your changes.
This ensures that your admin columns are displayed in the most logical and useful order.
JetEngine Custom Fields – Conclusion
Congratulations, you’ve successfully set up JetEngine Custom Fields for your WordPress website. These custom fields and admin columns not only make your backend more user-friendly but also allow you to create more dynamic and functional websites. Understanding the ‘why’ behind each step can make the process more intuitive and your setup more effective.

