Adding Elementor inline dynamic text using ACF or JetEngine is a game-changer for WordPress designers. This technique allows for the seamless integration of dynamic data within your content, enhancing user engagement and personalization. Let’s explore how you can implement this powerful feature in your projects.
Prerequisites
Please make sure you have the following installed and activated:
Additional Knowledge
Understanding the concept of dynamic content is key here. Dynamic content refers to parts of your website that change based on certain conditions, like user input, data changes, or integrations. ACF and JetEngine are powerful tools that allow you to create custom fields and data types in WordPress, which you can then display dynamically using Elementor.
Elementor Inline Dynamic Text Instructions
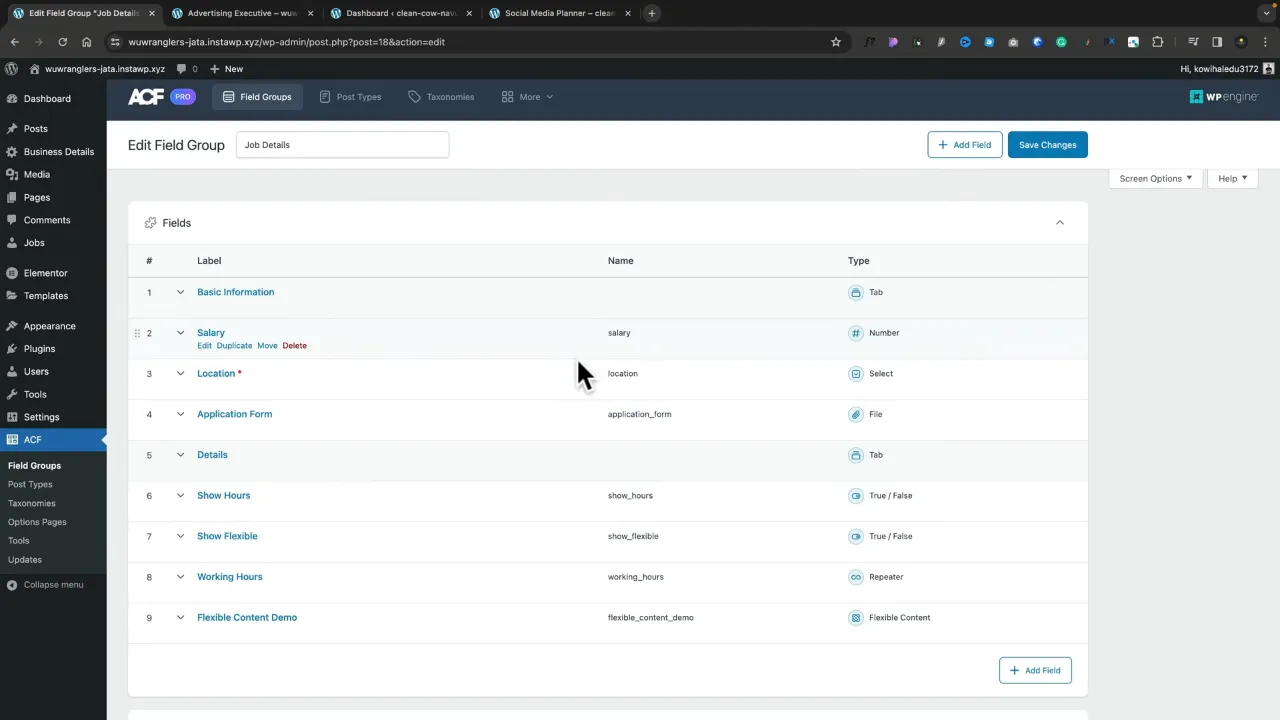
- Navigate to ACF > Field Groups and set up a field group, e.g. ‘Job Details’. Add fields such as ‘salary’ and ‘location’. Remember the field names for later use (the step is similar for JetEngine users).

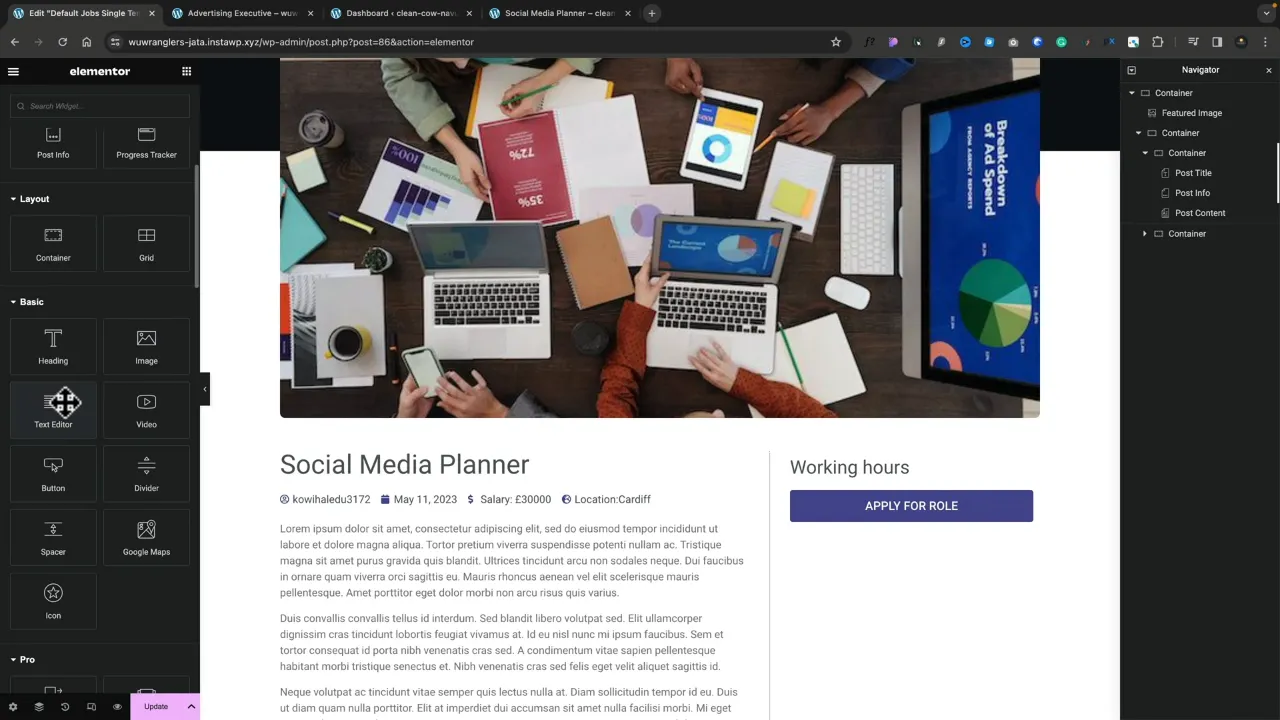
- Open your Elementor page where you want to incorporate the Elementor inline dynamic text.

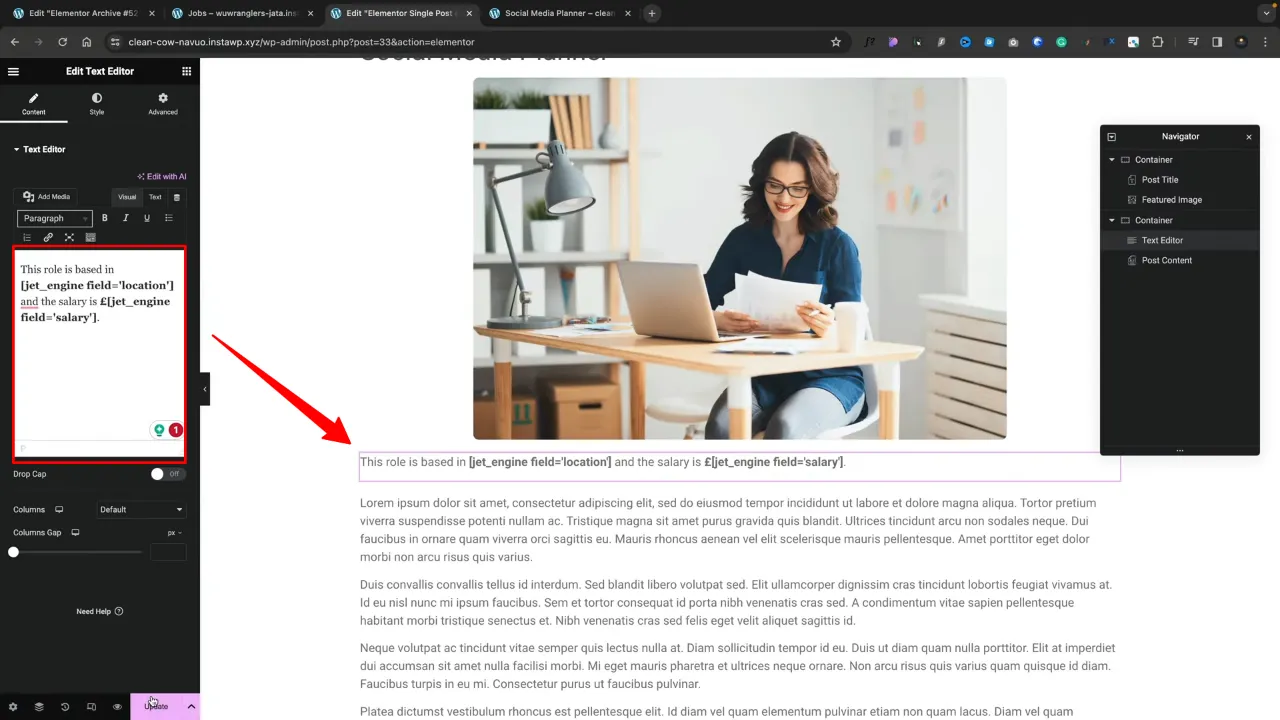
- Use a standard text editor widget and add dynamic content:
- Update and preview your changes to ensure that the dynamic data is correctly displayed.
Official Documentation
Elementor Inline Dynamic Text – Conclusion
Implementing inline dynamic text in Elementor using ACF or JetEngine expands your website’s functionality and user experience. By following these steps, you can enhance your WordPress sites with personalized, dynamic content.


