Creating an interactive and visually appealing website often involves adding unique elements that capture user attention. In this tutorial, we’ll explore how to create a captivating Elementor hover effect, specifically a glowing cursor effect when hovering over a card. This effect not only enhances the user experience but also adds a dynamic aesthetic to your Elementor-based website.
Prerequisites
Please make sure you have the following installed and activated:
The Utility of a Glowing Hover Effect
Incorporating a glowing hover effect into your website’s design can enhance user engagement and interaction. This visual cue is not just a stylistic choice; it serves practical purposes in guiding user navigation and emphasizing specific content. Let’s explore why this effect is beneficial, supported by real-life examples:
- Highlighting Key Elements
For instance, a portfolio website showcasing graphic design work can use the glowing effect to draw attention to the most impressive projects. When a user hovers over a project thumbnail, the glow can signal its importance or uniqueness. - Improving User Experience
Websites like e-commerce platforms can use this effect to enhance the shopping experience. When a customer hovers over a product image, the glow effect can indicate that the item is clickable, leading to more detailed information or a quick view feature. - Interactive Feedback
Educational websites, particularly those with interactive learning modules, can employ the glowing hover effect to indicate interactive elements like quizzes or clickable infographics. This subtle cue encourages students to engage more deeply with the content. - Visual Aesthetics
In the realm of creative websites, such as digital art portfolios or music artist pages, a glowing hover effect can align with the overall artistic theme, adding a dynamic and modern feel to the website. It can create an immersive experience, much like how an artist’s gallery might use lighting to enhance the presentation of artworks. - Navigation and Accessibility
For websites with dense information, like news portals or scholarly databases, the glowing hover effect can make navigation more intuitive. It can be used to distinguish between different sections or topics, aiding in finding relevant information more efficiently. - Promotional and Marketing Use
In marketing campaigns, particularly on landing pages, the glowing hover effect can be used to draw attention to special offers, call-to-action buttons, or new product announcements. This subtle enhancement can increase conversion rates by guiding users towards key actions.
Instructions for a Glowing Cursor Elementor Hover Effect
- Begin by launching the Elementor editor on the page where you want to add the hover effect.

- Drag a container widget into your layout and add spacing for better visibility by setting the padding to 2rem on all sides.

- Insert additional inner containers inside your main container. These will serve as your cards. Duplicate them to create multiple cards.

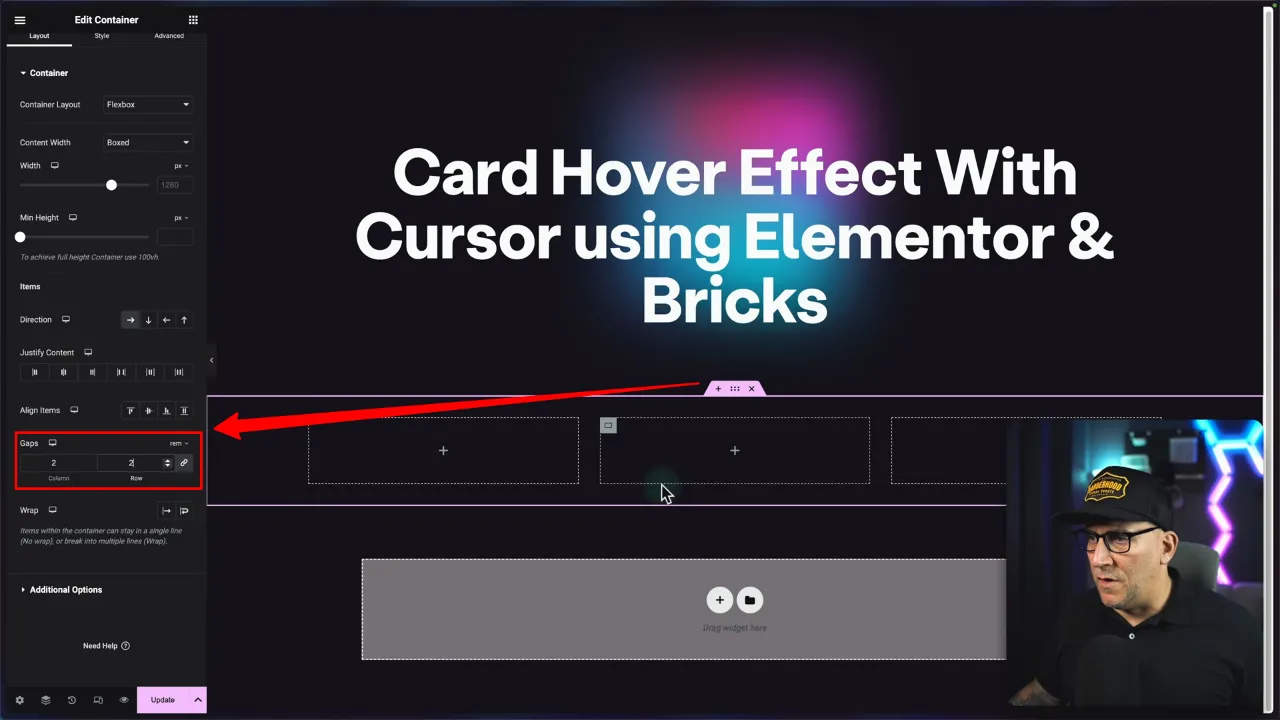
- Adjust the gaps in the layout settings of the outer container to create sufficient space between the cards.
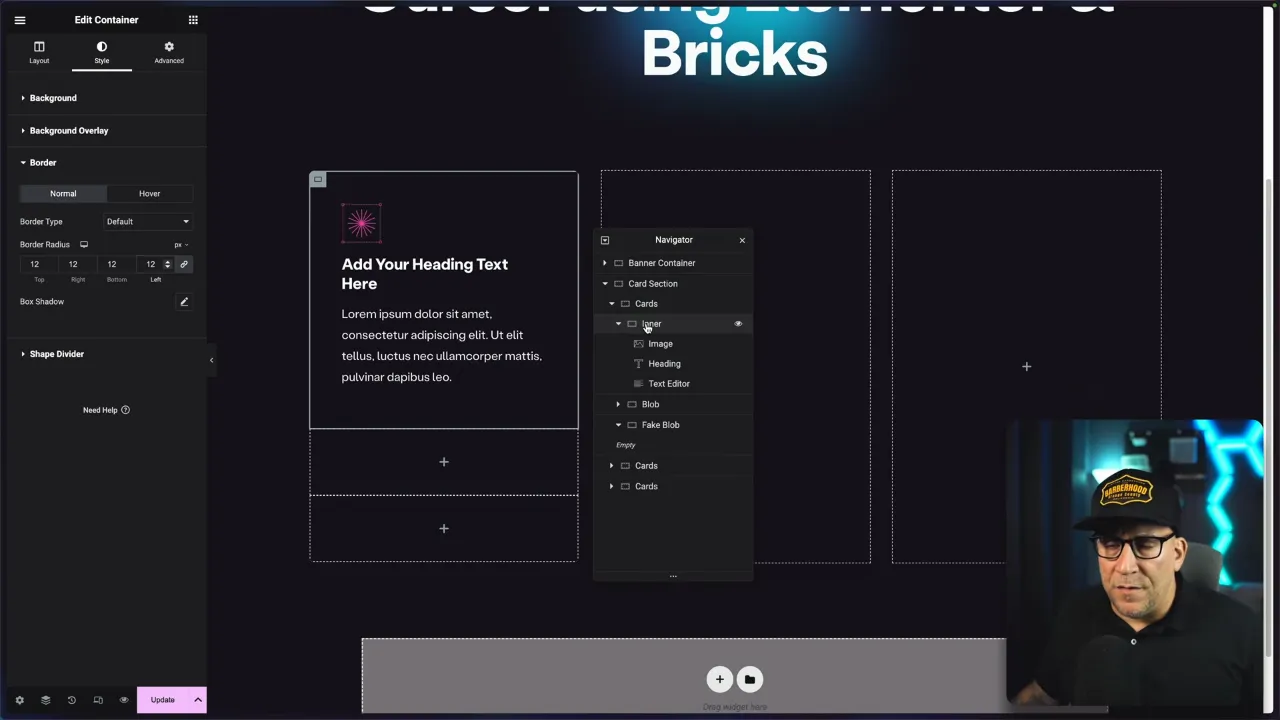
Tip: Elementor’s Navigator for easier management of your layout with multiple overlapping elements.
- Label each element like ‘card section’, ‘card’, etc., for easier identification and management.
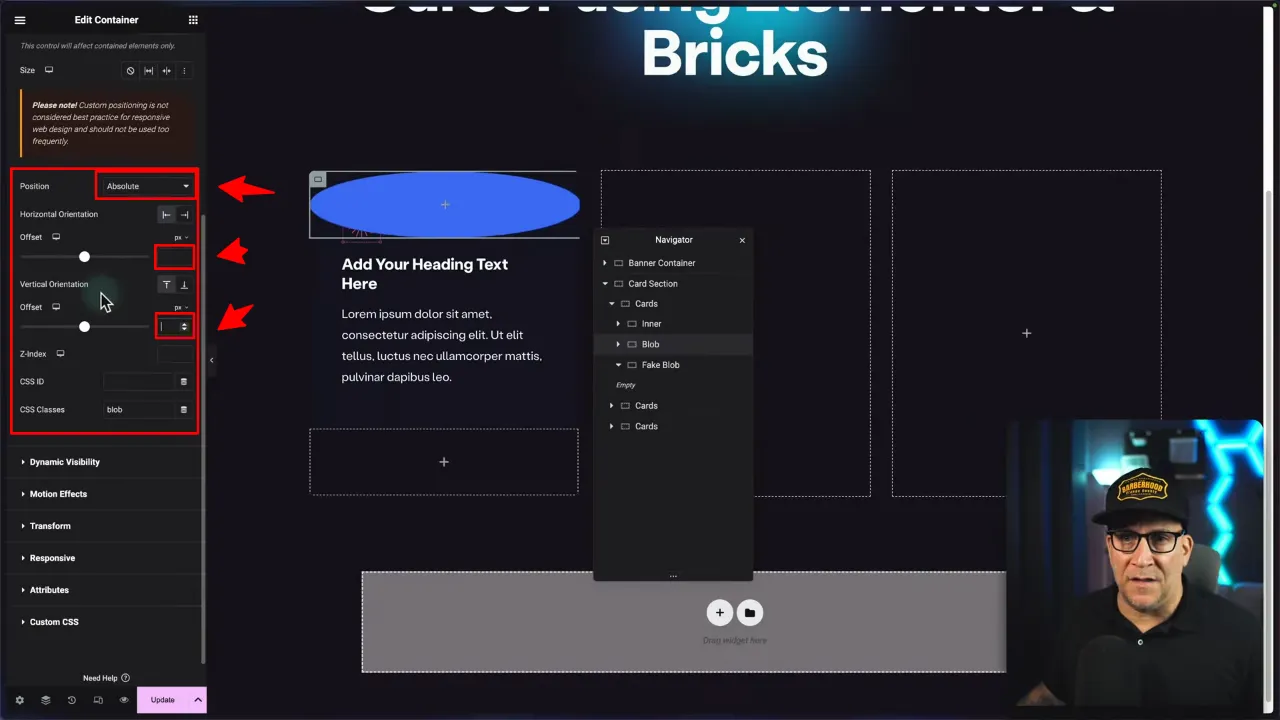
- Add CSS classes, set padding (which will later serve as the border size), and set the z-index via the Advanced settings.

- Set overflow properties to ‘hidden’ via Layout > Additional Options.

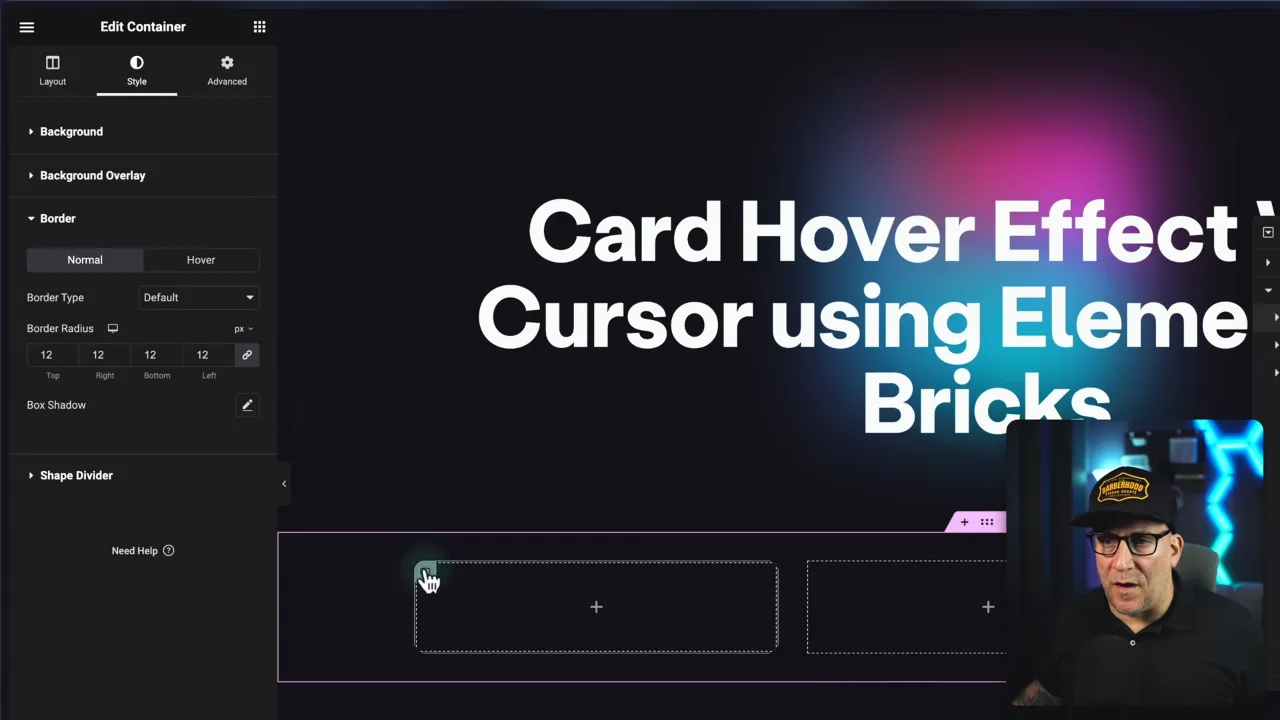
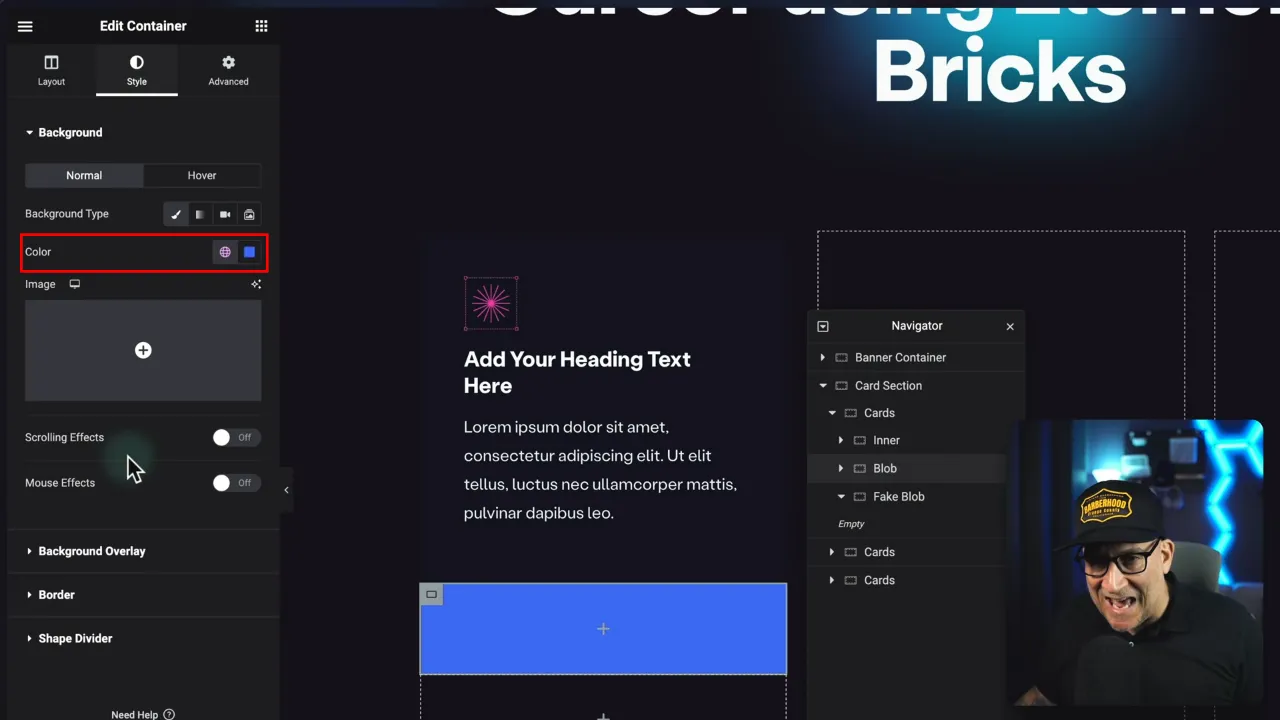
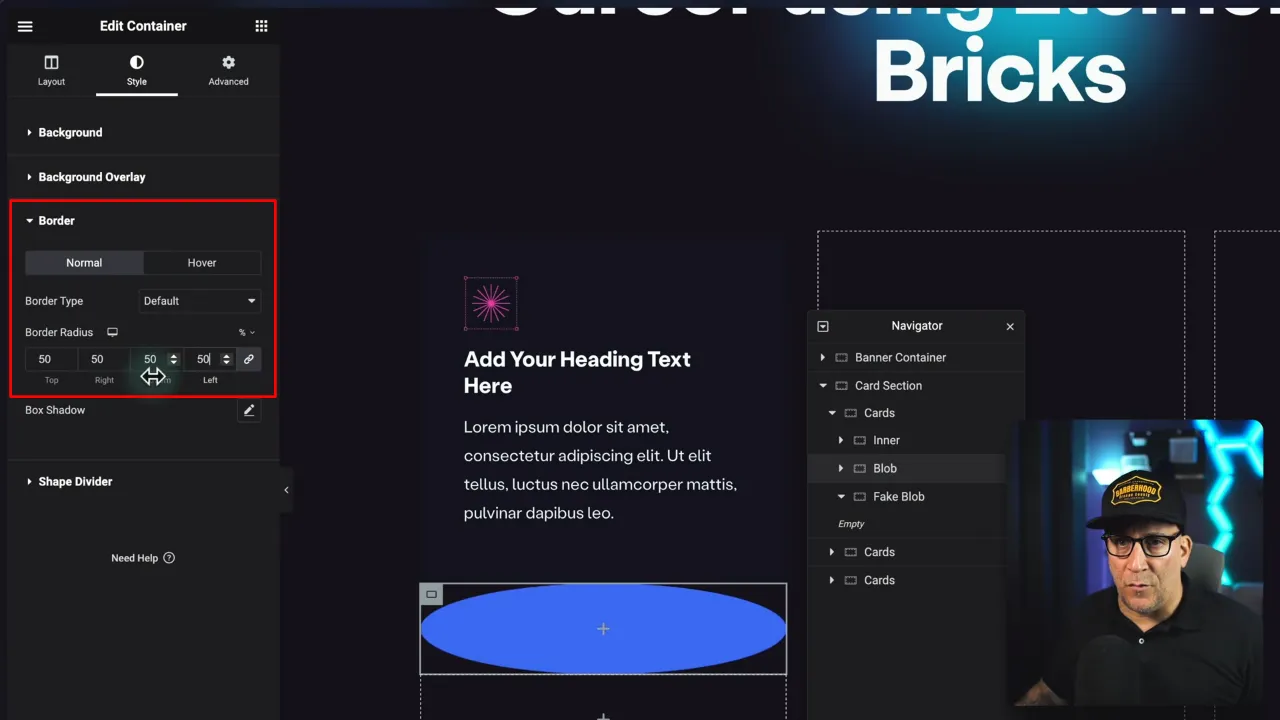
- Customize the background color, border-radius, and other styling options as per your design needs.
- Create three containers inside the card container (e.g. Inner, Blob, Fake Blob) and add CSS Classes for each (e.g. inner, blob, fakeblob)

- Add elements like images, titles, or text inside the ‘inner’ container. Adjust their styling to match the overall design.
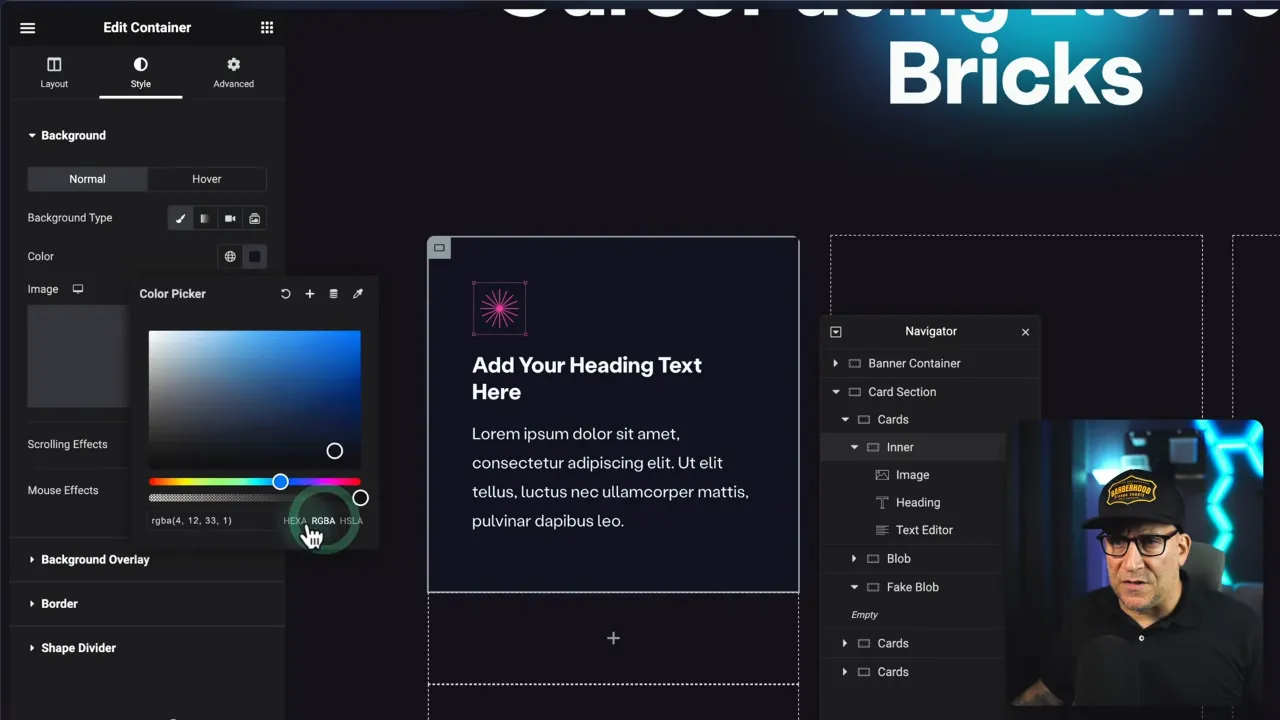
- Set background colors for normal and hover states for the inner container. This controls the visibility and intensity of the hover effect.
- Set up the background color, border percentage, and position settings in the ‘blob’ and ‘fakeblob’ containers (repeat this step for both). This will be the color of the hover effect.
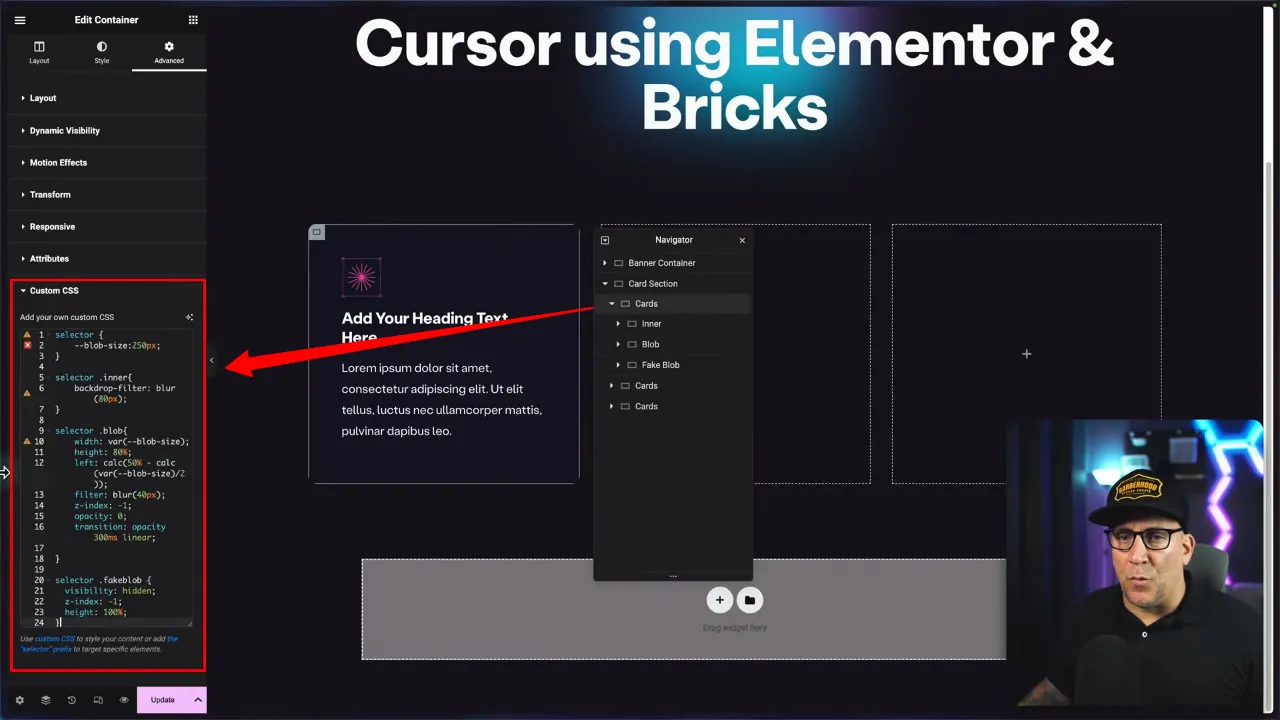
- Paste the CSS snippet below into Advanced > Custom CSS of the card container:
/* css goes in .card */

selector {
    --blob-size:250px;
}

selector .inner{
    backdrop-filter: blur(80px);
    height: 100%;
}

selector .blob{
    width: var(--blob-size);
    height: 80%;
    left: calc(50% - calc(var(--blob-size)/2));
    filter: blur(40px);
    z-index: -1;
    opacity: 0;
    transition: opacity 300ms linear;

}

selector .fakeblob {
  visibility: hidden;
  z-index: -1;
  height: 100%;
}
Source: Lytbox Academy
- Paste the Java Script below as a custom code (Elementor > Custom Code) or as an HTML widget and ensure it is placed at the body’s end to avoid loading delays:
<script type="text/javascript">

    const cards = document.querySelectorAll(".card");


window.addEventListener("mousemove", (ev) => {

  cards.forEach((e) => {
    const blob = e.querySelector(".blob");
    const fblob = e.querySelector(".fakeblob");
    const rec = fblob.getBoundingClientRect();


    blob.animate(
      [
        {
          transform: `translate(${
            (ev.clientX - rec.left) - (rec.width / 2)
          }px,${(ev.clientY - rec.top) - (rec.height / 2)}px)`
        }
      ],
      {
        duration: 300,
        fill: "forwards"
      }
    );

  e.addEventListener("mouseenter", function(){
          blob.style.opacity = "1";
  })
 e.addEventListener("mouseleave", function(){
          blob.style.opacity = "0";
  })

  });

});


</script>
Source: Lytbox Academy

- Review your work in the front end. Adjust colors, border thickness, and hover opacity to achieve the desired effect.

- Apply these settings across other cards or elements where the hover effect is needed once satisfied with the design.
Official Documentation
Glowing Cursor Elementor Hover Effect – Conclusion
This tutorial demonstrates the simplicity and effectiveness of enhancing user interaction on your website using Elementor. By following these steps, you can create a glowing cursor hover effect that not only looks professional but also adds a layer of engagement to your site’s design.
