Divi Premade Layouts are more than just eye-catching designs; they’re the starting point for a functional and problem-solving website. In this post, we’re going to explore how you can effectively use these layouts, and specifically, how to integrate a booking system into a Divi layout using FluentBooking plugin.
Prerequisites
Please make sure you have the following installed and activated:
Understanding the Value of Premade Layouts
The true potential of Divi’s premade layouts lies in their customization. A layout provides a foundational design that, when augmented with the right plugins and customization, can transform into a fully functional website tailored to specific business needs.
Customizing Divi Premade Layouts
Step 1: Creating Your Page
- Navigate to Pages > Add New.
- Name your page appropriately, for instance, “Booking”.
Step 2: Accessing Divi Premade Layouts
- Once your new page loads, click on “Start Building”.

- Select the option to browse through the premade layouts.

Step 3: Choosing Your Layout
- For a booking site, select a layout category such as ‘Fashion and Beauty’.

- Choose a layout, like the ‘Barber Shop’, that suits your business model.

Step 4: Importing the Layout
Step 5: Setting Up Fluent Booking
- Install and activate the FluentBooking plugin.
- Navigate to
Fluent Booking > Calendars.

- Add a new calendar by clicking on “Add New Host”.

Step 6: Configuring Your Booking Calendar
- Select yourself as the host.

- Define the service, such as ‘Haircut’, including duration, description, location, and timezone.
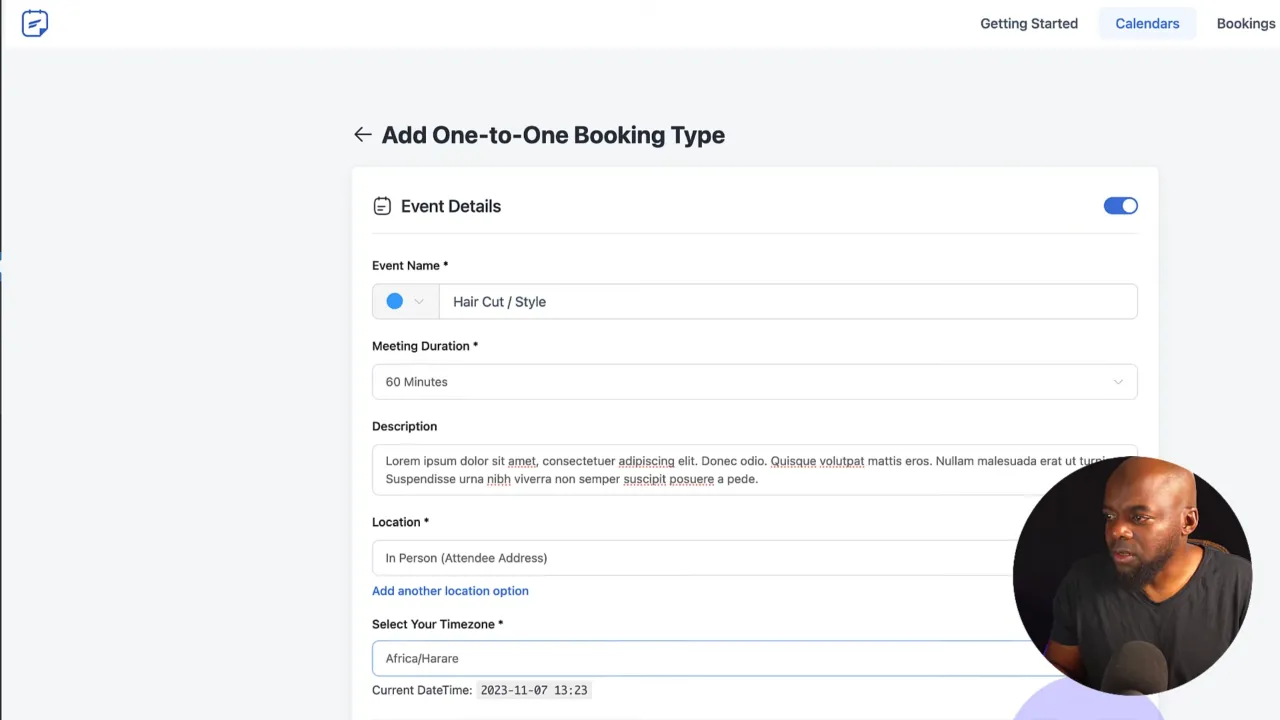
- Set your availability by adjusting days and working hours.

- If needed, configure SMS notifications via Twilio.

Step 7: Customizing Booking Details
- Adjust schedule settings and override specific dates if necessary.

- Set up email notifications for booking confirmations.

Step 8: Enabling Payments
- Link your Stripe account to accept payments.
- Set the price for your service in the calendar settings.
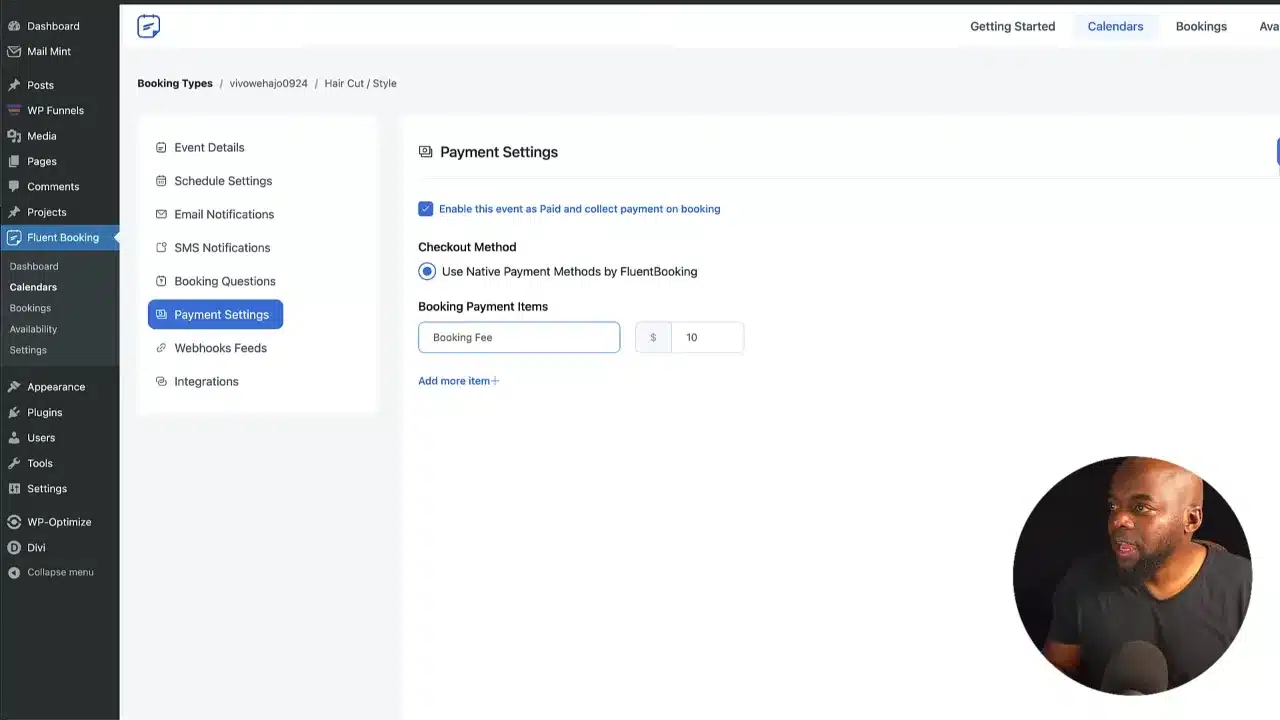
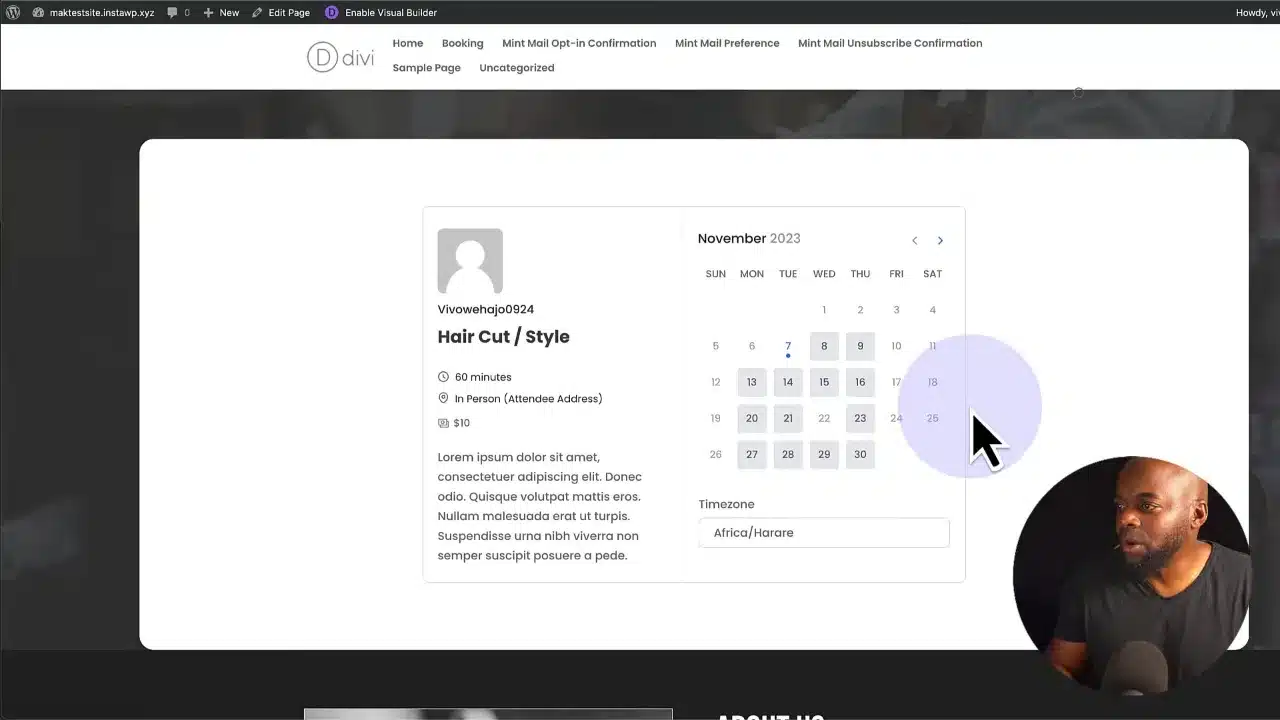
Step 9: Embedding the Booking System
- Copy the provided shortcode from Fluent Booking.

- Navigate back to your Divi page and insert a new row with a text module.

- Paste the shortcode into the module.
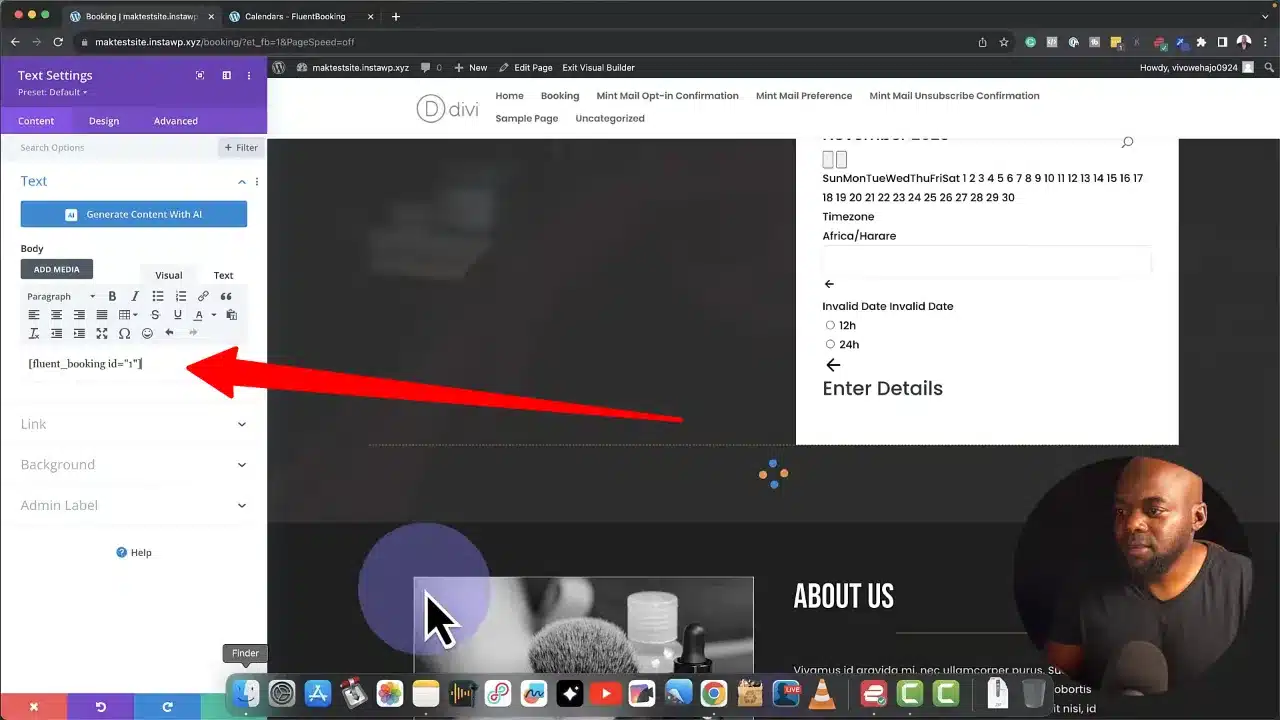
Step 10: Fine-Tuning Your Page Design
- Add a background and padding to your text module for better aesthetics.
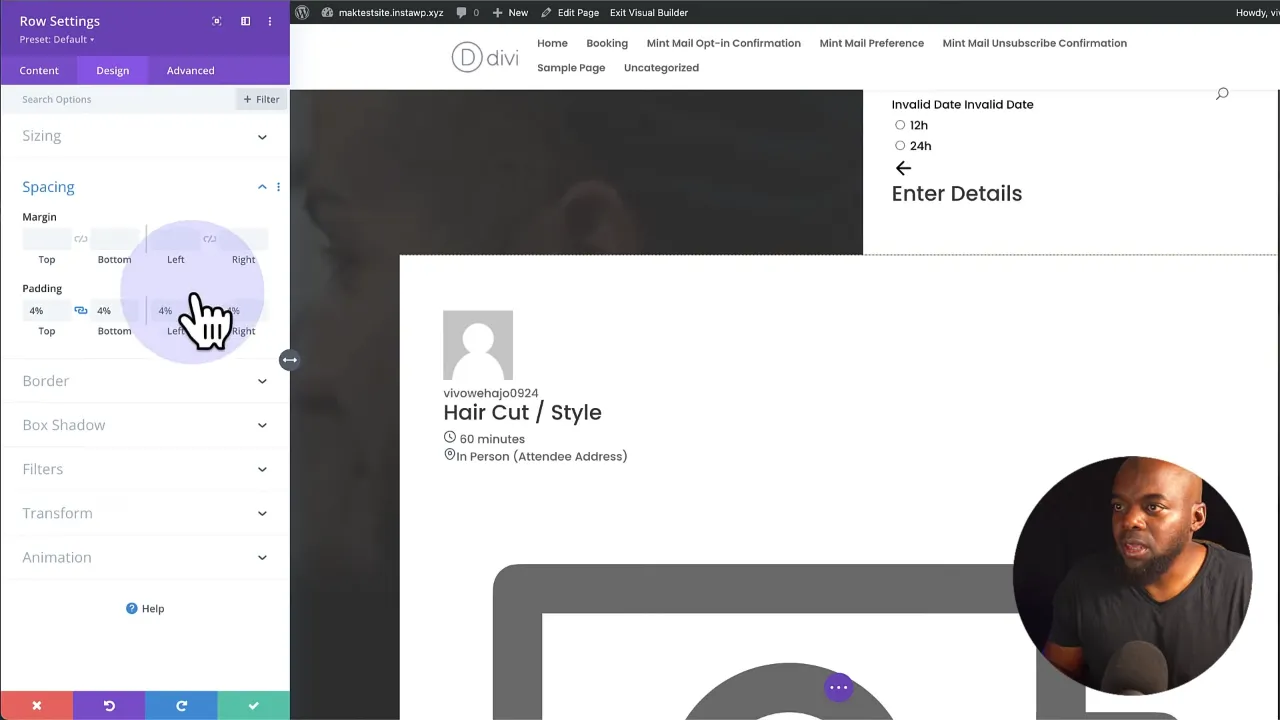
- Save changes and preview the page to ensure the booking system appears correctly.
Customizing Your Premade Layout Further
Once you’ve integrated the booking system, you can personalize your layout further:
- Replace generic images with your brand-specific visuals.
- Edit the text to convey your unique brand message.
Divi Premade Layouts and FluentBooking – Conclusion
By integrating plugins like Fluent Booking with Divi Premade Layouts, you unlock a new level of functionality for your website. It’s not just about the aesthetic; it’s about creating a seamless and efficient user experience that serves your business needs.


