Customize Elementor form submissions with HTML, ensuring that the emails you receive are not only informative but also pleasing to the eye and better aligned with your brand or personal preferences. When utilizing Elementor to craft forms on your WordPress site, you might find the default email notification format lacking in customization and style. Particularly, if your forms collect paragraphs or specific formatting, the default email can fall short. Fear not, as this tutorial will walk you through the process of creating some customized form outputs.
Prerequisites
Please make sure you have the following installed and activated:
Why Customize Form Submissions?
Customizing HTML for form submissions can vastly improve both the functionality and aesthetic of your email notifications. Here are a few practical use cases to consider:
- Personalized Email Layouts
By customizing the HTML, you can create a unique layout that matches your brand identity or personal aesthetic. This can include adding your logo, using custom fonts, or even arranging the form submission data in a more visually appealing way than the standard list format. - Improved Readability with Custom Styling
Custom HTML allows you to style different parts of the email differently. For instance, you could highlight important information, such as the respondent’s name or specific answers, in bold or a different color, making them stand out for quicker scanning. - Incorporating Rich Content
Beyond simple text formatting, custom HTML enables the inclusion of rich content in your emails. This could range from embedding images (like a product the customer is inquiring about) to including clickable buttons (such as a call-to-action to view the submission in a dashboard or initiate a follow-up). - Conditional Formatting
For more advanced users, custom HTML coupled with scripting or templating languages can allow for conditional formatting in emails. This means certain parts of the email can be shown or hidden based on the submission’s content. For example, if a customer indicates they’re interested in a particular service, you can include additional details or offers related to that service. - Accessibility Enhancements
Custom HTML can also be used to make your email notifications more accessible. By using semantic HTML tags and proper structure, you can ensure that recipients who use screen readers or other assistive technologies can easily navigate and understand the email content.
Instructions to Customize Elementor Form Submissions with HTML
- Open the page with the Elementor form you wish to customize.
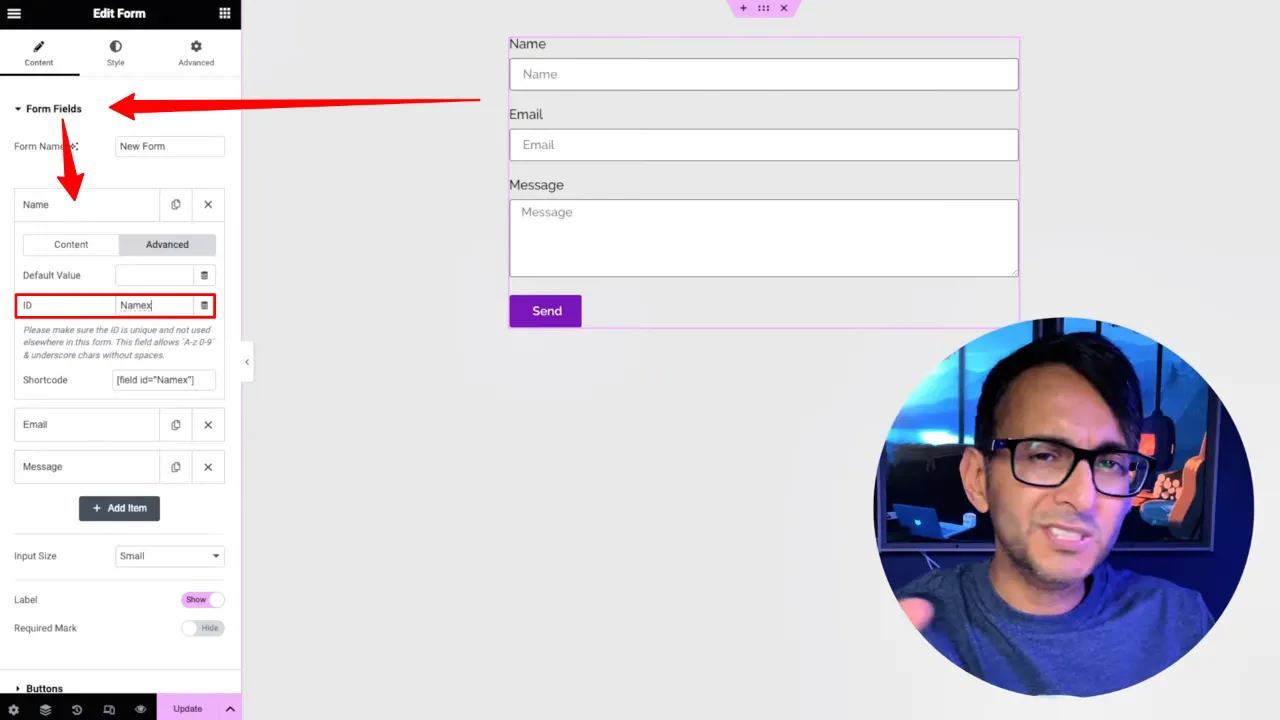
- Navigate to the ‘Form Fields’ and give your fields an ID (Field > Advanced > ID), (e.g.,
nameX,contactX,detailsX).

Tip: Ensure that “Email” is selected as one of the ‘Actions After Submit’ actions.
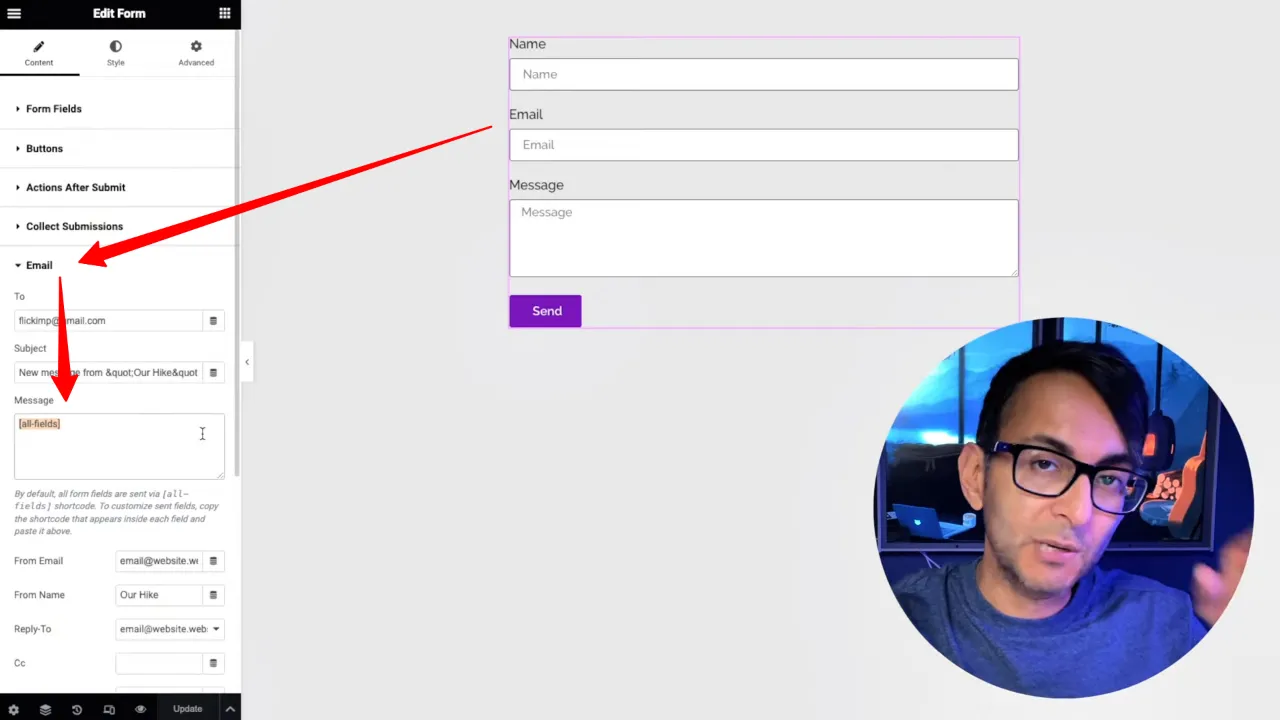
- Go to the Email > Message to add your custom HTML (it includes all form fields by default using the shortcode
[all-fields]).

- Replace the
[all-fields]shortcode with your custom HTML structure. Here’s an example you can start with:<html> <body> <p><strong>Name:</strong> [field id="Namex"]<br></p> <p><strong>Contact:</strong> <a href="mailto:[field id="Contactx"]">[field id="Contactx"]</a><br></p> <p><strong>Message:</strong><br><pre>[field id="Detailsx"]</pre></p> </body> </html>Source: Code Snippets Cloud
Tip: Customize the HTML template to fit your needs. You can add inline CSS for styling, use different HTML tags, or adjust the structure as necessary.
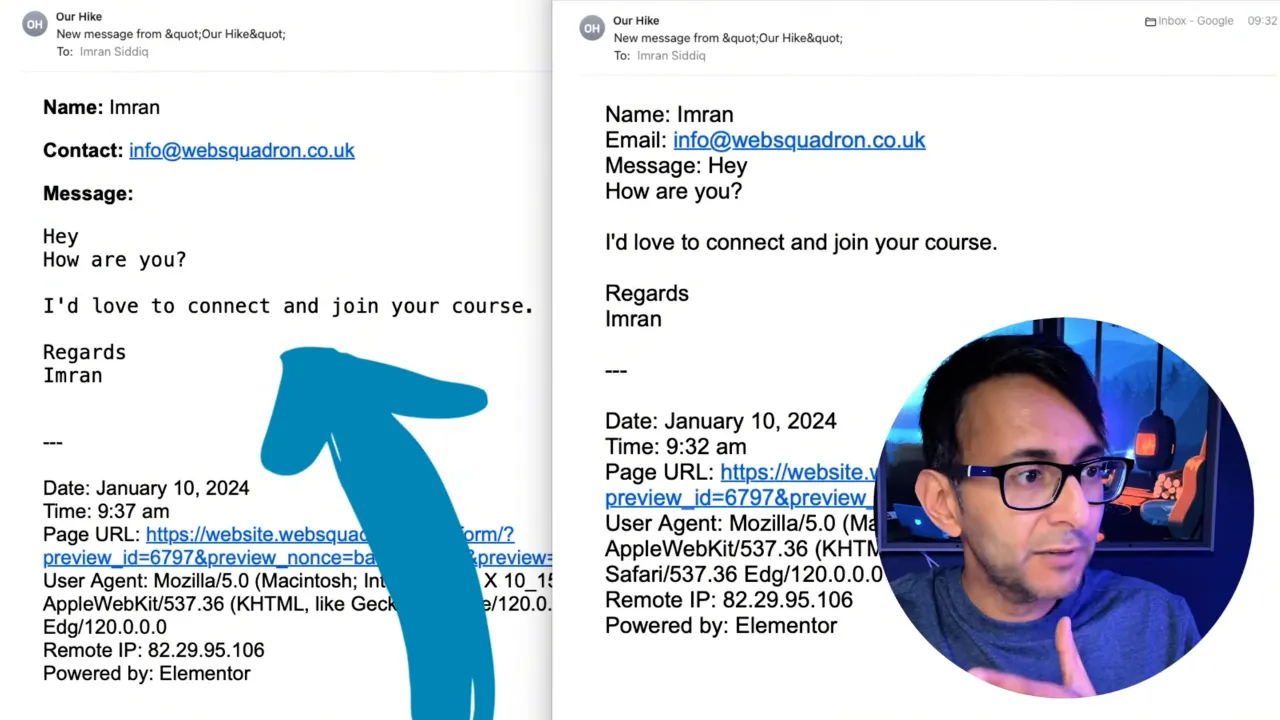
- Update or Publish your page and test the form to ensure the email output matches your customization.

Official Documentation
Customize Elementor Form Submissions – Conclusion
With these steps, you’ve successfully customized your Elementor form email submissions to better fit your or your client’s needs. Not only does this make the emails more readable and professional, but it also allows for a level of personalization that can reflect your brand’s identity. Dive into further customization with HTML and CSS to make your emails stand out even more.

