We will explore how to set up automatic post expiration in WordPress using two plugins: JetEngine and JetFormBuilder. We will also utilize an additional module called JetEngine Post Expiration Period. This setup will allow your posts, submitted via a form, to be automatically deleted or moved to the trash after a specified period.
Setting Up Automatic Post Expiration
- Ensure JetEngine and JetFormBuilder are Installed
Before we begin, make sure that you have both the JetEngine and JetFormBuilder plugins installed on your WordPress site. - Activate the JetEngine Post Expiration Period Module
Go to the JetEngine tab in WordPress Dashboard, and there you can find the post expiration period among external modules. Enable the toggle to activate the feature.

- Create a Front-End Form
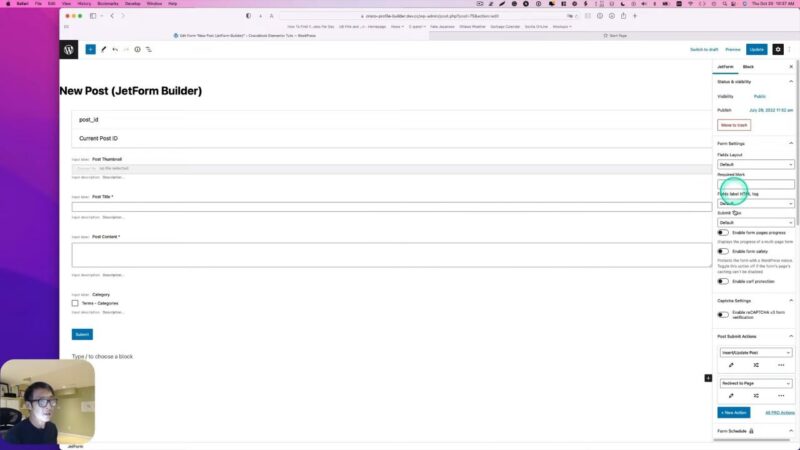
For this tutorial, we have already created a front-end form that logged-in users can use to add new posts. This form includes fields for the post thumbnail, title, and content.

- Configure Post Submit Actions
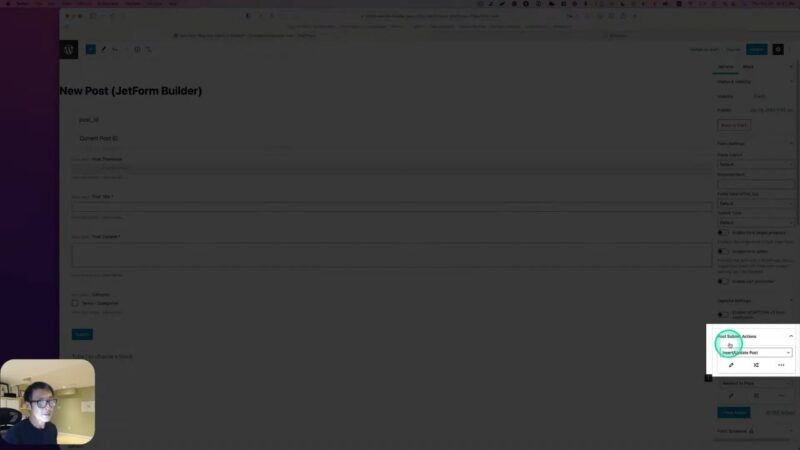
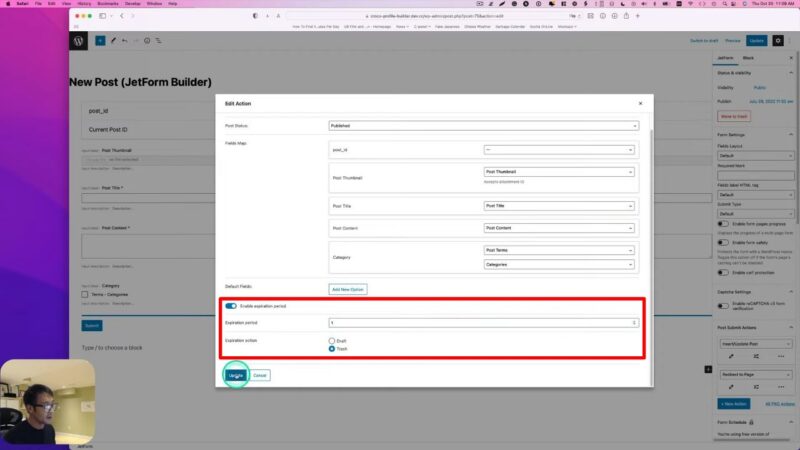
Navigate to the JetFormBuilder and find the form you created. Under the form settings, go to JetForm > Post Submit Actions > Insert/Update Post. Here, you will see an option to enable the expiration period, which will become available once the JetEngine Post Expiration Period module is installed.

- Enable Expiration Period and Set Duration
Enable the expiration period and set the duration for which the post should remain published. For example, if you want the post to be deleted after seven days, simply type ‘7’ in the duration field. You can also choose whether the post should be moved to draft or trash upon expiration.

- Submit a New Post & Check after Expiration
Go back to your front-end form and submit a new post to test the setup. The post will be automatically deleted or moved to trash after the specified duration.

Why Automatic Post Expiration is Beneficial
Automatic post expiration is a powerful feature that can improve the management of your WordPress content. It is particularly beneficial for:
Time-Sensitive Content
If you frequently publish content that is time-sensitive, such as event announcements or limited-time offers, automatic post expiration can ensure that your site remains up-to-date. It removes outdated posts automatically, saving you the time and effort of manually deleting them.
Content Organization
Automatic post expiration can also help keep your site organized. By removing old posts, you can ensure that your site remains clutter-free and easy to navigate for your visitors.
User Experience
By ensuring that your site only displays current and relevant content, you can enhance the user experience. Visitors will appreciate not coming across outdated posts, leading to increased engagement and return visits.
Common Issues and Solutions
- The expiration period option is not visible in the form settings
Make sure that the JetEngine PostExpiration Period module is installed and activated. This option will only appear once the module is installed. - The post is not being deleted or moved to trash after the specified duration
Check the duration you have set for the expiration period. Ensure that the duration has passed since the post was published. Also, make sure that the post was created using the form. - The expiration feature is not working for old posts or posts updated using the form
The post expiration feature only works for new posts created with the form. It does not apply to old posts or posts updated using the form.


