To allow user registration on WordPress can open up new avenues for engagement and content creation for your website. Whether you want to build a community or allow guest posts, enabling this feature is the first step. In this guide, we’ll walk you through the entire process, from enabling the feature to managing your registered users.
Prerequisites
Please make sure you have the following installed and activated:
- WordPress 5.0 or higher
- Astra Theme (or any theme that supports customizer)
Enabling User Registration in General Settings
- Log In: Log into your WordPress admin dashboard.
- Navigate to
Settings > Generalto access the general settings. - Locate the ‘Membership’ section and check the box next to ‘Anyone can register’.
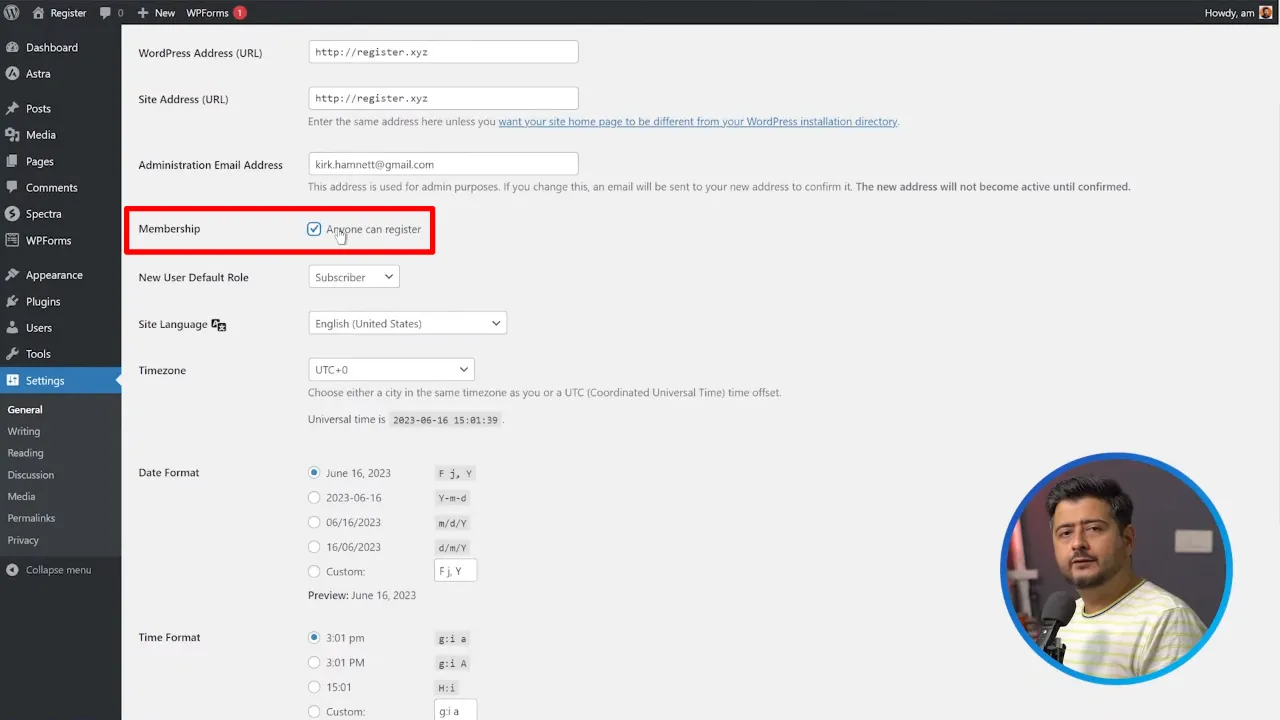
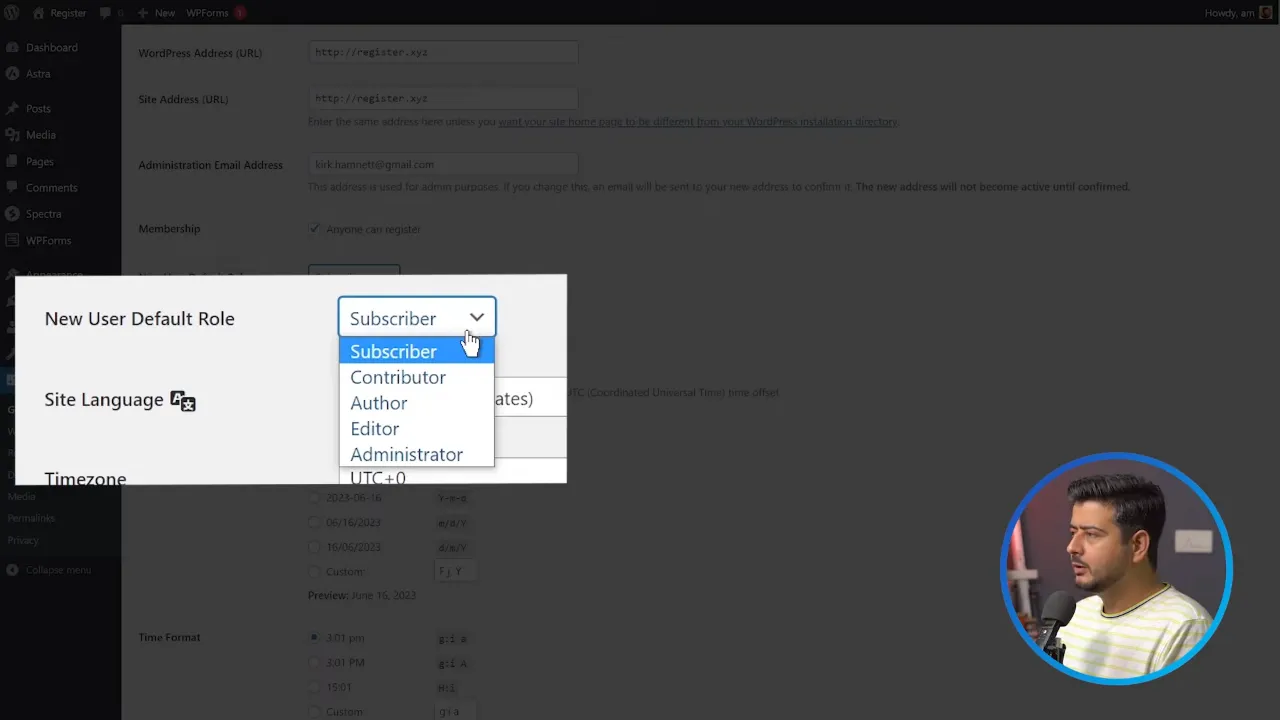
- Choose the ‘New User Default Role’ from the dropdown. For most cases, ‘Subscriber’ is recommended.
- Save your changes.
Tip: The role you assign to new users determines their capabilities on your site. Make sure to read up on WordPress user roles to make an informed decision.
Adding Registration Links to Your Site
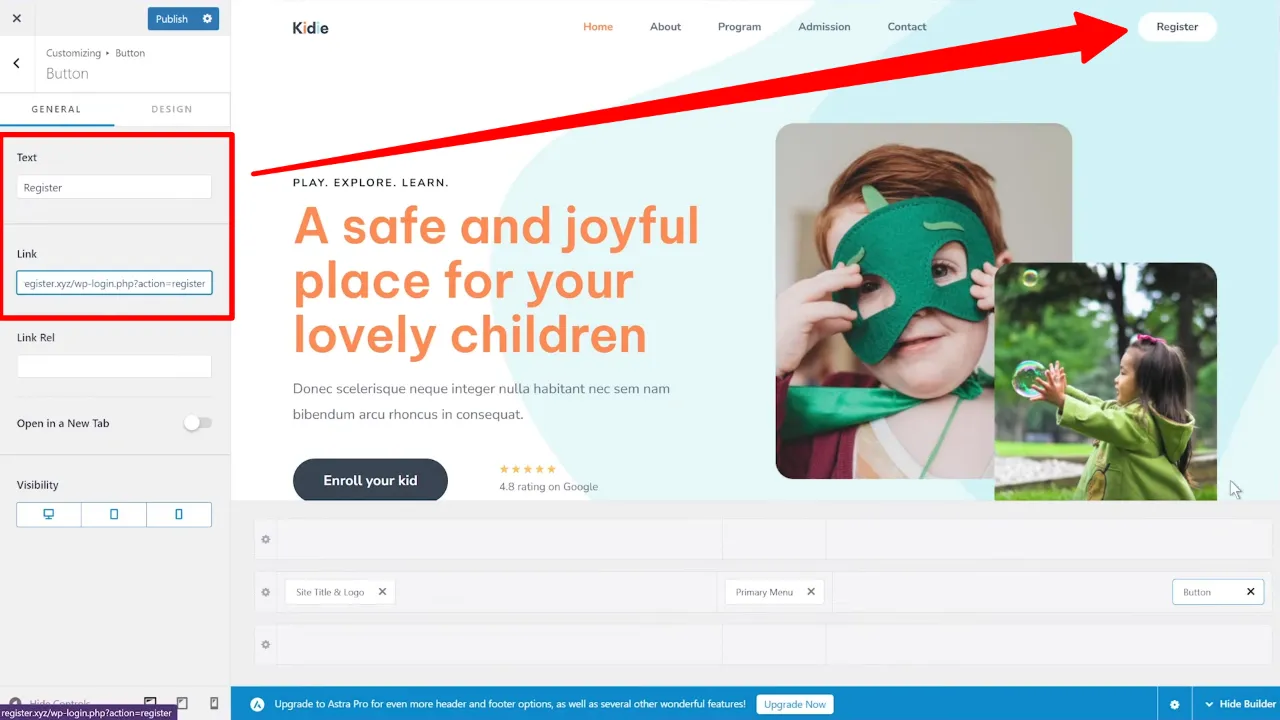
In the Header
- Go to
Appearance > Customizeto open the customizer. - Locate the header section and find the button or link where you want to add the registration link.
- Edit the button text to say “Register” and add the registration URL.
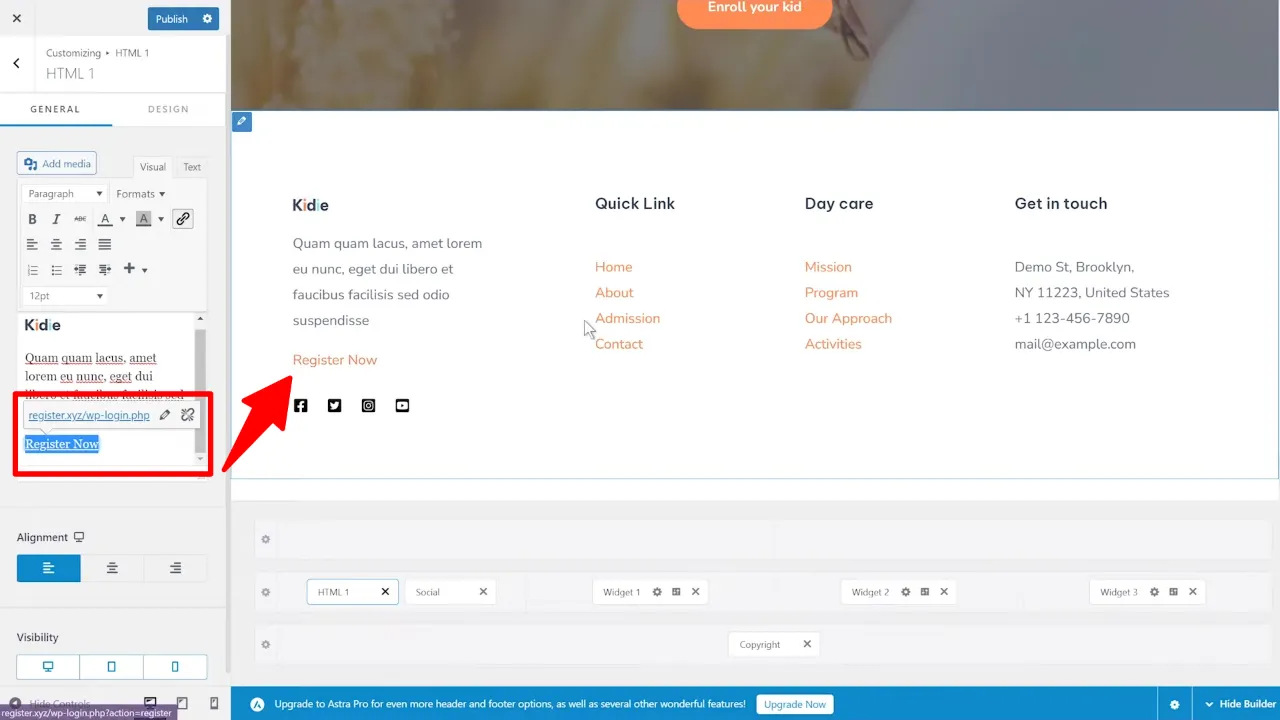
In the Footer
- Scroll down to the footer section in the customizer.
- Add a new HTML block or edit an existing one.
- Insert the registration link with anchor text like “Register Here”.
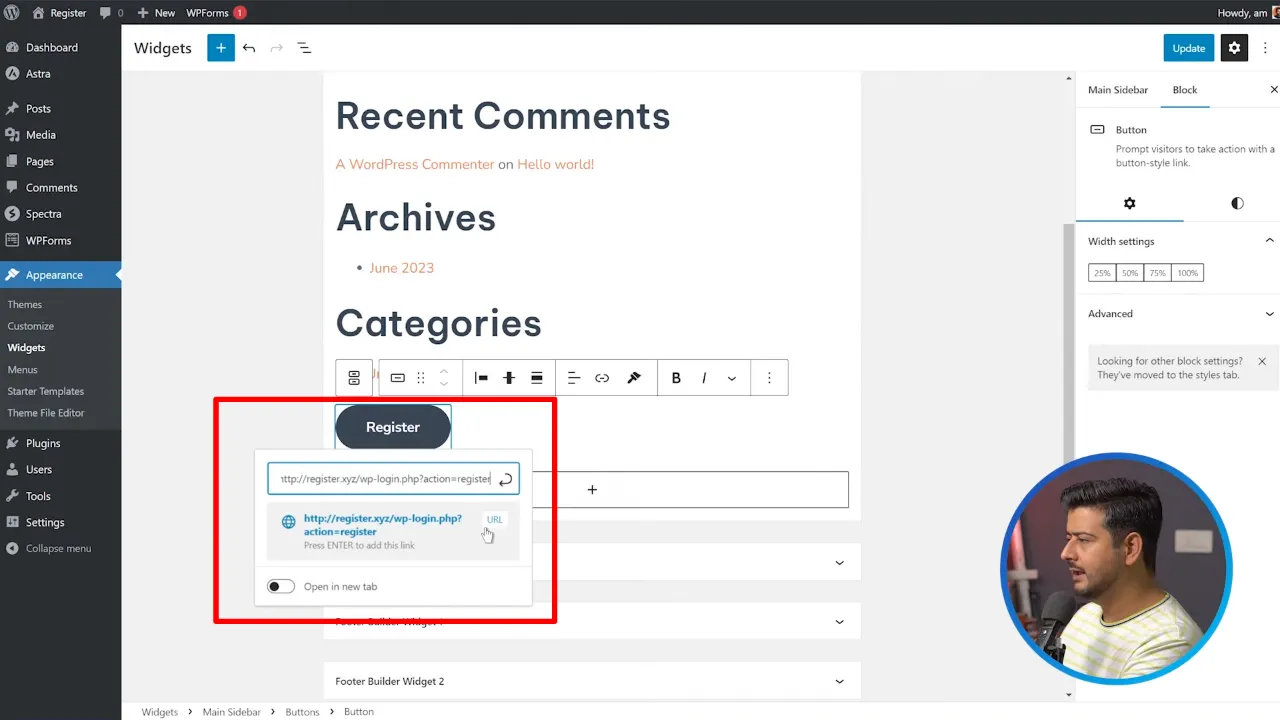
In the Sidebar
- Navigate to
Appearance > Widgets. - Add a new button block to your sidebar.
- Label the button as “Register” and link it to the registration URL.
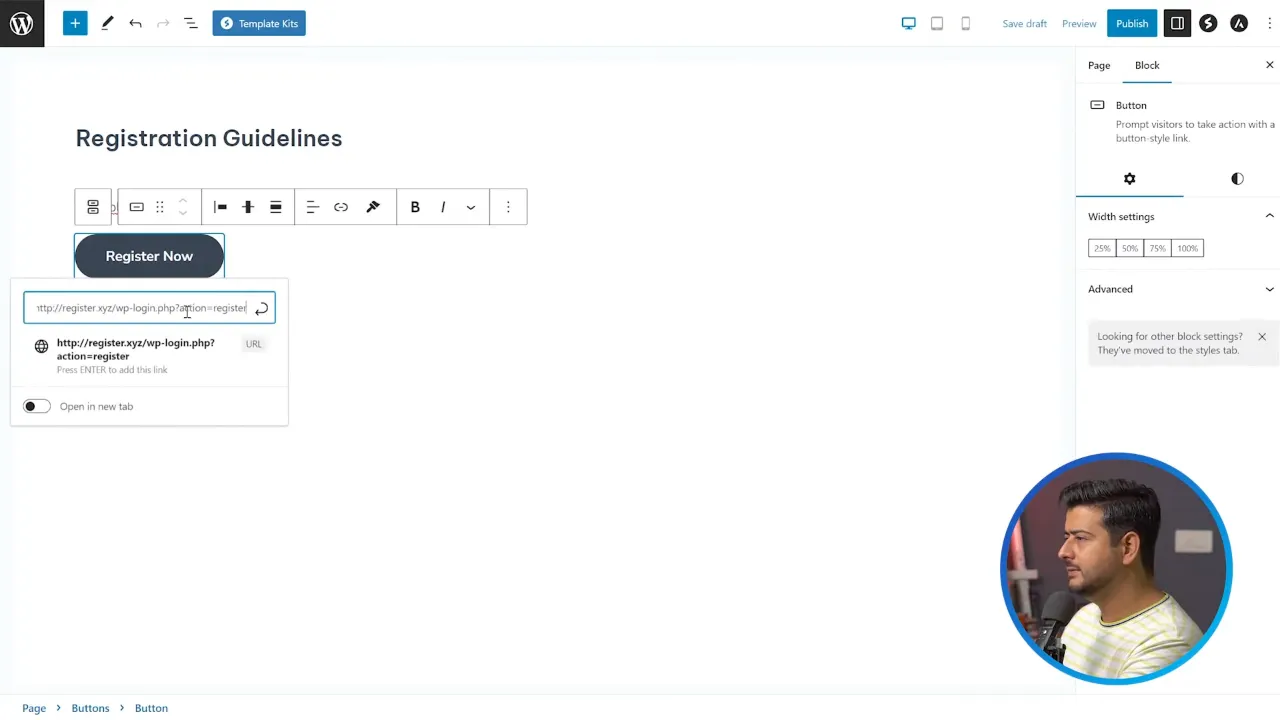
Creating a Dedicated Registration Page
- Navigate to
Pages > Add Newto create a new page. - Title the page something like “Registration Guidelines”.
- Add content explaining the rules and guidelines for registration.
- Insert a button at the end, linking to the registration URL.
Managing Registered Users
- Go to
Users > All Usersin the admin dashboard. - View the list of registered users, their roles, and other details.
- Edit or delete users as needed.
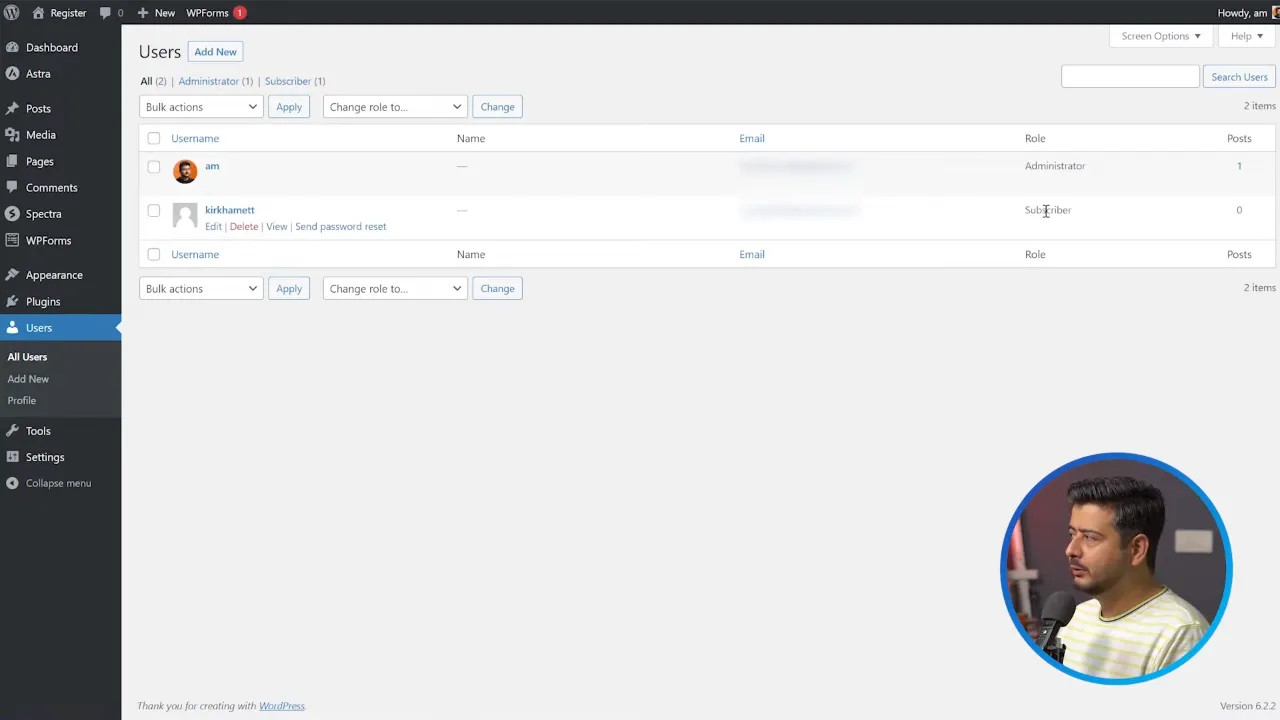
Note: You can also change user roles if you find that they are contributing positively to your site.
Allow User Registration on WordPress – Conclusion
Enabling user registration on your WordPress site is more than just ticking a box in the settings. It involves making the feature accessible and managing your user base effectively. We hope this tutorial has provided you with the steps and insights needed to get started.
