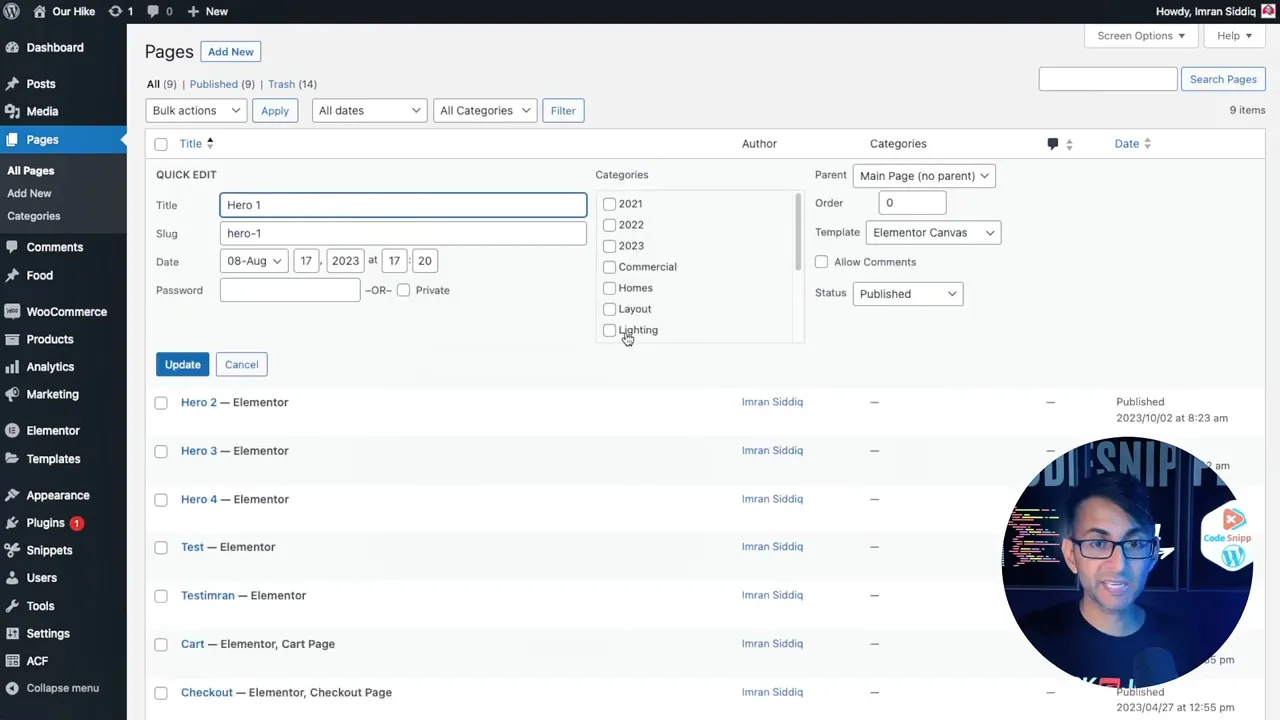
Adding categories to pages in WordPress can help you organize your content more effectively. This tutorial will show you how to accomplish this task using the Code Snippets plugin.
Prerequisites
Please make sure you have the following installed and activated:
- Code Snippets (Plugin)
Step 1: Install the Code Snippets Plugin
- Navigate to
Plugins > Add Newin your WordPress dashboard. - Search for “Code Snippets” in the search bar.
- Install and Activate the plugin.
Tip: The Code Snippets plugin allows you to run custom code snippets on your site without editing your theme’s
functions.phpfile. It supports full CSS, JavaScript, Gutenberg, and Elementor integrations.
Step 2: Create a New Code Snippet
- Navigate to
Snippets > Add Newin your WordPress dashboard. - Name it “Add Categories to Pages” to identify it later.
- Copy the code below:
add_action( 'init', 'add_categories_to_pages' );
 /*
  * Add CATEGORIES to pages
  */
function add_categories_to_pages() {

  register_taxonomy_for_object_type( 'category', 'page' );

}
Source: Code Snippets
- Navigate to
Snippets > Add New. - Paste the copied code into the code area.

- Save changes and Activate the snippet.
Tip: Activating the snippet will implement the changes immediately.
Step 3: Assign Categories to Pages
- Navigate to
Pages > All Pages. - Select a page and click on “Quick Edit”.

- Assign categories from the categories dropdown.
- Update the page.
Note: You can now see categories in the Pages section of your WordPress dashboard.
Add Categories to Pages in WordPress – Conclusion
You’ve successfully added categories to your WordPress pages using the Code Snippets plugin and a snippet from Code Snippets Cloud. This will help you organize your content and make your website more user-friendly.

